这期内容当中小编将会给大家带来有关Pytorch中怎么利用ResNet50实现图像分类,文章内容丰富且以专业的角度为大家分析和叙述,阅读完这篇文章希望大家可以有所收获。
模型
Torchvision.models包里面包含了常见的各种基础模型架构,主要包括:
AlexNet
VGG
ResNet
SqueezeNet
DenseNet
Inception v3
GoogLeNet
ShuffleNet v2
MobileNet v2
ResNeXt
Wide ResNet
MNASNet
这里我选择了ResNet50,基于ImageNet训练的基础网络来实现图像分类, 网络模型下载与加载如下:
model = torchvision.models.resnet50(pretrained=True).eval().cuda()
tf = transforms.Compose([
transforms.Resize(256),
transforms.CenterCrop(224),
transforms.ToTensor(),
transforms.Normalize(
mean=[0.485, 0.456, 0.406],
std=[0.229, 0.224, 0.225]
)])
使用模型实现图像分类
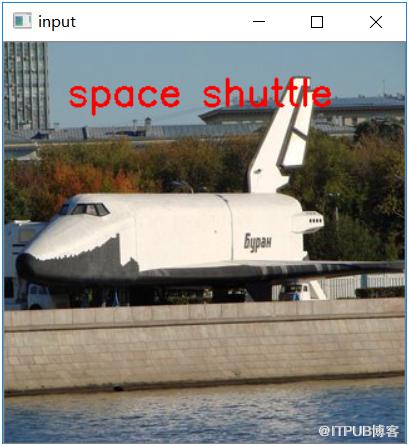
这里首先需要加载ImageNet的分类标签,目的是最后显示分类的文本标签时候使用。然后对输入图像完成预处理,使用ResNet50模型实现分类预测,对预测结果解析之后,显示标签文本,完整的代码演示如下:
 1with open('imagenet_classes.txt') as f:
 2    labels = [line.strip() for line in f.readlines()]
 3
 4src = cv.imread("D:/images/space_shuttle.jpg") # aeroplane.jpg
 5image = cv.resize(src, (224, 224))
 6image = np.float32(image) / 255.0
 7image[:,:,] -= (np.float32(0.485), np.float32(0.456), np.float32(0.406))
 8image[:,:,] /= (np.float32(0.229), np.float32(0.224), np.float32(0.225))
 9image = image.transpose((2, 0, 1))
10input_x = torch.from_numpy(image).unsqueeze(0)
11print(input_x.size())
12pred = model(input_x.cuda())
13pred_index = torch.argmax(pred, 1).cpu().detach().numpy()
14print(pred_index)
15print("current predict class name : %s"%labels[pred_index[0]])
16cv.putText(src, labels[pred_index[0]], (50, 50), cv.FONT_HERSHEY_SIMPLEX, 1.0, (0, 0, 255), 2)
17cv.imshow("input", src)
18cv.waitKey(0)
19cv.destroyAllWindows()
运行结果如下:
转ONNX支持
在torchvision中的模型基本上都可以转换为ONNX格式,而且被OpenCV DNN模块所支持,所以,很方便的可以对torchvision自带的模型转为ONNX,实现OpenCV DNN的调用,首先转为ONNX模型,直接使用torch.onnx.export即可转换(还不知道怎么转,快点看前面的例子)。转换之后使用OpenCV DNN调用的代码如下:
 1with open('imagenet_classes.txt') as f:
 2    labels = [line.strip() for line in f.readlines()]
 3net = cv.dnn.readNetFromONNX("resnet.onnx")
 4src = cv.imread("D:/images/messi.jpg")  # aeroplane.jpg
 5image = cv.resize(src, (224, 224))
 6image = np.float32(image) / 255.0
 7image[:, :, ] -= (np.float32(0.485), np.float32(0.456), np.float32(0.406))
 8image[:, :, ] /= (np.float32(0.229), np.float32(0.224), np.float32(0.225))
 9blob = cv.dnn.blobFromImage(image, 1.0, (224, 224), (0, 0, 0), False)
10net.setInput(blob)
11probs = net.forward()
12index = np.argmax(probs)
13cv.putText(src, labels[index], (50, 50), cv.FONT_HERSHEY_SIMPLEX, 1.0, (0, 0, 255), 2)
14cv.imshow("input", src)
15cv.waitKey(0)
16cv.destroyAllWindows()
上述就是小编为大家分享的Pytorch中怎么利用ResNet50实现图像分类了,如果刚好有类似的疑惑,不妨参照上述分析进行理解。如果想知道更多相关知识,欢迎关注亿速云行业资讯频道。
免责声明:本站发布的内容(图片、视频和文字)以原创、转载和分享为主,文章观点不代表本网站立场,如果涉及侵权请联系站长邮箱:is@yisu.com进行举报,并提供相关证据,一经查实,将立刻删除涉嫌侵权内容。


