小编这次要给大家分享的是如何实现Element Notification通知,文章内容丰富,感兴趣的小伙伴可以来了解一下,希望大家阅读完这篇文章之后能够有所收获。
组件— 通知
基本用法
<template>
<el-button
plain
@click="open1">
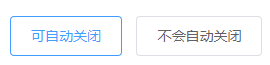
可自动关闭
</el-button>
<el-button
plain
@click="open2">
不会自动关闭
</el-button>
</template>
<script>
export default {
methods: {
open1() {
const h = this.$createElement;
this.$notify({
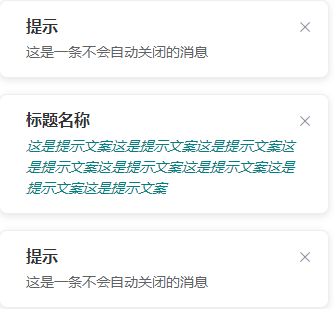
title: '标题名称',
message: h('i', { style: 'color: teal'}, '这是提示文案这是提示文案这是提示文案这是提示文案这是提示文案这是提示文案这是提示文案这是提示文案')
});
},
open2() {
this.$notify({
title: '提示',
message: '这是一条不会自动关闭的消息',
duration: 0
});
}
}
}
</script>带有倾向性
<template>
<el-button
plain
@click="open1">
成功
</el-button>
<el-button
plain
@click="open2">
警告
</el-button>
<el-button
plain
@click="open3">
消息
</el-button>
<el-button
plain
@click="open4">
错误
</el-button>
</template>
<script>
export default {
methods: {
open1() {
this.$notify({
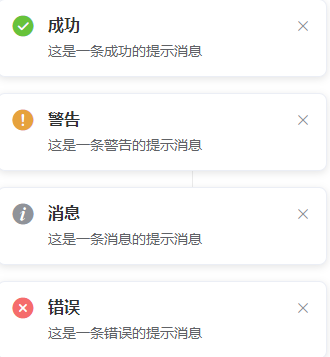
title: '成功',
message: '这是一条成功的提示消息',
type: 'success'
});
},
open2() {
this.$notify({
title: '警告',
message: '这是一条警告的提示消息',
type: 'warning'
});
},
open3() {
this.$notify.info({
title: '消息',
message: '这是一条消息的提示消息'
});
},
open4() {
this.$notify.error({
title: '错误',
message: '这是一条错误的提示消息'
});
}
}
}
</script>自定义弹出位置

<template>
 <el-button
  plain
  @click="open1">
  右上角
 </el-button>
 <el-button
  plain
  @click="open2">
  右下角
 </el-button>
 <el-button
  plain
  @click="open3">
  左下角
 </el-button>
 <el-button
  plain
  @click="open4">
  左上角
 </el-button>
</template>

<script>
 export default {
  methods: {
   open1() {
    this.$notify({
     title: '自定义位置',
     message: '右上角弹出的消息'
    });
   },

   open2() {
    this.$notify({
     title: '自定义位置',
     message: '右下角弹出的消息',
     position: 'bottom-right'
    });
   },

   open3() {
    this.$notify({
     title: '自定义位置',
     message: '左下角弹出的消息',
     position: 'bottom-left'
    });
   },

   open4() {
    this.$notify({
     title: '自定义位置',
     message: '左上角弹出的消息',
     position: 'top-left'
    });
   }
  }
 }
</script>
带有偏移
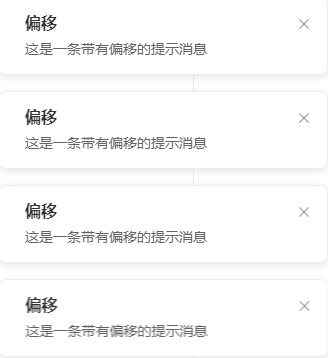
<template>
<el-button
plain
@click="open">
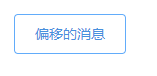
偏移的消息
</el-button>
</template>
<script>
export default {
methods: {
open() {
this.$notify({
title: '偏移',
message: '这是一条带有偏移的提示消息',
offset: 100
});
}
}
}
</script>使用 HTML 片段
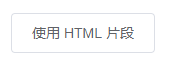
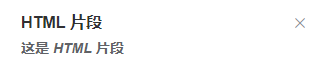
<template>
 <el-button
  plain
  @click="open">
  使用 HTML 片段
 </el-button>
</template>

<script>
 export default {
  methods: {
   open() {
    this.$notify({
     title: 'HTML 片段',
     dangerouslyUseHTMLString: true,
     message: '<strong>这是 <i>HTML</i> 片段</strong>'
    });
   }
  }
 }
</script>
隐藏关闭按钮
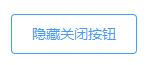

<template>
 <el-button
  plain
  @click="open">
  隐藏关闭按钮
 </el-button>
</template>

<script>
 export default {
  methods: {
   open() {
    this.$notify.success({
     title: 'Info',
     message: '这是一条没有关闭按钮的消息',
     showClose: false
    });
   }
  }
 }
</script>
全局方法
Element 为 Vue.prototype 添加了全局方法 $notify。因此在 vue instance 中可以采用本页面中的方式调用 Notification。
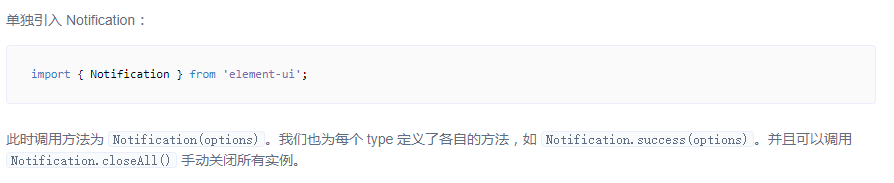
单独引用
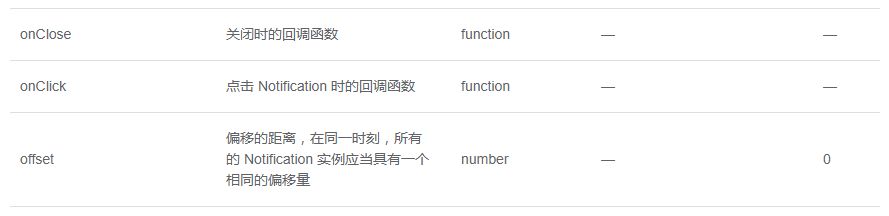
Options

方法

Vue项目中Element的Notification通知若干问题
要求是后台推送过来一条消息,前端接收后再将消息进行提炼后通过弹窗通知用户。前后端发送接收消息用的技术是webIm,这个先不提了,官方文档配置一下就OK了。
遇到的问题是产品给的设计图与Element的出入很大,所以就使用了Element的dangerouslyUseHTMLString属性,即把需要发送的消息写成HTML结构发送
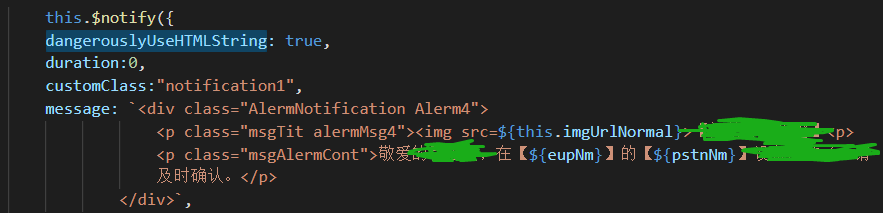
在模板字符串中,加载图片那里发现路径无法实现图片的加载,试了很多种方法,发现使用require+${}的方法最好用,上图中<img src=${this.imgUrlNormal}>中,${}保存的地址需要先在data里边return出来

这个问题就解决了。
第二个问题是遇到了样式的调整问题,Element的权重太高,真的是不太好搞,在网上找了很多解决方案,发现把<style>标签中的scoped去掉这种方法可以解决问题。
并且用到了costomClass这个属性,这个属性是给元素添加一个class类名,自己来添加样式。
这样,这个弹窗的问题就解决了。
看完这篇关于如何实现Element Notification通知的文章,如果觉得文章内容写得不错的话,可以把它分享出去给更多人看到。
免责声明:本站发布的内容(图片、视频和文字)以原创、转载和分享为主,文章观点不代表本网站立场,如果涉及侵权请联系站长邮箱:is@yisu.com进行举报,并提供相关证据,一经查实,将立刻删除涉嫌侵权内容。


