小编给大家分享一下vue-video-player如何实现实时视频播放的案例,希望大家阅读完这篇文章后大所收获,下面让我们一起去探讨吧!
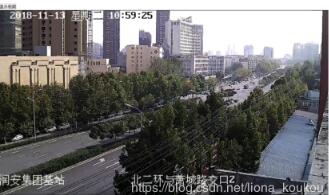
监控设备播放效果如下
1、vue项目安装vue-video-player
npm install vue-video-player --save
2、编写视频播放组件(放上完整的组件例子,父组件调用时给videoSrc和playerOptions.sources[0].src赋值就可以播放了,具体操作有注释)
注:style样式部分用了lang=scss,如果自己的项目没用他请用自己的方式改一下样式部分避免报错
 <template>
  <div class="video-js">
   <div v-if="videoSrc===''" class="no-video">
    暂未播放视频
   </div>
   <video-player v-else class="video-player vjs-custom-skin"
          ref="videoPlayer"
          :playsinline="true"
          :options="playerOptions">
   </video-player>
  </div>
</template>

<script>
import videojs from 'video.js'
import 'video.js/dist/video-js.css'
import 'vue-video-player/src/custom-theme.css'
import {videoPlayer} from 'vue-video-player'
import 'videojs-flash'
import SWF_URL from 'videojs-swf/dist/video-js.swf'

videojs.options.flash.swf = SWF_URL // 设置flash路径,Video.js会在不支持html5的浏览中使用flash播放视频文件
export default {
 name: 'videojs',
 components: {
  videoPlayer
 },
 data () {
  return {
   videoSrc: '',
   playerOptions: {
    live: true,
    autoplay: true, // 如果true,浏览器准备好时开始播放
    muted: false, // 默认情况下将会消除任何音频
    loop: false, // 是否视频一结束就重新开始
    preload: 'auto', // 建议浏览器在<video>加载元素后是否应该开始下载视频数据。auto浏览器选择最佳行为,立即开始加载视频(如果浏览器支持)
    aspectRatio: '16:9', // 将播放器置于流畅模式,并在计算播放器的动态大小时使用该值。值应该代表一个比例 - 用冒号分隔的两个数字(例如"16:9"或"4:3")
    fluid: true, // 当true时,Video.js player将拥有流体大小。换句话说,它将按比例缩放以适应其容器。
    controlBar: {
     timeDivider: false,
     durationDisplay: false,
     remainingTimeDisplay: false,
     currentTimeDisplay: false, // 当前时间
     volumeControl: false, // 声音控制键
     playToggle: false, // 暂停和播放键
     progressControl: false, // 进度条
     fullscreenToggle: true // 全屏按钮
    },
    techOrder: ['flash'], // 兼容顺序
    flash: {
     hls: {
      withCredentials: false
     },
     swf: SWF_URL
    },
    sources: [{
     type: 'rtmp/flv',
     src: '' // 视频地址-改变它的值播放的视频会改变
    }],
    notSupportedMessage: '此视频暂无法播放,请稍后再试' // 允许覆盖Video.js无法播放媒体源时显示的默认信息。
   }
  }
 }
}
</script>

<style scoped lang="less">
 .video-js{
  width:100%;
  height:100%;
  .no-video{
   display:flex;
   height:100%;
   font-size:14px;
   text-align:center;
   justify-content: center;
   align-items:center;
  }
 }
</style>
3、父组件调用视频播放组件,点击“播放视频”替换组件里的视频流地址播放实时视频
<template>
 <div class="about">
  <video-player ref="playerObj"></video-player>
  <a @click="playVideo">播放视频</a>
 </div>
</template>
<script>
 import VideoPlayer from './../../components/VideoPlayer'
 export default {
   name: 'about',
   components: {
     VideoPlayer
   },
   data() {
     return {}

   },
   methods: {
     playVideo() {
       this.$refs['playerObj'].videoSrc = 'rtmp://xxxxxxxx'
       this.$refs['playerObj'].playerOptions.sources[0].src = 'rtmp://xxxxxxxx'
     }
   }
 }
</script>
4、vue.config.js文件如下:需要加入的是chainwebpack配置
// vue.config.js
const path = require('path')
const webpack = require('webpack')

module.exports = {
 baseUrl: process.env.NODE_ENV === 'production' ? '/bcmp-web/' : '/',
 outputDir: process.env.NODE_ENV === 'production' ? 'bcmp-web' : 'dist',
 lintOnSave: true,
 productionSourceMap: false,

 devServer: {
  open: true,
  host: '0.0.0.0',
  port: 9005,
  https: false,
  hotOnly: false,
  proxy: null
 },
 configureWebpack: {
  plugins: [
   new webpack.ProvidePlugin({
    jQuery: 'jquery',
    $: 'jquery',
    'windows.jQuery': 'jquery'
   })
  ]
 },
 chainWebpack: config => {
  config.module
   .rule('swf')
   .test(/\.swf$/)
   .use('url-loader')
   .loader('url-loader')
   .options({
    limit: 10000
   })
 },

 pluginOptions: {
  'style-resources-loader': {
   preProcessor: 'scss',
   patterns: [
    path.resolve(__dirname, './src/assets/baseStyle/var.scss'),
    path.resolve(__dirname, './src/assets/baseStyle/mixin.scss')
   ]
  }
 }
}
目前vue-video-player版本5.0.2,测试可用
补充知识:vue项目接入视频监控系列-------播放器的选择
在智慧城市发展迅速的今天,视频监控接入web平台的需求似乎成了不可或缺和潮流。博主准备对自己开发视频监控项目的经历做个记录,整理成一个系列的文章。
在前端发展迅速的今天,h6的出现让在web平台实现无插件播放似乎成了可能,但是video对于RTMP或者RTSP协议的视频流却无能为力,在这里向大家推荐一个播放器: LivePlayer,这是一家视频公司封装的一个播放器,可以免费使用:说明文档
(获取的播放地址为后端配置服务后调用接口获取的)
使用:
第一步: 安装:
npm install @liveqing/liveplayer
npm i -D copy-webpack-plugin
第二步:引入:
在webpack.dev.conf.js中引入和声明插件:
const CopyWebpackPlugin = require('copy-webpack-plugin')
在该文件夹下plugins中声明插件new CopyWebpackPlugin
plugins: [
new CopyWebpackPlugin([

  { from: 'node_modules/@liveqing/liveplayer/dist/component/crossdomain.xml'},
  { from: 'node_modules/@liveqing/liveplayer/dist/component/liveplayer.swf'},
  { from: 'node_modules/@liveqing/liveplayer/dist/component/liveplayer-lib.min.js', to: 'js/'}

])]
第三步:
在index.html中引入:<script type="text/javascript" src="./js/liveplayer-lib.min.js"></script>
路径中的js为上面输出的js地址
第四步:
引入使用组件:
<template>
 <div class="video">
  <el-button type="primary" size="mini" @click="getDeviceChanleData" icon="el-icon-search">选择通道</el-button>
  <el-button type="primary" size="mini" @click="doStart" icon="el-icon-search">开始直播</el-button>
  <live-player :videoUrl="videoUrl" fluent autoplay live stretch></live-player>
 </div>
</template>
<script>
import LivePlayer from '@liveqing/liveplayer'
import {
 getDeviceList,
 getDeviceChanleList,
 start
} from './apis/index.js'
export default {
 data() {
  return {
   id: '',
   videoUrl: ''
  }
 },
 components: {
  LivePlayer
 },
 created() {
  this.getDeviceData()
 },
 methods: {
  // 获取设备数据列表
  getDeviceData() {
   const para = {
    start: 1,
    limit: 10,
    online: true,
    q: ''
   }
   var par = {
    params: para
   }
   getDeviceList(par).then(res => {
    console.log('设备数据', res)
    this.id = res.DeviceList[0].ID
   })
  },
  // 查询设备通道列表
  getDeviceChanleData() {
   const para = {
    serial: this.id
   }
   var par = {
    params: para
   }
   getDeviceChanleList(par).then(res => {
    console.log('设备通道数据', res)
   })
  },
  // 开始直播
  doStart() {
   const para = {
    serial: this.id
   }
   var par = {
    params: para
   }
   start(par).then(res => {
    console.log('开始直播', res)
    this.videoUrl = res.RTMP
    // this.videoUrl = res.HLS
    // this.videoUrl = res.FLV
   })
  }
 }
}
</script>
<style scoped>
.video{
 position: relative;
 width:500px;
 height:300px;
}
img{
 width:100%;
 height:100%;
}
.time1{
 position: absolute;
 top:13px;
 right:150px;
}
</style>
效果图:

看完了这篇文章,相信你对vue-video-player如何实现实时视频播放的案例有了一定的了解,想了解更多相关知识,欢迎关注亿速云行业资讯频道,感谢各位的阅读!
免责声明:本站发布的内容(图片、视频和文字)以原创、转载和分享为主,文章观点不代表本网站立场,如果涉及侵权请联系站长邮箱:is@yisu.com进行举报,并提供相关证据,一经查实,将立刻删除涉嫌侵权内容。


