前言
本篇文章 中写到的是 flutter 调用了Android 原生的 TextView 案例
添加原生组件的流程基本上可以描述为:
1 android 端实现原生组件PlatformView提供原生view
2 android 端创建PlatformViewFactory用于生成PlatformView
3 android 端创建FlutterPlugin用于注册原生组件
4 flutter 平台嵌入 原生view
1 创建原生组件
创建在fLutter工程时会生成几个文件夹,lib是放flutter工程代码,android和ios文件夹分别是对应的双平台的原生工程。
在这里直接打开Android工程目录,项目默认生成了GeneratedPluginRegistrant和MainActivity两个文件,GeneratedPluginRegistrant不要动,GeneratedPluginRegistrant是flutter中配制使用其他插件时,程序在编译时自动进行插件注册使用的类。
在MainActivity的包下新建自定义View,Flutter的原生View不能直接继承自View,需要实现提供的PlatformView接口:
public class TestTextView implements PlatformView r{
private final TextView mTestTextView;
/**
*
* @param context
* @param messenger
* @param id
* @param params 初始化时 flutter 传递过来的参数
*/
TestTextView(Context context, BinaryMessenger messenger, int id, Map<String, Object> params) {
//创建 TextView
TextView lTextView = new TextView(context);
lTextView.setText("Android的原生TextView");
this.mTestTextView = lTextView;
//flutter 传递过来的参数
if (params!=null&¶ms.containsKey("content")) {
String myContent = (String) params.get("content");
lTextView.setText(myContent);
}
}
@Override
public View getView() {
return mTestTextView;
}
@Override
public void dispose() {
}
}
2 创建PlatformViewFactory
import android.content.Context;
import java.util.Map;
import io.flutter.plugin.common.BinaryMessenger;
import io.flutter.plugin.common.StandardMessageCodec;
import io.flutter.plugin.platform.PlatformView;
import io.flutter.plugin.platform.PlatformViewFactory;

public class TestViewFactory extends PlatformViewFactory {
	private final BinaryMessenger messenger;
	public TestViewFactory(BinaryMessenger messenger) {
		super(StandardMessageCodec.INSTANCE);
		this.messenger = messenger;
	}

	/**
	 *
	 * @param context
	 * @param id
	 * @param args args是由Flutter传过来的自定义参数
	 * @return
	 */
	@SuppressWarnings("unchecked")
	@Override
	public PlatformView create(Context context, int id, Object args) {
		//flutter 传递过来的参数
		Map<String, Object> params = (Map<String, Object>) args;
		//创建 TestTextView
		return new TestTextView(context, messenger, id, params);

	}
3 创建Plugin并在ManActivity中注册插件
/**
 * flutter 调用 android 原生view
 *
 */
public class TestFluttertoAndroidTextViewPlugin {
	public static void registerWith(PluginRegistry registry) {
		//防止多次注册
		final String key = TestFluttertoAndroidTextViewPlugin.class.getCanonicalName();
		if (registry.hasPlugin(key)) return;
		//初始化 PluginRegistry
		PluginRegistry.Registrar registrar = registry.registrarFor(key);
		//设置标识
		registrar.platformViewRegistry().registerViewFactory("com.flutter_to_native_test_textview", new TestViewFactory(registrar.messenger()));
	}
}
MainActivity 中注册
import android.os.Bundle

import io.flutter.app.FlutterActivity
import io.flutter.plugins.FlutterToAndroidPlugins
import io.flutter.plugins.GeneratedPluginRegistrant

class MainActivity: FlutterActivity() {
 override fun onCreate(savedInstanceState: Bundle?) {
 super.onCreate(savedInstanceState)
 //flutter 项目工程中默认生成的
 GeneratedPluginRegistrant.registerWith(this)
 //这是我们新创建的插件
 TestFluttertoAndroidTextViewPlugin.registerWith(this)

 }

 override fun onDestroy() {
 super.onDestroy()

 }
}
4 flutter页面中嵌入android 原生Textview
4.1 最简单的调用

//这里设置的 viewType值与 android 中插件注册的标识 一至
//registrar.platformViewRegistry().registerViewFactory("com.flutter_to_native_test_textview", new TestViewFactory(registrar.messenger()));
mTextWidget = Container(
 height: 200,
 child: AndroidView(
 	//设置标识
  viewType: "com.flutter_to_native_test_textview",
  ),
 );

@override
 Widget build(BuildContext context) {
 // TODO: implement build
 return Scaffold(
  appBar: appBar,
  //显示的页面
  body: mTextWidget,
 );
 }
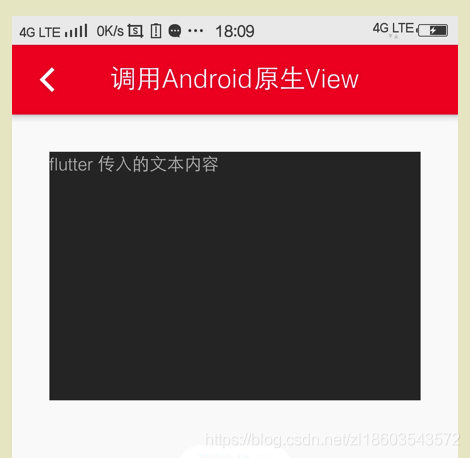
4.2 flutter 调用 原生view并传参数
   mTextWidget = Container(
   height: 200,
   child: AndroidView(
    //标识
    viewType: "com.flutter_to_native_test_textview",
    creationParams: {
    "content": "flutter 传入的文本内容",
    },
    //参数的编码方式
    creationParamsCodec: const StandardMessageCodec(),
   ),
   );
android 原生中的接收(只会接收一次)
... ...
TestTextView(Context context, BinaryMessenger messenger, int id, Map<String, Object> params) {
... ..
//flutter 传递过来的参数
if (params!=null&&!params.isEmpty()&¶ms.containsKey("content")) {
String myContent = (String) params.get("content");
lTextView.setText(myContent);
}
... ...
}
4.3 flutter 更新 原生view 中的数据
原生组件初始化的参数并不会随着setState重复赋值,可以通过MethodCall来实现更新数据。
首先让原生view组件实现MethodCallHandler接口:
public class TestTextView implements PlatformView , MethodChannel.MethodCallHandler{

	private final TextView mTestTextView;

	TestTextView(Context context, BinaryMessenger messenger, int id, Map<String, Object> params) {

		... ...

		//com.flutter_to_native_test_view_ 是更新数据的通信标识
		MethodChannel methodChannel = new MethodChannel(messenger, "com.flutter_to_native_test_textview_" + id);
		methodChannel.setMethodCallHandler(this);
	}

	... ...

	@Override
	public void onMethodCall(MethodCall methodCall, MethodChannel.Result result) {

  //updateText 是flutter 中调用的方法名称,可以随意定义
		if ("updateText".equals(methodCall.method)) {
			String text = (String) methodCall.arguments;
			this.mTestTextView .setText(text);
			//对flutter 的回调
			result.success(null);
		}
	}
}
flutter 中调用 android 原生view
 MethodChannel _channel;
 int viewId=0;
   mTextWidget = Container(
   height: 200,
   child: AndroidView(
    //标识
    viewType: "com.flutter_to_native_test_textview",
    creationParams: {
    "content": "flutter 传入的文本内容",
    },
    //参数的编码方式
    creationParamsCodec: const StandardMessageCodec(),
    //view创建完成时的回调
    onPlatformViewCreated: (id) {
    viewId = id;
    },
   ),
   );
更新数据
//这里设置的标识 MethodChannel('com.flutter_to_native_test_textview_$viewId');
// 与android MethodChannel methodChannel = new MethodChannel(messenger, "com.flutter_to_native_test_textview_" + id); 中注册的一至
void clickUpdtae(){
_channel = new MethodChannel('com.flutter_to_native_test_textview_$viewId');
 updateTextView();
}

//这里的标识 updateText
//与android 中接收消息的方法中
//if ("updateText".equals(methodCall.method)) {...} 一至
void updateTextView() async {
 return _channel.invokeMethod('updateText', "更新内容");
 }
通过onPlatformViewCreated回调,监听原始组件成功创建,并能够在回调方法的参数中拿到当前组件的id,这个id是系统随机分配的,然后通过这个分配的id加上我们的组件名称最为前缀创建一个和组件通讯的MethodChannel,拿到channel对象之后就可以通过invokeMethod方法向原生组件发送消息了,这里这里调用的是‘updateText'这个方法,参数是一个String
总结
到此这篇关于Flutter中嵌入Android 原生TextView实例教程的文章就介绍到这了,更多相关Flutter嵌入Android 原生TextView内容请搜索亿速云以前的文章或继续浏览下面的相关文章希望大家以后多多支持亿速云!
免责声明:本站发布的内容(图片、视频和文字)以原创、转载和分享为主,文章观点不代表本网站立场,如果涉及侵权请联系站长邮箱:is@yisu.com进行举报,并提供相关证据,一经查实,将立刻删除涉嫌侵权内容。


