小编给大家分享一下怎么实现laravel的artisan,希望大家阅读完这篇文章后大所收获,下面让我们一起去探讨吧!
laravel 的 artisan 命令行太好用了,换个框架没有这个功能,于是自己学习实现一些,直接上代码
新建目录
-artisan
--bin
--src
进入artisan composer init
composer require symfony/console
#!/usr/bin/env php
<?php

use Symfony\Component\Console\Application;
use Symfony\Component\Console\Input\InputInterface;
use Symfony\Component\Console\Output\OutputInterface;

require_once __DIR__.'/../vendor/autoload.php';

$app = new Application('artisan','1.1.1');

$app->register('artisan')->setCode(function(InputInterface $input, OutputInterface $output){
    $output->writeln('artisan start');
});

$app->run();

exit();

以上是简单的实现
#!/usr/bin/env php
<?php
use Symfony\Component\Console\Application;
use Symfony\Component\Console\Input\InputInterface;
use Symfony\Component\Console\Output\OutputInterface;
use Symfony\Component\Console\Input\InputArgument;
require_once __DIR__ . '/../vendor/autoload.php';
$app = new Application('artisan', '1.1.1');
$app->register('artisan')
->setDescription('myself artisan description')
->setCode(
function (InputInterface $input, OutputInterface $output) {
$name = $input->getArgument('name');
$output->writeln("hello {$name}");
}
)->addArgument('name', InputArgument::REQUIRED, 'please input your name');
$app->run();
exit();
这里演示了如何接收参数#!/usr/bin/env php
<?php
use Symfony\Component\Console\Application;
use Symfony\Component\Console\Input\InputInterface;
use Symfony\Component\Console\Output\OutputInterface;
use Symfony\Component\Console\Input\InputArgument;
use Symfony\Component\Console\Input\InputOption;
require_once __DIR__ . '/../vendor/autoload.php';
$app = new Application('artisan', '1.1.1');
$app->register('artisan')
->setDescription('myself artisan description')
->setCode(
function (InputInterface $input, OutputInterface $output) {
$string = $input->getOption('string');
$name = $input->getArgument('name');
if($string == 'lower'){
$name = strtolower($name);
}
if($string == 'upper'){
$name = strtoupper($name);
}
$output->writeln("hello {$name}");
}
)->addArgument('name', InputArgument::REQUIRED, 'please input your name')
->addOption('string',null,InputOption::VALUE_OPTIONAL,'转换字符串大小','lower')
;
$app->run();
exit();
这里演示了如何给命令行添加选项 ./bin/artisan.php artisan ffff --string='upper' echo FFFF$output->writeln("<info>hello {$name}</info>");
$output->writeln("<error>hello {$name}</error>");
$output->writeln("<comment>hello {$name}</comment>");
$output->writeln("hello {$name}");
可以给它们加上颜色
接下来将命令行拆分为文件
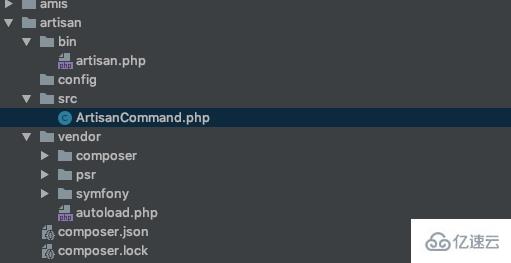
bin/artisan.php
ArtisanCommand.php
#!/usr/bin/env php
<?php

use Symfony\Component\Console\Application;
use Artisan\ArtisanCommand;
require_once __DIR__ . '/../vendor/autoload.php';

$app = new Application('artisan', '1.1.1');

$app->add(new ArtisanCommand());

$app->run();

exit();


ArtisanCommand.php
<?php
namespace Artisan;
use Symfony\Component\Console\Application;
use Symfony\Component\Console\Input\InputInterface;
use Symfony\Component\Console\Output\OutputInterface;
use Symfony\Component\Console\Input\InputArgument;
use Symfony\Component\Console\Input\InputOption;
use Symfony\Component\Console\Command\Command;
class ArtisanCommand extends Command{
public function configure()
{
$this->setName('artisan');
$this->setDescription('myself artisan description')
->addArgument('name', InputArgument::REQUIRED, 'please input your name')
->addOption('string',null,InputOption::VALUE_OPTIONAL,'转换字符串大小','lower');
}
public function execute(InputInterface $input, OutputInterface $output)
{
$string = $input->getOption('string');
$name = $input->getArgument('name');
if($string == 'lower'){
$name = strtolower($name);
}
if($string == 'upper'){
$name = strtoupper($name);
}
$output->writeln("<info>hello {$name}</info>");
$output->writeln("<error>hello {$name}</error>");
$output->writeln("<comment>hello {$name}</comment>");
$output->writeln("hello {$name}");
}
}composer.json
{
    "name": "baidu/artisan",
    "authors": [
        {
            "name": "gaobingbing",
            "email": "v_gaobingbing01@baidu.com"
        }
    ],
    "require": {
        "symfony/console": "^4.3"
    },
    "autoload":  {
        "psr-4": {
            "Artisan\\": "src"
        }
    }
}
看完了这篇文章,相信你对怎么实现laravel的artisan有了一定的了解,想了解更多相关知识,欢迎关注亿速云行业资讯频道,感谢各位的阅读!
免责声明:本站发布的内容(图片、视频和文字)以原创、转载和分享为主,文章观点不代表本网站立场,如果涉及侵权请联系站长邮箱:is@yisu.com进行举报,并提供相关证据,一经查实,将立刻删除涉嫌侵权内容。


