怎么在node.js中利用Sequelize 对MySQL进行连接?相信很多没有经验的人对此束手无策,为此本文总结了问题出现的原因和解决方法,通过这篇文章希望你能解决这个问题。
1.1 安装koa-generator
在终端输入:
$ npm install -g koa-generator
1.2 使用koa-generator生成koa2项目
$ koa2 HelloKoa2
成功创建项目后,进入项目目录,并执行npm install命令
$ cd HelloKoa2
$ npm install
1.3 启动项目
在终端输入:
$ npm start
项目启动后,默认端口号是3000,在浏览器中运行可以得到下图的效果说明运行成功。
2.1刚刚创建的文件使用webstorm打开
新建一个db目录
2.2查看Sequelize文档
使用npm安装Sequelize
npm install --save sequelize
你还必须手动为所选数据库安装驱动程序选择一个方法之一:
# 选择以下之一:
$ npm install --save pg pg-hstore # Postgres
$ npm install --save mysql2
$ npm install --save mariadb
$ npm install --save sqlite3
$ npm install --save tedious # Microsoft SQL Server
我这里下载得是MySQL2
2.3连接数据库
再刚刚创建得db文件加里面添加**config.js**
添加连接代码:
module.exports = {
 dbsMysql: 'mysql://root:123456@localhost:3306/new'
 //root是数据库管理员账号,‘123546'是密码 3306是端口号(MySQL默认是3306) school_admin是数据库名称

}继续在db文件夹里面添加mysql.js
添加连接以及添加日记:
const Sequelize = require('sequelize');
const mysqlurl = require('./config').dbsMysql
const sequelize = new Sequelize(mysqlurl, {
 // 选择一种日志记录参数
 logging: console.log // 默认值,显示日志函数调用的第一个参数
});
// //每次启动server刷新数据库
//  (async ()=>{
//   await sequelize.sync({ force: true });
//  })()

module.exports = sequelize3.1模型定义
在db目录下添加models文件夹再添加一个new2.js
定义模型:
const { Sequelize, DataTypes, Model } = require('sequelize');
const sequelize = require('../mysql');

const new2 = sequelize.define('t_new2', {
  name: {
   type: DataTypes.STRING,
   allowNull: false
  },
 },
 {
  // 这是其他模型参数
  freezeTableName: true
 });
// 定义的模型是类本身
module.exports= new24.1创建new2路由
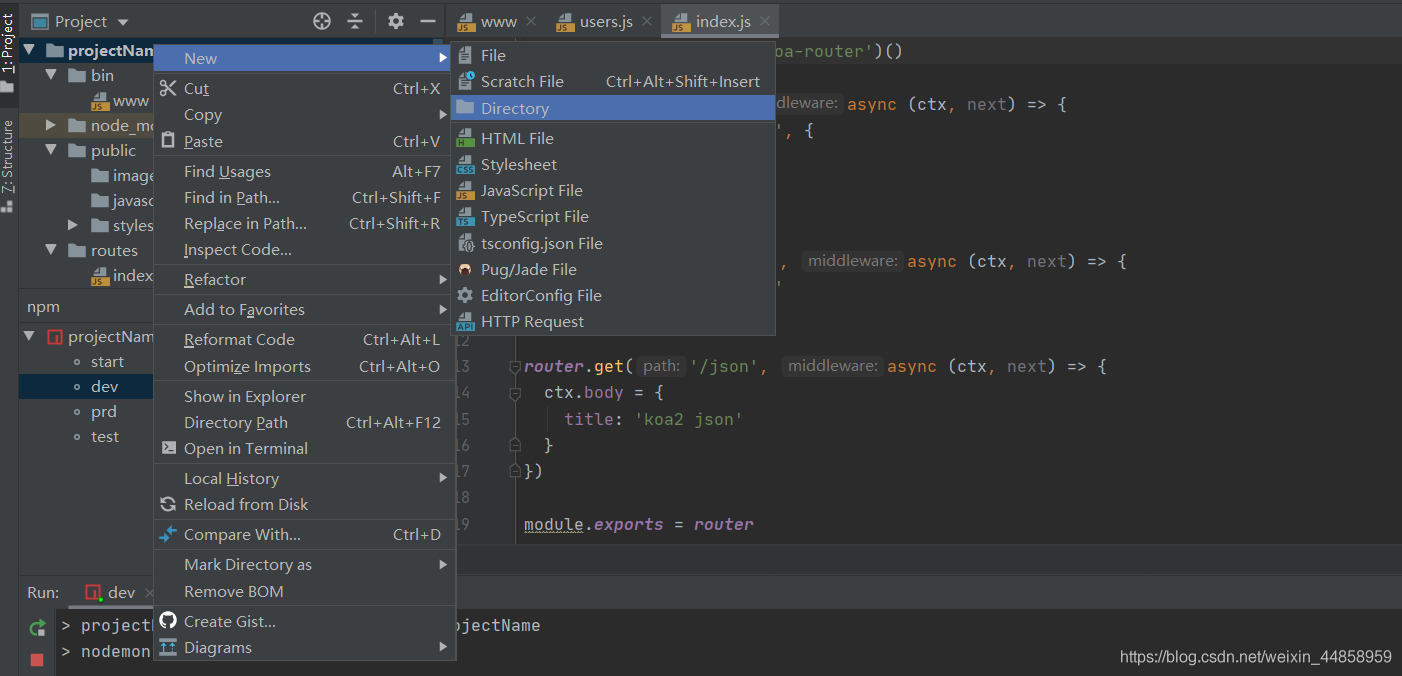
在routes文件夹中添加new2.js
//引入kob得routes模块
const router = require('koa-router')()
//定义模型为刚刚创建得new2.js
let Model = require("../db/models/new2");
//正常来说启动端口为http://localhost:3000 添加/new2就可以进入new2路由
router.prefix('/new1')
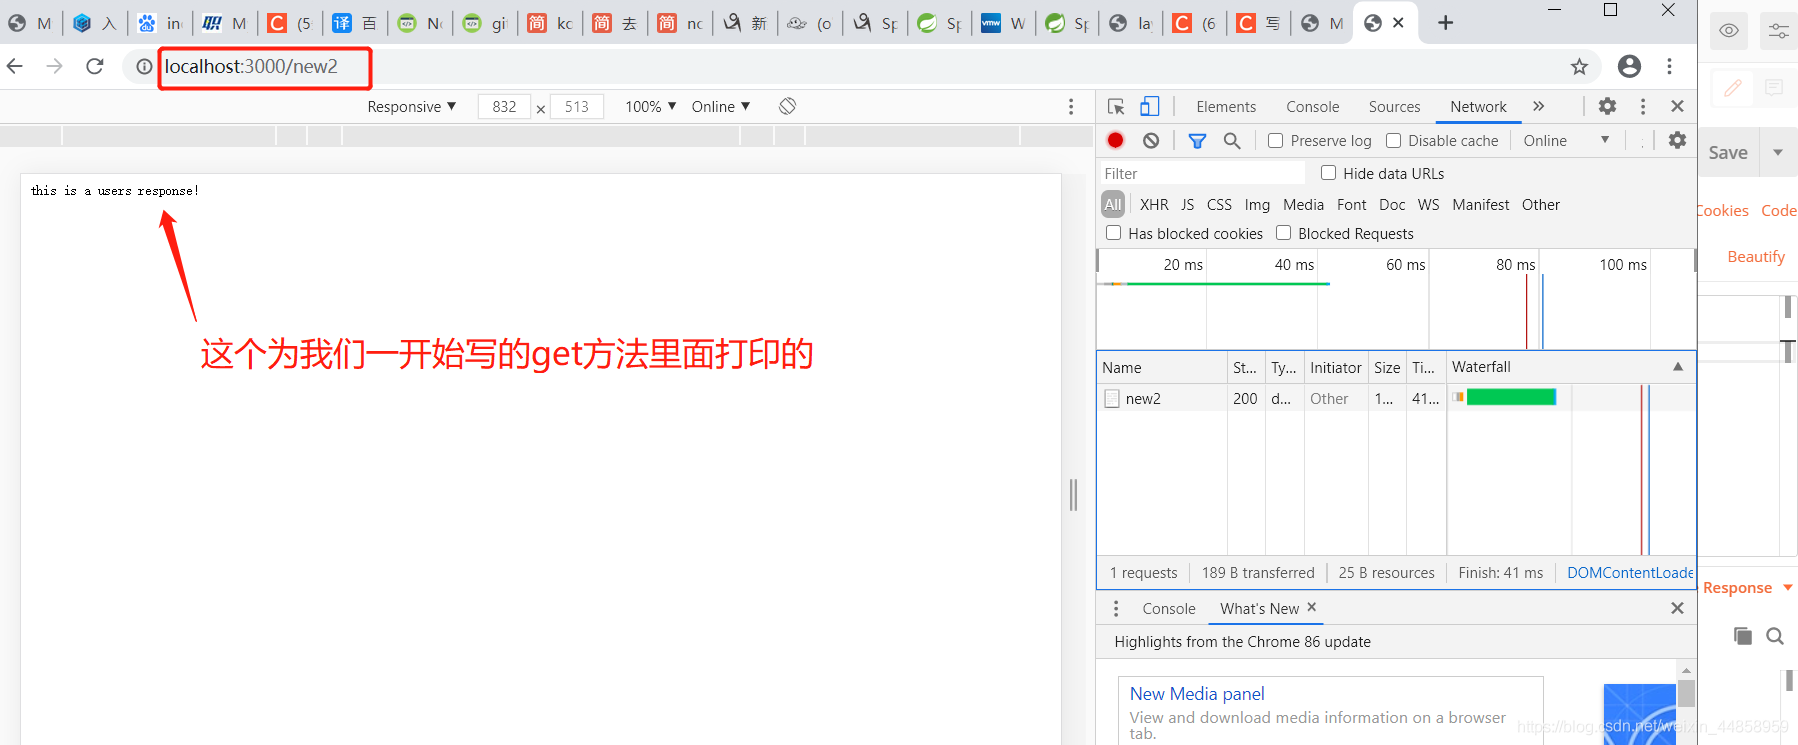
// 进入new2路由以后可以打印this is a users response!
router.get('/', function (ctx, next) {
ctx.body = 'this is a users response!'
})
//设置增加add接口
router.post('/add', async function (ctx, next) {
console.log(ctx.request.body)
const new2 = await Model.create(ctx.request.body);
ctx.body = {
code:200,
data:new2
}
})
//设置查询find接口
router.post('/find', async function (ctx, next) {
const new2 =await Model.findAll({include: []})
console.log(1111)
ctx.body = {
code: 200,
data: new2
}
})
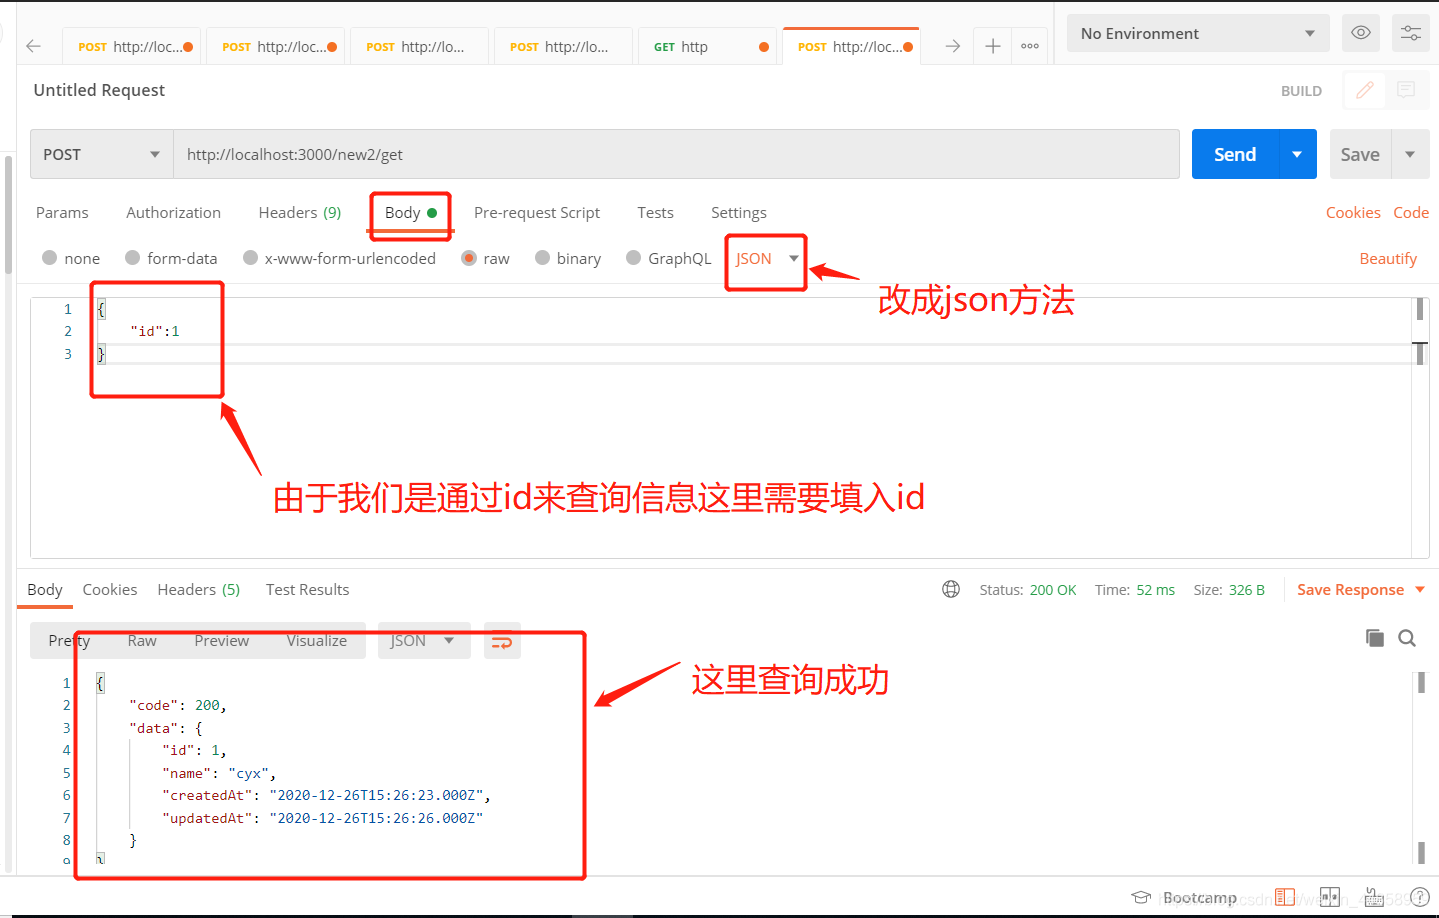
//设置通过id得到所需信息的get接口
router.post('/get', async function (ctx, next) {
// let users = await User.
// find({})
console.log(ctx.request.body)
let new2 = await Model.findOne({
// attributes: ['name', 'where']
where: {
id: ctx.request.body.id
}
});
ctx.body = {
code:200,
data:new2
}
})
//设置修改update接口
router.post('/update', async function (ctx, next) {
console.log(ctx.request.body)
// let pbj = await Model.update({ _id: ctx.request.body._id }, ctx.request.body);
let new2 = await Model.update(ctx.request.body, {
where: {
id: ctx.request.body.id
}
});
ctx.body = new2
})
//设置删除delete接口
router.post('/delete', async function (ctx, next) {
console.log(ctx.request.body)
// 删除所有名为 "Jane" 的人
await Model.destroy({
where: { id: ctx.request.body.id }
});
ctx.body = 'shibai '
})
// //每次启动server刷新数据库
// (async ()=>{
// await sequelize.sync({ force: true });
// })()
module.exports = router4.2在app.js里面添加路由
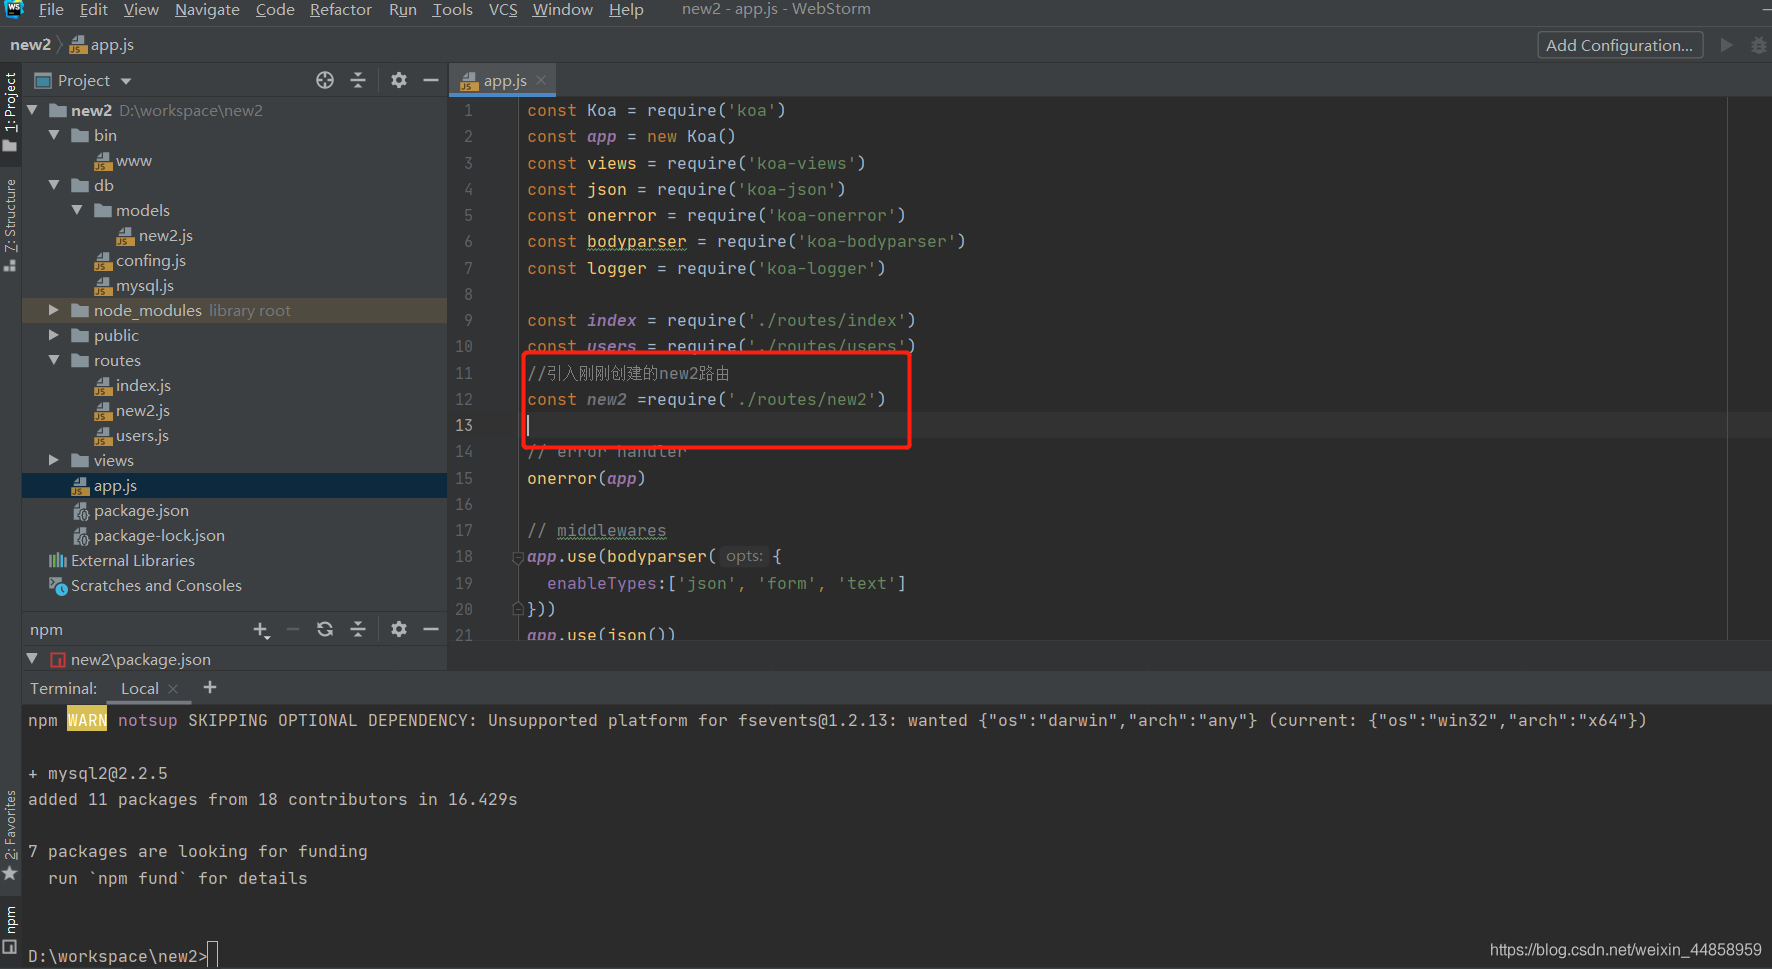

//引入刚刚创建的new2路由
const new2 =require('./routes/new2')
//使用我们的路由 app.use(new2.routes(),new2.allowedMethods())
4.3启动项目
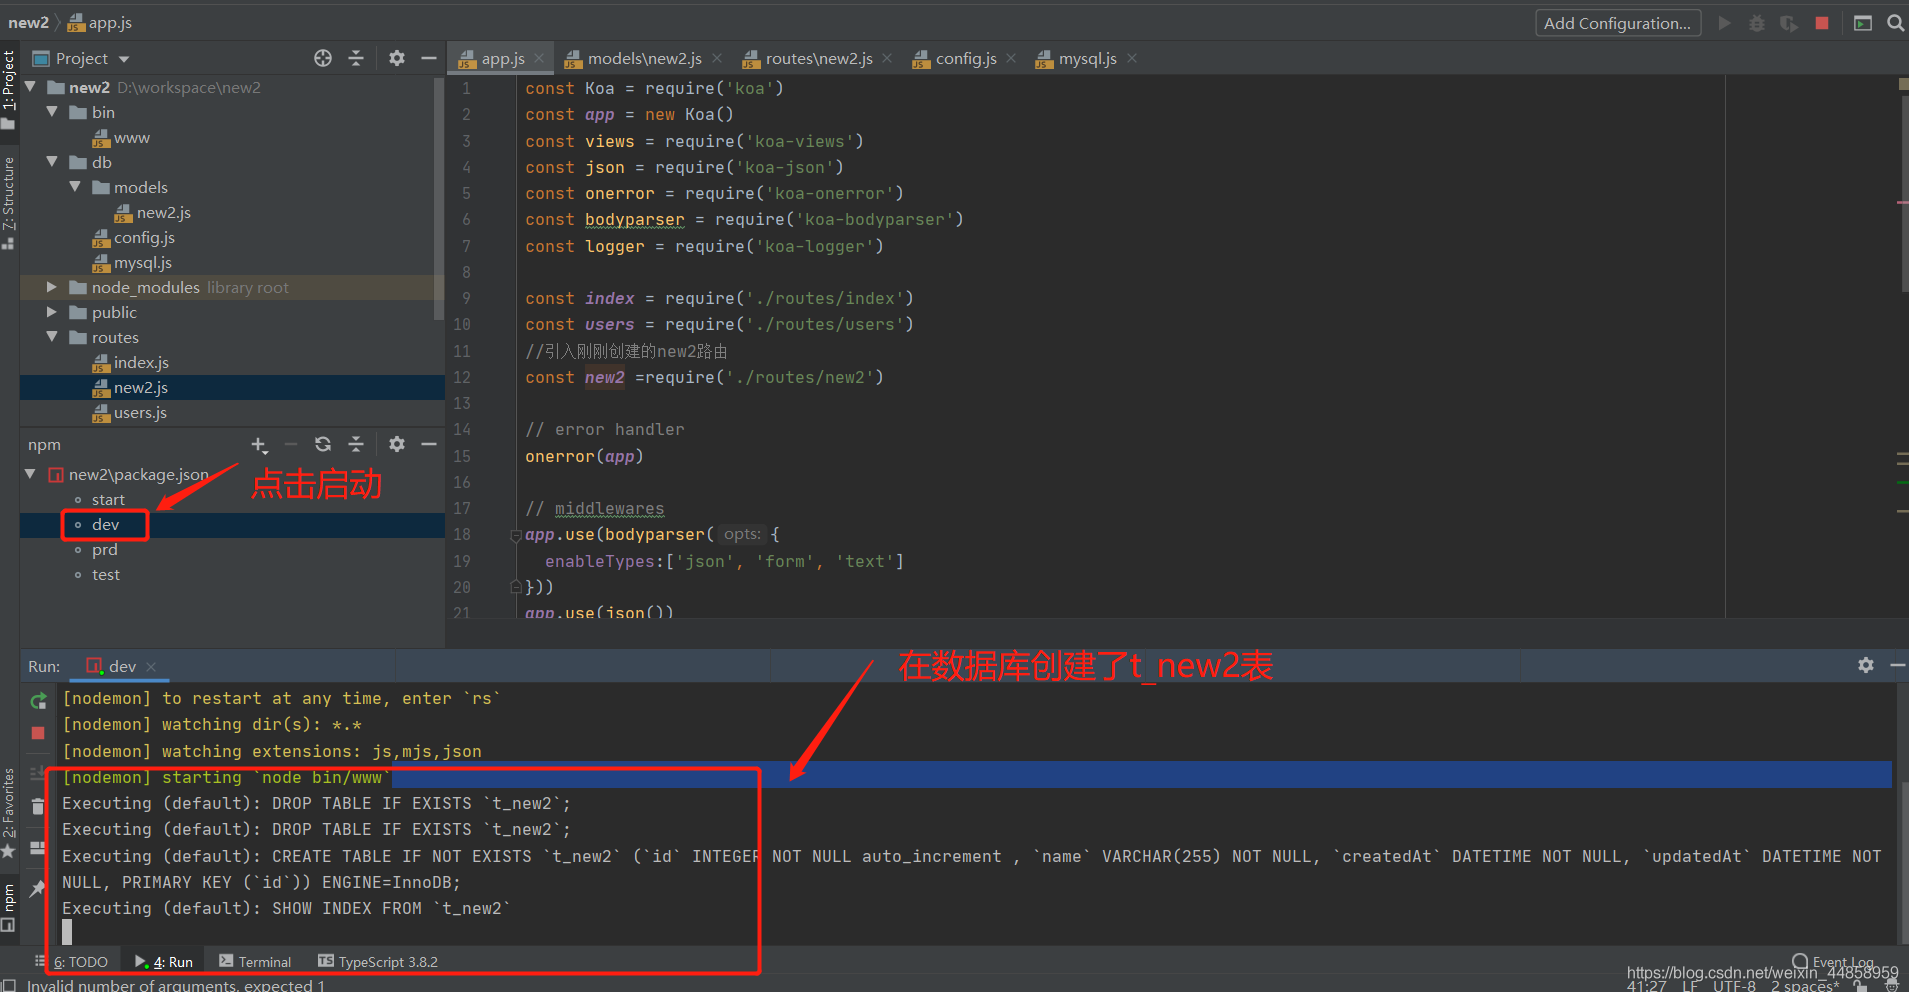
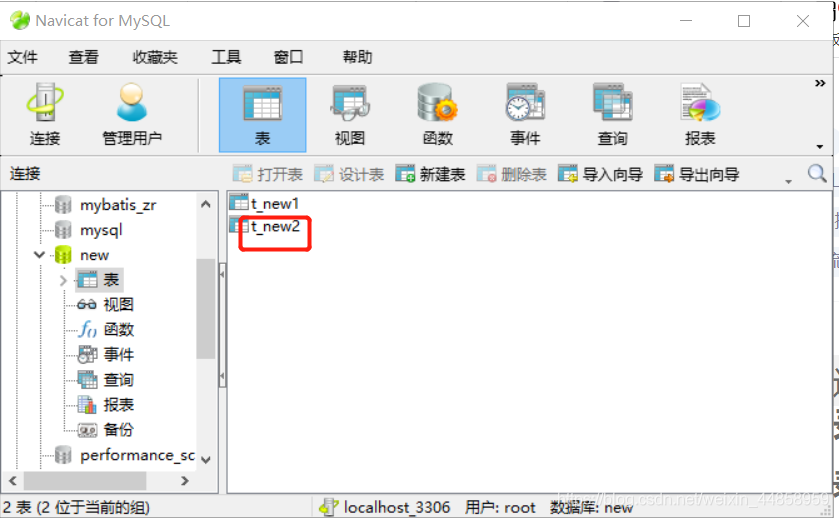
在数据库中查看
5.测试
5.1使用浏览器查看
输入url:http://localhost:3000/new2
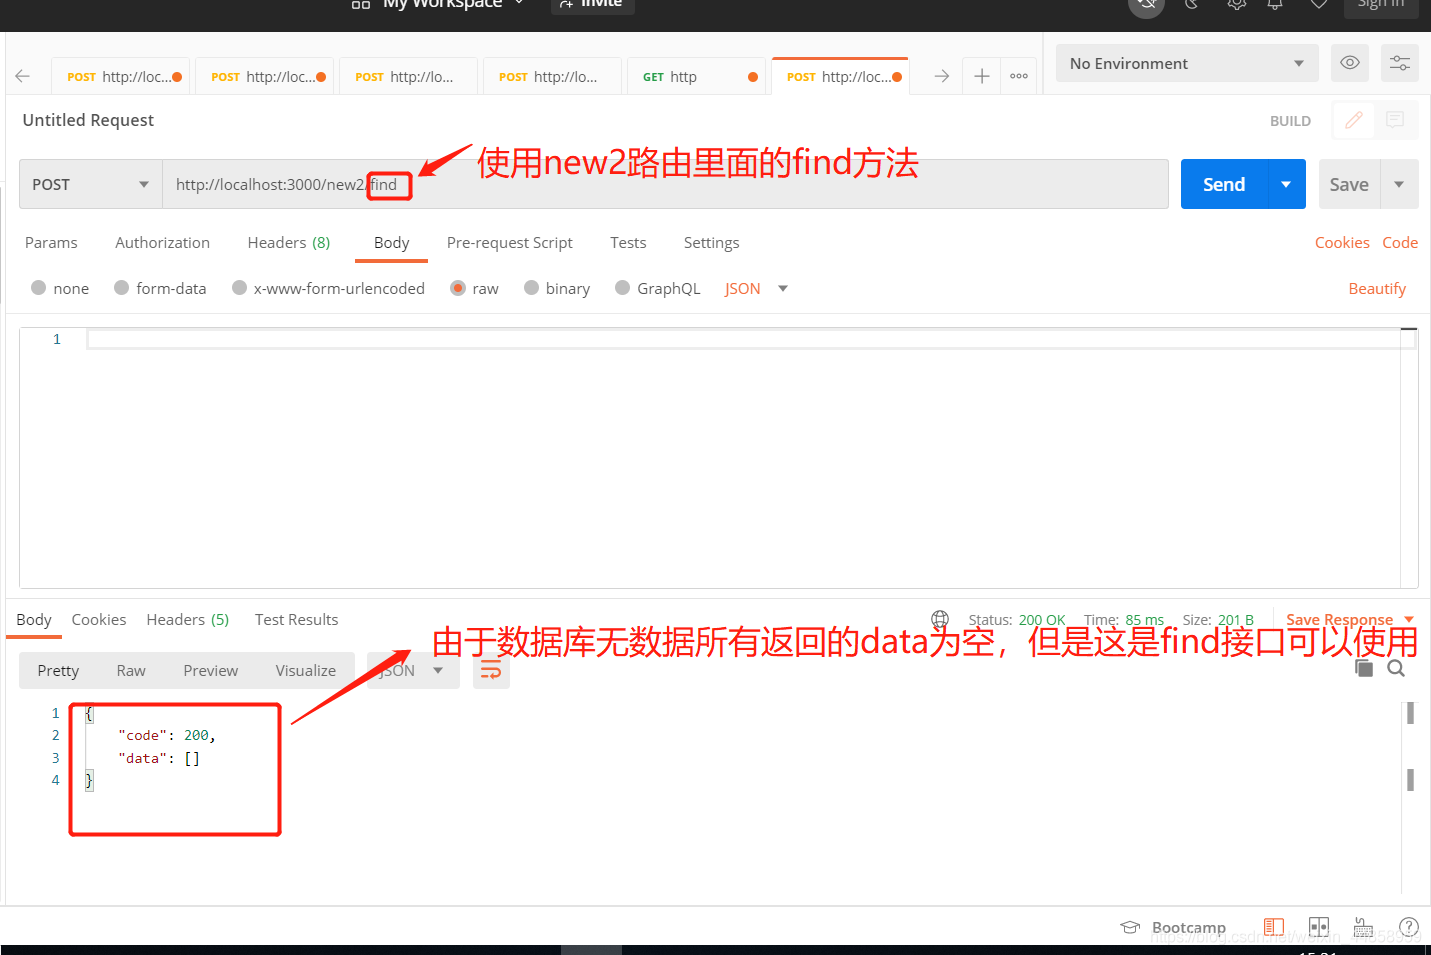
5.2.使用postman测试接口
测试find接口(因为我们写的find方法使用的post方法所以记得将get换成post):
http://localhost:3000/new2/find
测试get接口
展示一下最后的目录

看完上述内容,你们掌握怎么在node.js中利用Sequelize 对MySQL进行连接的方法了吗?如果还想学到更多技能或想了解更多相关内容,欢迎关注亿速云行业资讯频道,感谢各位的阅读!
免责声明:本站发布的内容(图片、视频和文字)以原创、转载和分享为主,文章观点不代表本网站立场,如果涉及侵权请联系站长邮箱:is@yisu.com进行举报,并提供相关证据,一经查实,将立刻删除涉嫌侵权内容。


