еҰӮдҪ•дҪҝз”Ёkubekeyе®үиЈ…kubesphere
иҝҷзҜҮж–Үз« дё»иҰҒдёәеӨ§е®¶еұ•зӨәдәҶвҖңеҰӮдҪ•дҪҝз”Ёkubekeyе®үиЈ…kubesphereвҖқпјҢеҶ…е®№з®ҖиҖҢжҳ“жҮӮпјҢжқЎзҗҶжё…жҷ°пјҢеёҢжңӣиғҪеӨҹеё®еҠ©еӨ§е®¶и§ЈеҶіз–‘жғ‘пјҢдёӢйқўи®©е°Ҹзј–еёҰйўҶеӨ§е®¶дёҖиө·з ”究并еӯҰд№ дёҖдёӢвҖңеҰӮдҪ•дҪҝз”Ёkubekeyе®үиЈ…kubesphereвҖқиҝҷзҜҮж–Үз« еҗ§гҖӮ
дёӢиҪҪ KubeKey
KubeKey жҳҜж–°дёҖд»Ј Kubernetes е’Ң KubeSphere е®үиЈ…еҷЁпјҢеҸҜеё®еҠ©жӮЁд»Ҙз®ҖеҚ•гҖҒеҝ«йҖҹгҖҒзҒөжҙ»зҡ„ж–№ејҸе®үиЈ… Kubernetes е’Ң KubeSphereгҖӮ
export KKZONE=cn curl -sfL https://get-kk.kubesphere.io | VERSION=v1.0.1 sh -
еҮҶеӨҮй•ңеғҸ
еҰӮжһңжӮЁжғіи®©е®үиЈ…еҠ еҝ«жҲ–иҖ…жӮЁзҡ„жңәжҲҝжІЎжңүеӨ–зҪ‘пјҢеҸҜд»ҘдҪҝз”Ёе…¬еҸёеҶ…йғЁзҡ„з§Ғжңүд»“еә“пјҢйў„е…ҲжҠҠй•ңеғҸжҺЁйҖҒеҲ°з§Ғжңүд»“еә“дёӯпјҢжҲ‘иҝҷйҮҢзҡ„д»“еә“дҪҝз”Ёharbor
дёӢиҪҪзҰ»зәҝе®үиЈ…е·Ҙе…·пјҢжҲ‘иҝҷйҮҢеҸӘжҳҜз”ЁиҝҷдёӘи„ҡжң¬жқҘдёӢиҪҪе’ҢжҺЁйҖҒй•ңеғҸ
curl -L -O https://github.com/kubesphere/ks-installer/releases/download/v3.0.0/offline-installation-tool.sh curl -L -O https://github.com/kubesphere/ks-installer/releases/download/v3.0.0/images-list.txt
жӢүеҸ–й•ңеғҸ
./offline-installation-tool.sh -s -l images-list.txt -d ./kubesphere-images еңЁ./kubesphere-imagesзӣ®еҪ•дёӢиғҪзңӢеҲ°д»ҘдёӢеҺӢзј©еҢ… # ll total 8606088 -rw-r--r-- 1 root root 454465957 Feb 2 15:37 csi-images.tar.gz -rw-r--r-- 1 root root 1231853258 Feb 2 15:33 example-images.tar.gz -rw-r--r-- 1 root root 445244294 Feb 2 14:50 istio-images.tar.gz -rw-r--r-- 1 root root 762326634 Feb 2 14:27 k8s-images.tar.gz -rw-r--r-- 1 root root 1297767607 Feb 2 14:40 ks-core-images.tar.gz -rw-r--r-- 1 root root 3439146357 Feb 2 15:19 ks-devops-images.tar.gz -rw-r--r-- 1 root root 733165078 Feb 2 14:46 ks-logging-images.tar.gz -rw-r--r-- 1 root root 448651153 Feb 2 15:23 openpitrix-images.tar.gz
жҺЁйҖҒй•ңеғҸеҲ°з§Ғжңүд»“еә“пјҢеҫ…и„ҡжң¬е®ҢжҲҗеҚіеҸҜ
./offline-installation-tool.sh -l images-list.txt -d ./kubesphere-images -r hub.evbj.easou.com
еҲӣе»әеӨҡиҠӮзӮ№йӣҶзҫӨ
жӮЁеҸҜз”ЁдҪҝз”Ё KubeKey еҗҢж—¶е®үиЈ… Kubernetes е’Ң KubeSphereпјҢйҖҡиҝҮиҮӘе®ҡд№үй…ҚзҪ®ж–Ү件дёӯзҡ„еҸӮж•°еҲӣе»әеӨҡиҠӮзӮ№йӣҶзҫӨгҖӮ
еҲӣе»әе®үиЈ…жңү KubeSphere зҡ„ Kubernetes йӣҶзҫӨ(дҫӢеҰӮ --with-kubesphere v3.0.0)
./kk create config --with-kubernetes v1.17.9 --with-kubesphere v3.0.0
зі»з»ҹе°ҶеҲӣе»әй»ҳи®Өзҡ„ config-sample.yaml ж–Ү件гҖӮжӮЁеҸҜд»Ҙж №жҚ®жӮЁзҡ„зҺҜеўғдҝ®ж”№жӯӨж–Ү件гҖӮ
apiVersion: kubekey.kubesphere.io/v1alpha1 kind: Cluster metadata: name: ESCloud spec: hosts: - {name: kubesphere001, address: 10.26.31.34, internalAddress: 10.26.31.34, privateKeyPath: "~/.ssh/id_dsa", port: 20755} - {name: kubesphere002, address: 10.26.31.36, internalAddress: 10.26.31.36, privateKeyPath: "~/.ssh/id_dsa", port: 20755} - {name: kubesphere003, address: 10.26.31.42, internalAddress: 10.26.31.42, privateKeyPath: "~/.ssh/id_dsa", port: 20755} - {name: kubesphere004, address: 10.26.31.46, internalAddress: 10.26.31.46, privateKeyPath: "~/.ssh/id_dsa", port: 20755} - {name: kubesphere005, address: 10.26.31.118, internalAddress: 10.26.31.118, privateKeyPath: "~/.ssh/id_dsa", port: 20755} - {name: kubesphere006, address: 10.26.31.119, internalAddress: 10.26.31.119, privateKeyPath: "~/.ssh/id_dsa", port: 20755} - {name: kubesphere007, address: 10.26.31.120, internalAddress: 10.26.31.120, privateKeyPath: "~/.ssh/id_dsa", port: 20755} - {name: kubesphere008, address: 10.26.31.121, internalAddress: 10.26.31.121, privateKeyPath: "~/.ssh/id_dsa", port: 20755} roleGroups: etcd: - kubesphere001 - kubesphere002 - kubesphere003 master: - kubesphere001 - kubesphere002 - kubesphere003 worker: - kubesphere004 - kubesphere005 - kubesphere006 - kubesphere007 - kubesphere008 controlPlaneEndpoint: domain: lb.kubesphere.local address: "" port: "6443" kubernetes: version: v1.17.9 imageRepo: kubesphere clusterName: cluster.local network: plugin: calico kubePodsCIDR: 10.233.64.0/18 kubeServiceCIDR: 10.233.0.0/18 registry: registryMirrors: [] insecureRegistries: ["hub.kubeops.net"] privateRegistry: "hub.kubeops.net" addons: [] --- apiVersion: installer.kubesphere.io/v1alpha1 kind: ClusterConfiguration metadata: name: ks-installer namespace: kubesphere-system labels: version: v3.0.0 spec: local_registry: "hub.kubeops.net" persistence: storageClass: "" authentication: jwtSecret: "" etcd: monitoring: true endpointIps: localhost port: 2379 tlsEnable: true common: es: elasticsearchDataVolumeSize: 20Gi elasticsearchMasterVolumeSize: 4Gi elkPrefix: logstash logMaxAge: 7 mysqlVolumeSize: 20Gi minioVolumeSize: 20Gi etcdVolumeSize: 20Gi openldapVolumeSize: 2Gi redisVolumSize: 2Gi console: enableMultiLogin: true # enable/disable multi login port: 30880 alerting: enabled: false auditing: enabled: false devops: enabled: false jenkinsMemoryLim: 2Gi jenkinsMemoryReq: 1500Mi jenkinsVolumeSize: 8Gi jenkinsJavaOpts_Xms: 512m jenkinsJavaOpts_Xmx: 512m jenkinsJavaOpts_MaxRAM: 2g events: enabled: false ruler: enabled: true replicas: 2 logging: enabled: false logsidecarReplicas: 2 metrics_server: enabled: true monitoring: prometheusMemoryRequest: 400Mi prometheusVolumeSize: 20Gi multicluster: clusterRole: none # host | member | none networkpolicy: enabled: false notification: enabled: false openpitrix: enabled: false servicemesh: enabled: falseзҺҜеўғеҲқе§ӢеҢ–
./kk init os -f config-sample.yaml INFO[14:04:19 CST] Init operating system INFO[14:04:20 CST] Start initializing kubesphere008 [10.26.31.121] node=10.26.31.121 INFO[14:04:20 CST] Start initializing kubesphere001 [10.26.31.34] node=10.26.31.34 INFO[14:04:20 CST] Start initializing kubesphere003 [10.26.31.42] node=10.26.31.42 INFO[14:04:20 CST] Start initializing kubesphere005 [10.26.31.118] node=10.26.31.118 INFO[14:04:20 CST] Start initializing kubesphere006 [10.26.31.119] node=10.26.31.119 INFO[14:04:20 CST] Start initializing kubesphere004 [10.26.31.46] node=10.26.31.46 INFO[14:04:20 CST] Start initializing kubesphere007 [10.26.31.120] node=10.26.31.120 INFO[14:04:20 CST] Start initializing kubesphere002 [10.26.31.36] node=10.26.31.36 INFO[14:06:34 CST] Complete initialization kubesphere005 [10.26.31.118] node=10.26.31.118 INFO[14:06:56 CST] Complete initialization kubesphere002 [10.26.31.36] node=10.26.31.36 INFO[14:07:04 CST] Complete initialization kubesphere006 [10.26.31.119] node=10.26.31.119 INFO[14:07:04 CST] Complete initialization kubesphere007 [10.26.31.120] node=10.26.31.120 INFO[14:07:07 CST] Complete initialization kubesphere003 [10.26.31.42] node=10.26.31.42 INFO[14:07:11 CST] Complete initialization kubesphere004 [10.26.31.46] node=10.26.31.46 INFO[14:08:23 CST] Complete initialization kubesphere001 [10.26.31.34] node=10.26.31.34 INFO[14:10:57 CST] Complete initialization kubesphere008 [10.26.31.121] node=10.26.31.121 INFO[14:10:57 CST] Init operating system successful.
йғЁзҪІ
д»ҘдёҠеҮҶеӨҮе·ҘдҪңе®ҢжҲҗдё”еҶҚж¬ЎжЈҖжҹҘй…ҚзҪ®ж–Үд»¶ж— иҜҜеҗҺпјҢжү§иЎҢе®үиЈ…гҖӮ
./kk create cluster -f config-sample.yaml +-------------------------+------+------+---------+----------+-------+-------+-----------+--------+------------+-------------+------------------+--------------+ | name | sudo | curl | openssl | ebtables | socat | ipset | conntrack | docker | nfs client | ceph client | glusterfs client | time | +-------------------------+------+------+---------+----------+-------+-------+-----------+--------+------------+-------------+------------------+--------------+ | kubesphere005 | y | y | y | y | y | y | y | y | y | y | y | CST 14:16:55 | | kubesphere006 | y | y | y | y | y | y | y | y | y | y | y | CST 14:16:55 | | kubesphere007 | y | y | y | y | y | y | y | y | y | y | y | CST 14:16:55 | | kubesphere004 | y | y | y | y | y | y | y | y | y | y | y | CST 14:16:55 | | kubesphere001 | y | y | y | y | y | y | y | y | y | y | y | CST 14:16:55 | | kubesphere003 | y | y | y | y | y | y | y | y | y | y | y | CST 14:16:55 | | kubesphere002 | y | y | y | y | y | y | y | y | y | y | y | CST 14:16:55 | | kubesphere008 | y | y | y | y | y | y | y | y | y | y | y | CST 14:16:55 | +-------------------------+------+------+---------+----------+-------+-------+-----------+--------+------------+-------------+------------------+--------------+ This is a simple check of your environment. Before installation, you should ensure that your machines meet all requirements specified at https://github.com/kubesphere/kubekey#requirements-and-recommendations Continue this installation? [yes/no]: yes INFO[14:17:25 CST] Downloading Installation Files INFO[14:17:25 CST] Downloading kubeadm ... ************************************************** ##################################################### ### Welcome to KubeSphere! ### ##################################################### Console: http://10.26.31.34:30880 Account: admin Password: P@88w0rd NOTESпјҡ 1. After logging into the console, please check the monitoring status of service components in the "Cluster Management". If any service is not ready, please wait patiently until all components are ready. 2. Please modify the default password after login. ##################################################### https://kubesphere.io 2021-02-05 15:47:21 #####################################################
иҮіжӯӨkubesphereе®үиЈ…жҲҗеҠҹпјҢеҸҜд»ҘйҖҡиҝҮжөҸи§ҲеҷЁи®ҝй—®http://10.26.31.34:30880 йӘҢиҜҒ
йӘҢиҜҒ
жӮЁеҸҜд»ҘдҪҝз”Ёй»ҳи®Өзҡ„еёҗжҲ·е’ҢеҜҶз Ғ admin/P@88w0rd зҷ»еҪ• KubeSphere жҺ§еҲ¶еҸ°е№¶ејҖе§ӢдҪҝз”Ё KubeSphereгҖӮиҜ·еңЁзҷ»еҪ•еҗҺдҝ®ж”№й»ҳи®ӨеҜҶз ҒгҖӮ
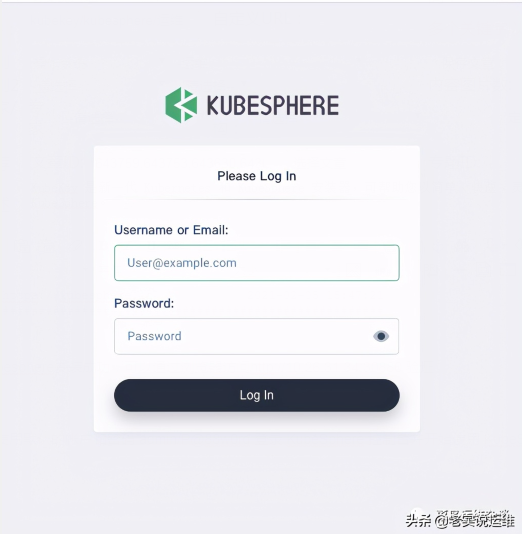
зҷ»еҪ•еҗҺеҰӮдёӢеӣҫ

д»ҘдёҠжҳҜвҖңеҰӮдҪ•дҪҝз”Ёkubekeyе®үиЈ…kubesphereвҖқиҝҷзҜҮж–Үз« зҡ„жүҖжңүеҶ…е®№пјҢж„ҹи°ўеҗ„дҪҚзҡ„йҳ…иҜ»пјҒзӣёдҝЎеӨ§е®¶йғҪжңүдәҶдёҖе®ҡзҡ„дәҶи§ЈпјҢеёҢжңӣеҲҶдә«зҡ„еҶ…е®№еҜ№еӨ§е®¶жңүжүҖеё®еҠ©пјҢеҰӮжһңиҝҳжғіеӯҰд№ жӣҙеӨҡзҹҘиҜҶпјҢж¬ўиҝҺе…іжіЁдәҝйҖҹдә‘иЎҢдёҡиө„и®Ҝйў‘йҒ“пјҒ


