Kubeless如何基于CPU自动伸缩,针对这个问题,这篇文章详细介绍了相对应的分析和解答,希望可以帮助更多想解决这个问题的小伙伴找到更简单易行的方法。
自动伸缩是 Serverless 的最大卖点之一。
Kubless 的自动伸缩功能基于 Kubernetes 的 HPA(HorizontalPodAutoscaler)功能实现。
目前,kubeless 中的函数支持基于 cpu 和 qps 这两种指标进行自动伸缩。
如何将演示基于 cpu 指标进行自动伸缩。
操作系统:macOS
Kubernetes 版本:v1.15.5
Kubeless 版本:v1.0.7
可以先通过 kubeless 命令行了解如何使用 autoscale。
kubeless autoscale 命令帮助文档如下:
$ kubeless help autoscale
autoscale command allows user to list, create, delete autoscale rule for function on Kubeless


Usage:
  kubeless autoscale SUBCOMMAND [flags]
  kubeless autoscale [command]


Available Commands:
  create      automatically scale function based on monitored metrics
  delete      delete an autoscale from Kubeless
  list        list all autoscales in Kubeless


Flags:
  -h, --help   help for autoscale


Use "kubeless autoscale [command] --help" for more information about a command.
kubeless autoscale create 命令帮助文档如下:
$ kubeless autoscale create --help
automatically scale function based on monitored metrics


Usage:
  kubeless autoscale create <name> FLAG [flags]


Flags:
  -h, --help               help for create
      --max int32          maximum number of replicas (default 1)
      --metric string      metric to use for calculating the autoscale. Supported metrics: cpu, qps (default "cpu")
      --min int32          minimum number of replicas (default 1)
  -n, --namespace string   Specify namespace for the autoscale
      --value string       value of the average of the metric across all replicas. If metric is cpu, value is a number represented as percentage. If metric is qps, value must be in format of Quantity
要使用 HPA,就需要在集群中安装 Metrics Server 服务,否则 HPA 无法获取指标,自然也就无法进行扩容缩容。
可以使用如下命令检查是否安装了 Metrics Server,如果没有安装,那么需要安装它。
$ kubectl api-versions|grep metrics
1、这里要先下载 metrics-server 的 components.yaml:
$ curl -L https://github.com/kubernetes-sigs/metrics-server/releases/download/v0.3.6/components.yaml --output components.yaml
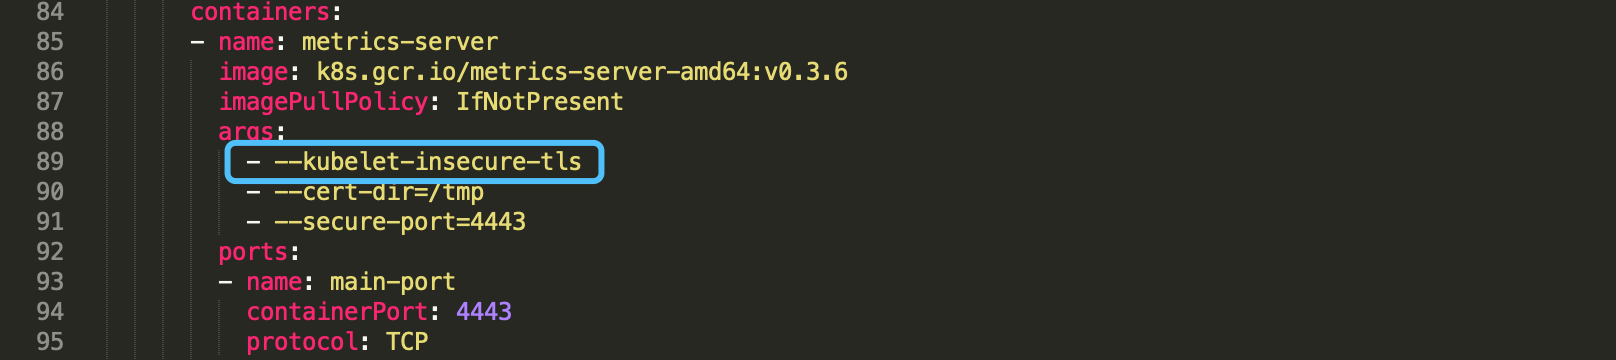
2、然后在 components.yaml 文件的 88行的 args 下面添加参数 --kubelet-insecure-tls,否则 metrics-server 启动报错:
3、最后再使用 kubectl apply 命令安装 Metrics Server:
$ kubectl apply -f components.yaml
clusterrole.rbac.authorization.k8s.io/system:aggregated-metrics-reader created
clusterrolebinding.rbac.authorization.k8s.io/metrics-server:system:auth-delegator created
rolebinding.rbac.authorization.k8s.io/metrics-server-auth-reader created
apiservice.apiregistration.k8s.io/v1beta1.metrics.k8s.io created
serviceaccount/metrics-server created
deployment.apps/metrics-server created
service/metrics-server created
clusterrole.rbac.authorization.k8s.io/system:metrics-server created
clusterrolebinding.rbac.authorization.k8s.io/system:metrics-server created
4、再次确认 metrics-server 是否安装成功:
$ kubectl api-versions|grep metrics
metrics.k8s.io/v1beta1
依旧使用那个熟悉的 Python 代码:
# test.py
def hello(event, context):
  print event
  return event['data']
创建 hello 函数,加上 cpu 参数和 memory 参数,以便 HPA 可以根据 cpu 指标进行扩容缩容:
$ kubeless function deploy hello --runtime python2.7 --from-file test.py --handler test.hello --cpu 200m --memory 200M
INFO[0000] Deploying function...
INFO[0000] Function hello submitted for deployment
INFO[0000] Check the deployment status executing 'kubeless function ls hello'
查看函数状态:
$ kubeless function ls hello
NAME     NAMESPACE    HANDLER       RUNTIME      DEPENDENCIES    STATUS
hello    default      test.hello    python2.7                    1/1 READY
使用 kubeless 为函数 hello 创建 autoscale:
$ kubeless autoscale create hello --metric=cpu --min=1 --max=20 --value=60
INFO[0000] Adding autoscaling rule to the function...
INFO[0000] Autoscaling rule for hello submitted for deployment
使用 kubectl proxy 创建反向代理,以便可以通过 http 访问函数:
$ kubectl proxy -p 8080
接下来对函数进行压力测试,这里使用 ab,它是 apache 自带的压力测试工具,macOS 默认安装了 apache,直接可以使用。
使用 ab 工具进行压力测试:
$ ab -n 3000 -c 8 -t 300 -k -r "http://127.0.0.1:8080/api/v1/namespaces/default/services/hello:http-function-port/proxy/"
使用 kubectl get hpa -w 命令观察 HPA 的状态,可以看到副本数会根据指标的大小进行变化,压力大的时候副本量会随着递增,等到压力小了副本量会递减:
$ kubectl get hpa -w
NAME    REFERENCE          TARGETS   MINPODS   MAXPODS   REPLICAS   AGE
hello   Deployment/hello   0%/60%    1         20        1          30m
hello   Deployment/hello   95%/60%   1         20        1          32m
hello   Deployment/hello   95%/60%   1         20        2          33m
hello   Deployment/hello   77%/60%   1         20        2          33m
hello   Deployment/hello   77%/60%   1         20        3          34m
hello   Deployment/hello   63%/60%   1         20        3          34m
hello   Deployment/hello   62%/60%   1         20        3          36m
hello   Deployment/hello   71%/60%   1         20        3          37m
hello   Deployment/hello   71%/60%   1         20        4          37m
hello   Deployment/hello   0%/60%    1         20        4          38m
hello   Deployment/hello   0%/60%    1         20        4          42m
hello   Deployment/hello   0%/60%    1         20        1          43m
使用 kubectl get pod -w 命令观察也可以看到自动伸缩时 Pod 的数量及状态变化:
$ kubectl get pod -w
NAME                     READY   STATUS    RESTARTS   AGE
hello-67b44c7585-5t9g4   1/1     Running   0          21h
hello-67b44c7585-d9w7j   0/1     Pending   0          0s
hello-67b44c7585-d9w7j   0/1     Pending   0          0s
hello-67b44c7585-d9w7j   0/1     Init:0/1   0          0s
hello-67b44c7585-d9w7j   0/1     PodInitializing   0          2s
hello-67b44c7585-d9w7j   1/1     Running           0          6s
hello-67b44c7585-fctgq   0/1     Pending           0          0s
hello-67b44c7585-fctgq   0/1     Pending           0          0s
hello-67b44c7585-fctgq   0/1     Init:0/1          0          0s
hello-67b44c7585-fctgq   0/1     PodInitializing   0          2s
hello-67b44c7585-fctgq   1/1     Running           0          3s
hello-67b44c7585-ht784   0/1     Pending           0          0s
hello-67b44c7585-ht784   0/1     Pending           0          0s
hello-67b44c7585-ht784   0/1     Init:0/1          0          0s
hello-67b44c7585-ht784   0/1     PodInitializing   0          2s
hello-67b44c7585-ht784   1/1     Running           0          3s
hello-67b44c7585-wfcg9   0/1     Pending           0          0s
hello-67b44c7585-wfcg9   0/1     Pending           0          0s
hello-67b44c7585-wfcg9   0/1     Init:0/1          0          0s
hello-67b44c7585-wfcg9   0/1     PodInitializing   0          2s
hello-67b44c7585-wfcg9   1/1     Running           0          3s
hello-67b44c7585-fctgq   1/1     Terminating       0          8m53s
hello-67b44c7585-ht784   1/1     Terminating       0          7m52s
hello-67b44c7585-wfcg9   1/1     Terminating       0          5m50s
hello-67b44c7585-d9w7j   1/1     Terminating       0          9m54s
hello-67b44c7585-fctgq   0/1     Terminating       0          9m24s
hello-67b44c7585-ht784   0/1     Terminating       0          8m23s
hello-67b44c7585-fctgq   0/1     Terminating       0          9m25s
hello-67b44c7585-fctgq   0/1     Terminating       0          9m25s
hello-67b44c7585-fctgq   0/1     Terminating       0          9m25s
hello-67b44c7585-d9w7j   0/1     Terminating       0          10m
hello-67b44c7585-d9w7j   0/1     Terminating       0          10m
hello-67b44c7585-ht784   0/1     Terminating       0          8m24s
hello-67b44c7585-wfcg9   0/1     Terminating       0          6m22s
hello-67b44c7585-d9w7j   0/1     Terminating       0          10m
hello-67b44c7585-d9w7j   0/1     Terminating       0          10m
hello-67b44c7585-d9w7j   0/1     Terminating       0          10m
hello-67b44c7585-wfcg9   0/1     Terminating       0          6m29s
hello-67b44c7585-wfcg9   0/1     Terminating       0          6m29s
hello-67b44c7585-ht784   0/1     Terminating       0          8m31s
hello-67b44c7585-ht784   0/1     Terminating       0          8m31s
关于Kubeless如何基于CPU自动伸缩问题的解答就分享到这里了,希望以上内容可以对大家有一定的帮助,如果你还有很多疑惑没有解开,可以关注亿速云行业资讯频道了解更多相关知识。
免责声明:本站发布的内容(图片、视频和文字)以原创、转载和分享为主,文章观点不代表本网站立场,如果涉及侵权请联系站长邮箱:is@yisu.com进行举报,并提供相关证据,一经查实,将立刻删除涉嫌侵权内容。


