小编给大家分享一下Android如何自定义软键盘,相信大部分人都还不怎么了解,因此分享这篇文章给大家参考一下,希望大家阅读完这篇文章后大有收获,下面让我们一起去了解一下吧!
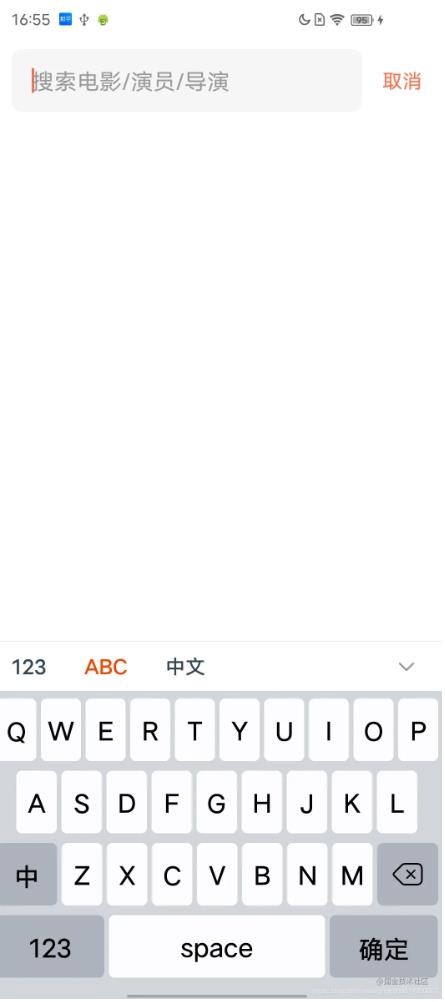
先放最终效果图 ???
需要实现一个软键盘很简单,只需要很简单的3步
1、通过xml文件,定义出来键盘结构
2、将定义好的键盘结构与KeyboardView绑定起来
3、实现onKey方法,处理输入和操作事件
在res下面定义一个xml文件夹,并创建你的软键盘布局xml文件
这边需要根据自己的每一个key对应的比例计算出来大小,%p就是占整个的百分比,要注意间隔距离。
<?xml version="1.0" encoding="utf-8"?>
<Keyboard xmlns:android="http://schemas.android.com/apk/res/android"
    android:horizontalGap="1%p"
    android:keyWidth="10%p"
    android:keyHeight="50dp"
    android:verticalGap="1%p">

    <Row>
        <Key
            android:codes="81"<!--最终展示内容的unicode-->
            android:horizontalGap="1%p"<!--横向间隔比率-->
            android:keyWidth="8.9%p"<!--键位宽度比率-->
            android:keyEdgeFlags="left"<!--键盘间隔对其方式-->
            android:keyLabel="Q" <!--键盘上展示的文案--> />
        <Key
            android:codes="87"
            android:keyWidth="8.9%p"
            android:keyLabel="W" />
        <Key
            android:codes="69"
            android:keyWidth="8.9%p"
            android:keyLabel="E" />
        <Key
            android:codes="82"
            android:keyWidth="8.9%p"
            android:keyLabel="R" />
        <Key
            android:codes="84"
            android:keyWidth="8.9%p"
            android:keyLabel="T" />
        <Key
            android:codes="89"
            android:keyWidth="8.9%p"
            android:keyLabel="Y" />
        <Key
            android:codes="85"
            android:keyWidth="8.9%p"
            android:keyLabel="U" />
        <Key
            android:codes="73"
            android:keyWidth="8.9%p"
            android:keyLabel="I" />
        <Key
            android:codes="79"
            android:keyWidth="8.9%p"
            android:keyLabel="O" />
        <Key
            android:codes="80"
            android:keyWidth="8.9%p"
            android:keyEdgeFlags="right"
            android:keyLabel="P" />
    </Row>

    <Row>
        <Key
            android:codes="65"
            android:horizontalGap="5.5%p"
            android:keyWidth="9%p"
            android:keyEdgeFlags="left"
            android:keyLabel="A" />
        <Key
            android:codes="83"
            android:keyWidth="9%p"
            android:keyLabel="S" />
        <Key
            android:codes="68"
            android:keyWidth="9%p"
            android:keyLabel="D" />
        <Key
            android:codes="70"
            android:keyWidth="9%p"
            android:keyLabel="F" />
        <Key
            android:codes="71"
            android:keyWidth="9%p"
            android:keyLabel="G" />
        <Key
            android:codes="72"
            android:keyWidth="9%p"
            android:keyLabel="H" />
        <Key
            android:codes="74"
            android:keyWidth="9%p"
            android:keyLabel="J" />
        <Key
            android:codes="75"
            android:keyWidth="9%p"
            android:keyLabel="K" />
        <Key
            android:codes="76"
            android:keyWidth="9%p"
            android:keyEdgeFlags="left"
            android:keyLabel="L" />
    </Row>

    <Row>
        <Key
            android:codes="-1005"
            android:keyWidth="13.5%p"
            android:keyEdgeFlags="left"
            android:keyLabel="中" />
        <Key
            android:codes="90"
            android:keyWidth="9%p"
            android:keyLabel="Z" />
        <Key
            android:codes="88"
            android:keyWidth="9%p"
            android:keyLabel="X" />
        <Key
            android:codes="67"
            android:keyWidth="9%p"
            android:keyLabel="C" />
        <Key
            android:codes="86"
            android:keyWidth="9%p"
            android:keyLabel="V" />
        <Key
            android:codes="66"
            android:keyWidth="9%p"
            android:keyLabel="B" />
        <Key
            android:codes="78"
            android:keyWidth="9%p"
            android:keyLabel="N" />
        <Key
            android:codes="77"
            android:keyWidth="9%p"
            android:keyLabel="M" />
        <Key
            android:codes="-5"
            android:isRepeatable="true"
            android:keyWidth="13.5%p" />
    </Row>
    <Row>
        <Key
            android:codes="-1004"
            android:keyWidth="24%p"
            android:keyEdgeFlags="left"
            android:keyLabel="123" />
        <Key
            android:codes="32"
            android:keyWidth="48%p"
            android:keyLabel="space" />
        <Key
            android:codes="-1003"
            android:keyWidth="24%p"
            android:keyEdgeFlags="right"
            android:keyLabel="确定" />
    </Row>
</Keyboard>
创建出来的keyboard文件是要与keyboard类结合起来使用的。
WordKeyboard = new Keyboard(context, R.xml.stock_word_keyboard);
实现自己的keyboardview,继承自KeyboardView。
public class MyKeyboardView extends KeyboardView {
...
init{
  WordKeyboard = new Keyboard(context, R.xml.stock_word_keyboard);
  //将你的keyboard与keyboardview绑定起来
  this.setKeyboard(WordKeyboard);
}
我们真实需要添加到布局中的view实际上就是自定义的MyKeyboardView ,它的使用和其他自定义view没有任何区别。
如果你完成了上面两步,并将view添加到布局中,你会发现已经可以展示出来了。但是点击并没有任何效果。
如果想要出效果,就需要实现onkey进行处理。
KeyboardView.this.setOnKeyboardActionListener(new OnKeyboardActionListener() {

    @Override
    public void onKey(int primaryCode, int[] keyCodes) {
        try {
            Editable editable = editText.getText();
            int start = editText.getSelectionStart();
            int end = editText.getSelectionEnd();
            String code = String.valueOf(primaryCode);
            switch (code) {
            		//切换到数字键盘
                case KeyboardKeyMap.TOOL_SWITCH_TO_NUM:
                    onKeyboardCallback.switchToNumberKeyboard();
                    break;
                    //切换到系统键盘
                case KeyboardKeyMap.TOOL_SWITCH_TO_WORD:
                    onKeyboardCallback.switchToSystemKeyboard();
                    break;
                    //隐藏键盘
                case KeyboardKeyMap.TOOL_HIDE:
                    onKeyboardCallback.onHideStockKeyboard();
                    break;
                    //删除
                case KeyboardKeyMap.TOOL_DEL:
                    if (editable != null && editable.length() > 0) {
                        if (start == end) {
                            editable.delete(start - 1, start);
                        } else {
                            editable.delete(start, end);
                        }
                    }
                    break;
                    //清空输入
                case KeyboardKeyMap.TOOL_CLEAR:
                    if (editable != null) {
                        editable.clear();
                    }
                    break;
                    //确认按钮
                case KeyboardKeyMap.TOOL_CONFIRM:
                    onKeyboardCallback.onConfirmStockKeyboard();
                    break;
                default:
                   //正常输入
                    if (editable != null) {
                        if (KeyboardKeyMap.isStockPrefix(code)) {
	                        //这里处理更加特殊的输入定义,
	                        //比如你需要输入城市简称等(车牌自定义键盘需要)
                            String resultCode = KeyboardKeyMap.findInputByKey(code);
                            editable.replace(start, end, resultCode);
                        } else {
                            //这里如果是正常的键位(排除确认、清空、切换等功能键位),
                            //则将键位上的unicode转换为正常的数字,比如定义键盘P对应的
                            //unicode是80,因为xml定义键位的时候为了方便匹配,所以值
                            //是使用的unicode,这边则会将80转换为真正要输入的P字母。
                            String resultCode = Character.toString((char) primaryCode);
                            editable.replace(start, end, resultCode);
                        }
                    }
                    break;
            }
        } catch (Exception e) {
            e.printStackTrace();
        }
    }
}
到这里,基本的自定义键盘定义操作就完成了。当然如果你是工作使用,并没有结束,因为一般情况下自定义键盘需要和系统键盘并存,因此你还需要处理键盘切换的闪动问题。对于键盘切换控制,我这里就不过多介绍了,可以自行查阅软键盘+表情切换,处理方案目前已经很成熟了。原理是一样的。
1、点击空白处,关闭软键盘,如果有内容,出发内容点击,并关系软键盘,如果是滑动,则只关闭软键盘
效果实现太简单了,这里不做过多说明,理解事件分发自然懂。
class AutoHideKeyboardCstLayout @JvmOverloads constructor(
    context: Context, attrs: AttributeSet? = null
) : ConstraintLayout(context, attrs) {

    var keyboardHideListener: (() -> Unit)? = null

    override fun onInterceptTouchEvent(ev: MotionEvent?): Boolean {
        if (ev?.action == MotionEvent.ACTION_DOWN) {
            keyboardHideListener?.invoke()
        }
        return super.onInterceptTouchEvent(ev)
    }
}
关闭操作只需要在回调方法执行即可。
contentHideKeyboardCstLayout.keyboardHideListener = {
    hidePanelAndKeyboard()
}
2、切换软键盘panel,很简单的实现
<RelativeLayout xmlns:android="http://schemas.android.com/apk/res/android"
    xmlns:app="http://schemas.android.com/apk/res-auto"
    android:layout_width="match_parent"
    android:layout_height="40dp"
    android:background="@android:color/white"
    android:elevation="0.5dp">

    <androidx.appcompat.widget.AppCompatTextView
        android:id="@+id/tvStockNumKeyboard"
        android:layout_width="wrap_content"
        android:layout_height="wrap_content"
        android:layout_centerVertical="true"
        android:layout_marginStart="10dp"
        android:button="@null"
        android:padding="6dp"
        android:text="123"
        android:textColor="@drawable/stock_switch_label_color"
        android:textSize="16dp"
        android:textStyle="bold" />

    <androidx.appcompat.widget.AppCompatTextView
        android:id="@+id/tvStockWordKeyboard"
        android:layout_width="wrap_content"
        android:layout_height="wrap_content"
        android:layout_centerVertical="true"
        android:layout_marginStart="18dp"
        android:layout_toEndOf="@+id/tvStockNumKeyboard"
        android:button="@null"
        android:padding="6dp"
        android:text="ABC"
        android:textColor="@drawable/stock_switch_label_color"
        android:textSize="16dp"
        android:textStyle="bold" />

    <androidx.appcompat.widget.AppCompatTextView
        android:id="@+id/tvSystemKeyboard"
        android:layout_width="wrap_content"
        android:layout_height="wrap_content"
        android:layout_centerVertical="true"
        android:layout_marginStart="18dp"
        android:layout_toEndOf="@+id/tvStockWordKeyboard"
        android:button="@null"
        android:padding="6dp"
        android:text="中文"
        android:textColor="@drawable/stock_switch_label_color"
        android:textSize="16dp"
        android:textStyle="bold" />

    <FrameLayout
        android:id="@+id/keyboardDone"
        android:layout_width="60sp"
        android:layout_height="match_parent"
        android:layout_alignParentEnd="true"
        android:layout_centerVertical="true">

        <ImageView
            android:layout_width="16dp"
            android:layout_height="16dp"
            android:layout_gravity="center"
            android:contentDescription="@null"
            android:scaleType="centerInside"
            android:src="@drawable/keyboard_done_"
            android:textColor="@color/white"
            android:textSize="16sp" />
    </FrameLayout>

    <View
        android:layout_width="match_parent"
        android:layout_height="0.5dp"
        android:background="#EEEEEE" />
</RelativeLayout>
颜色切换selector
<?xml version="1.0" encoding="utf-8"?>
<selector xmlns:android="http://schemas.android.com/apk/res/android">
    <item android:color="#F14400" android:state_selected="true" />
    <item android:color="#334455" android:state_selected="false" />
</selector>
class KeyboardSwitcher @JvmOverloads constructor(
    context: Context, attrs: AttributeSet? = null
) : RelativeLayout(context, attrs) {

    private var mViewBinding: RtcKeyboardSwitcherBinding? = null
    private var mStockKeyboardView: StockKeyboardView? = null

    init {
        mViewBinding = RtcKeyboardSwitcherBinding.inflate(LayoutInflater.from(context), this, true)
    }

    fun pressNumberKeyboard() {
        mViewBinding?.tvStockNumKeyboard?.performClick()
    }

    fun pressWordKeyboard() {
        mViewBinding?.tvStockWordKeyboard?.performClick()
    }

    fun pressSystemKeyboard() {
        mViewBinding?.tvSystemKeyboard?.performClick()
    }

    fun switchKeyboard(
        _switchKeyboard: (isSystemKeyboard: Boolean) -> Unit,
        _keyboardDone: () -> Unit
    ) {
        mViewBinding?.apply {
            tvStockNumKeyboard.setOnClickListener {
                resetSelectedState()
                _switchKeyboard.invoke(false)
                mStockKeyboardView?.showNumberKeyboard()
                it.isSelected = true
            }
            tvStockWordKeyboard.setOnClickListener {
                resetSelectedState()
                _switchKeyboard.invoke(false)
                mStockKeyboardView?.showWordKeyboard()
                it.isSelected = true
            }
            tvSystemKeyboard.setOnClickListener {
                resetSelectedState()
                _switchKeyboard.invoke(true)
                it.isSelected = true
            }
            keyboardDone.setOnClickListener {
                _keyboardDone.invoke()
            }
        }
    }

    fun setDefaultKeyboard(index: Int) {
        resetSelectedState()
        mViewBinding?.apply {
            when (index) {
                0 -> {
                    tvStockNumKeyboard.isSelected = true
                }
                1 -> {
                    tvStockWordKeyboard.isSelected = true
                }
                2 -> {
                    tvSystemKeyboard.isSelected = true
                }
            }
        }
    }

    private fun resetSelectedState() {
        mViewBinding?.apply {
            tvStockNumKeyboard.isSelected = false
            tvStockWordKeyboard.isSelected = false
            tvSystemKeyboard.isSelected = false
        }
    }

    override fun onTouchEvent(event: MotionEvent?): Boolean {
        if (event?.action == MotionEvent.ACTION_DOWN) {
            performClick()
        }
        return true
    }

    override fun performClick(): Boolean {
        return super.performClick()
    }

    fun attach(stockKeyboardView: StockKeyboardView) {
        this.mStockKeyboardView = stockKeyboardView
    }

    fun showNumberKeyboard() {
        this.mStockKeyboardView?.showNumberKeyboard()
    }
}
以上是“Android如何自定义软键盘”这篇文章的所有内容,感谢各位的阅读!相信大家都有了一定的了解,希望分享的内容对大家有所帮助,如果还想学习更多知识,欢迎关注亿速云行业资讯频道!
免责声明:本站发布的内容(图片、视频和文字)以原创、转载和分享为主,文章观点不代表本网站立场,如果涉及侵权请联系站长邮箱:is@yisu.com进行举报,并提供相关证据,一经查实,将立刻删除涉嫌侵权内容。


