这篇文章给大家介绍微信小程序后端Java接口开发的步骤是怎么样的,内容非常详细,感兴趣的小伙伴们可以参考借鉴,希望对大家能有所帮助。
微信小程序使用wx.request(OBJECT)来调用后端接口。
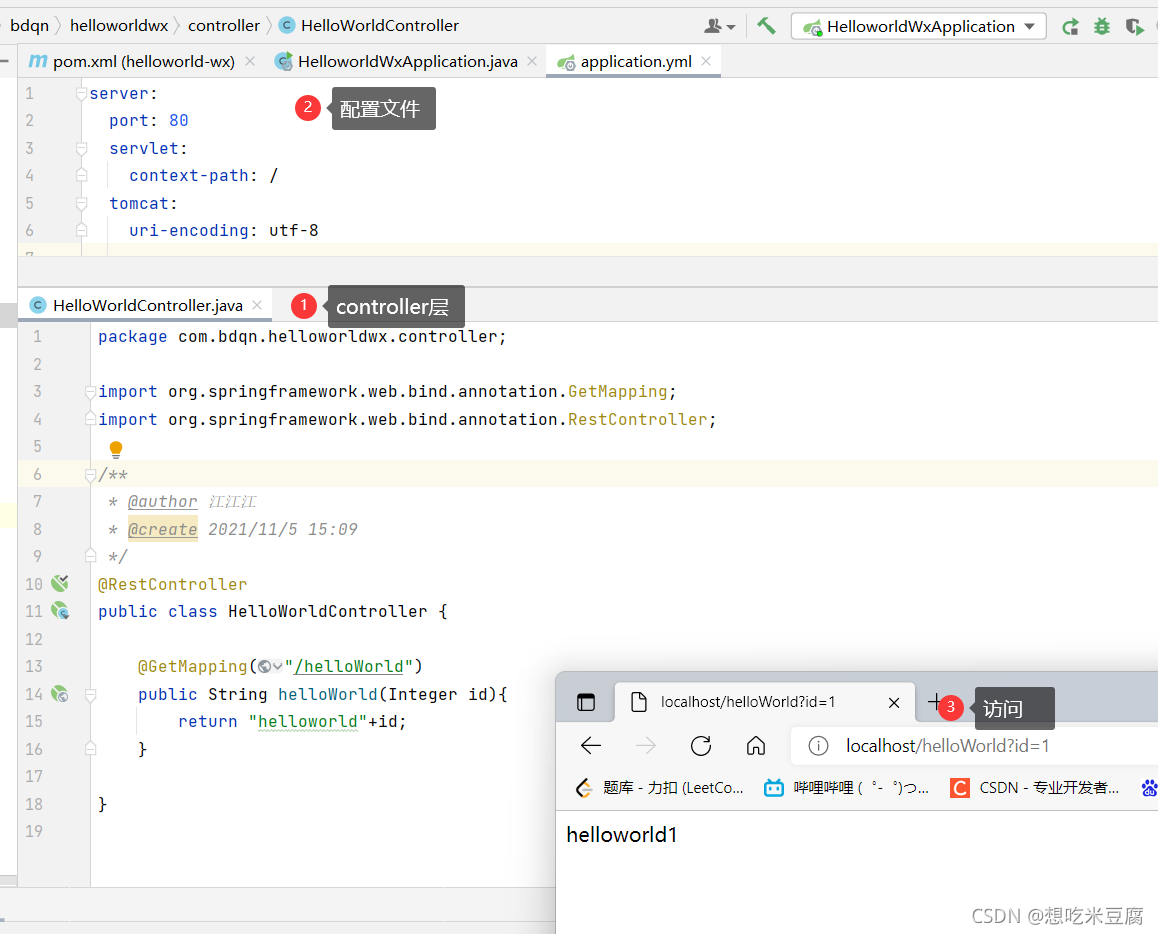
首先 我们来一个简单案例 —— helloworld实现

<dependency>
            <groupId>org.springframework.boot</groupId>
            <artifactId>spring-boot-starter-web</artifactId>
        </dependency>
@RestController
public class HelloWorldController {
    @GetMapping("/helloWorld")
    public String helloWorld(Integer id){
        return "helloworld"+id;
    }
}
server: port: 80 servlet: context-path: / tomcat: uri-encoding: utf-8
运行成功
helloworld.js
/**
* 页面的初始数据
*/
data: {
result:'请求后台中.....'
},
/**
* 生命周期函数--监听页面加载
*/
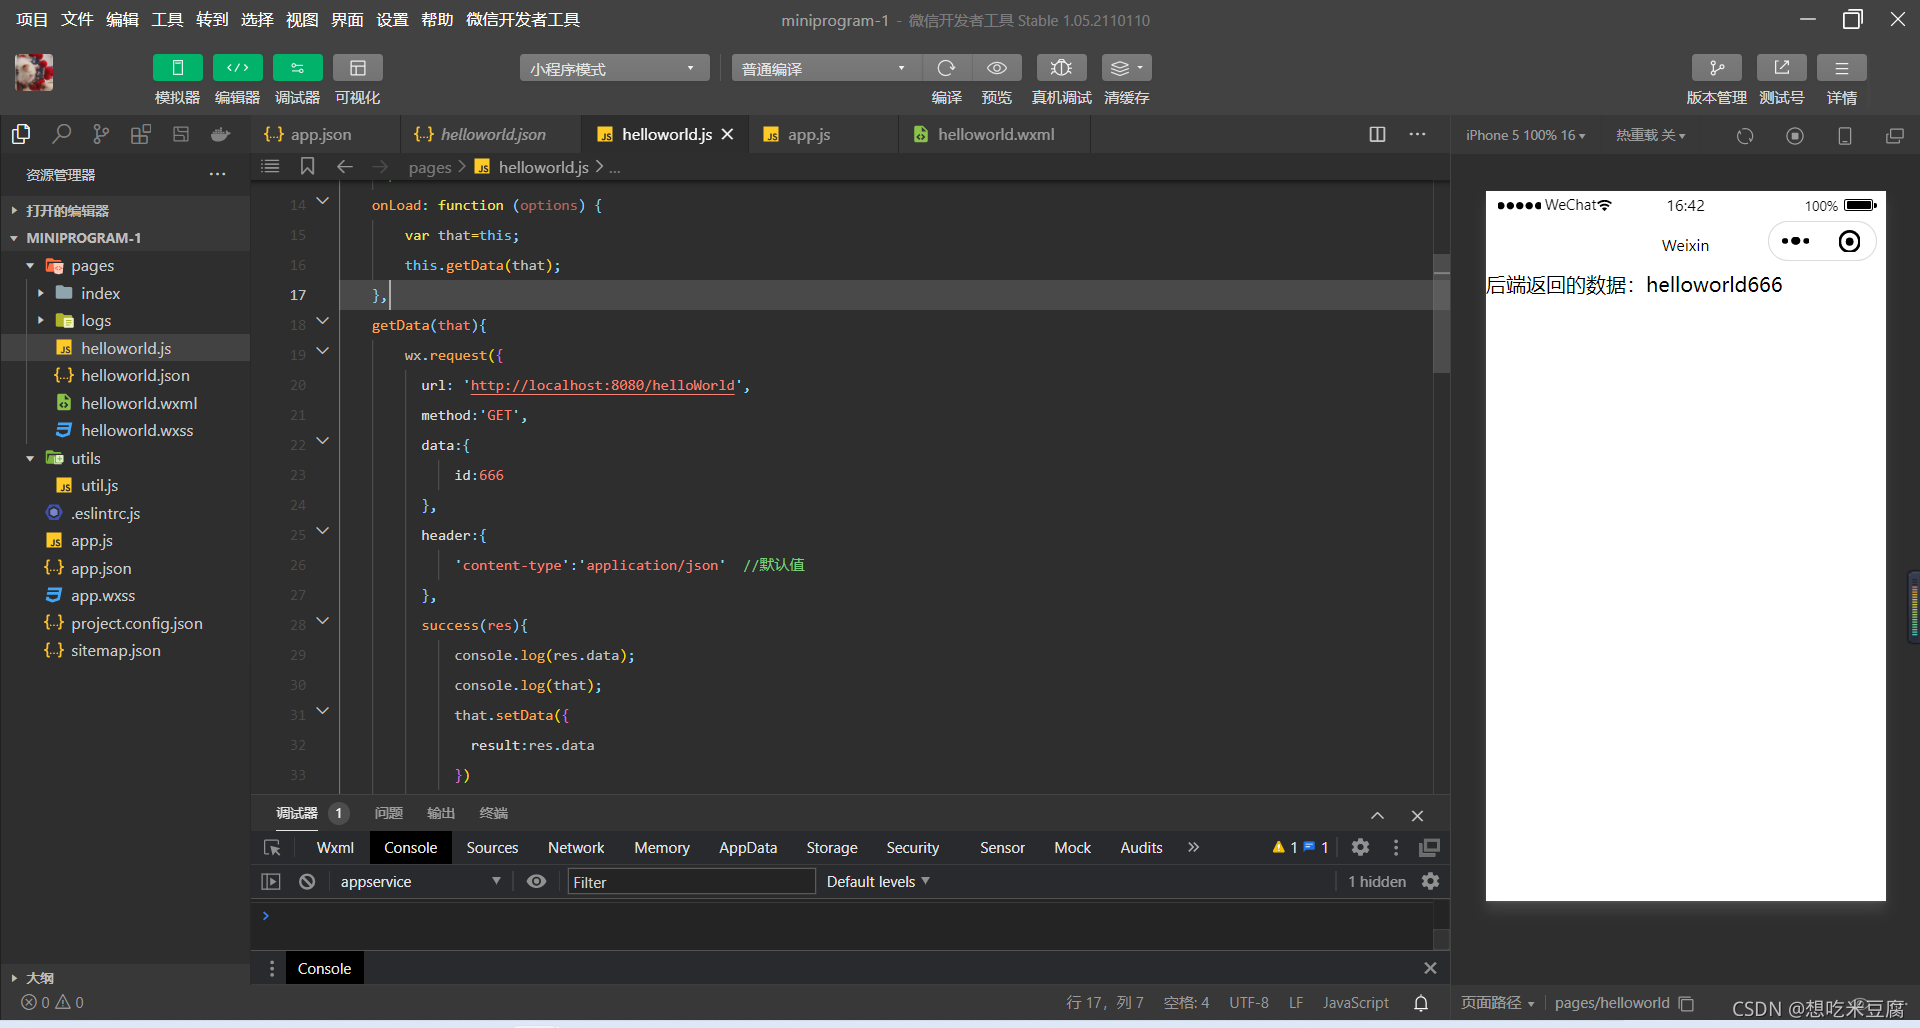
onLoad: function (options) {
var that=this;
this.getData(that);
},
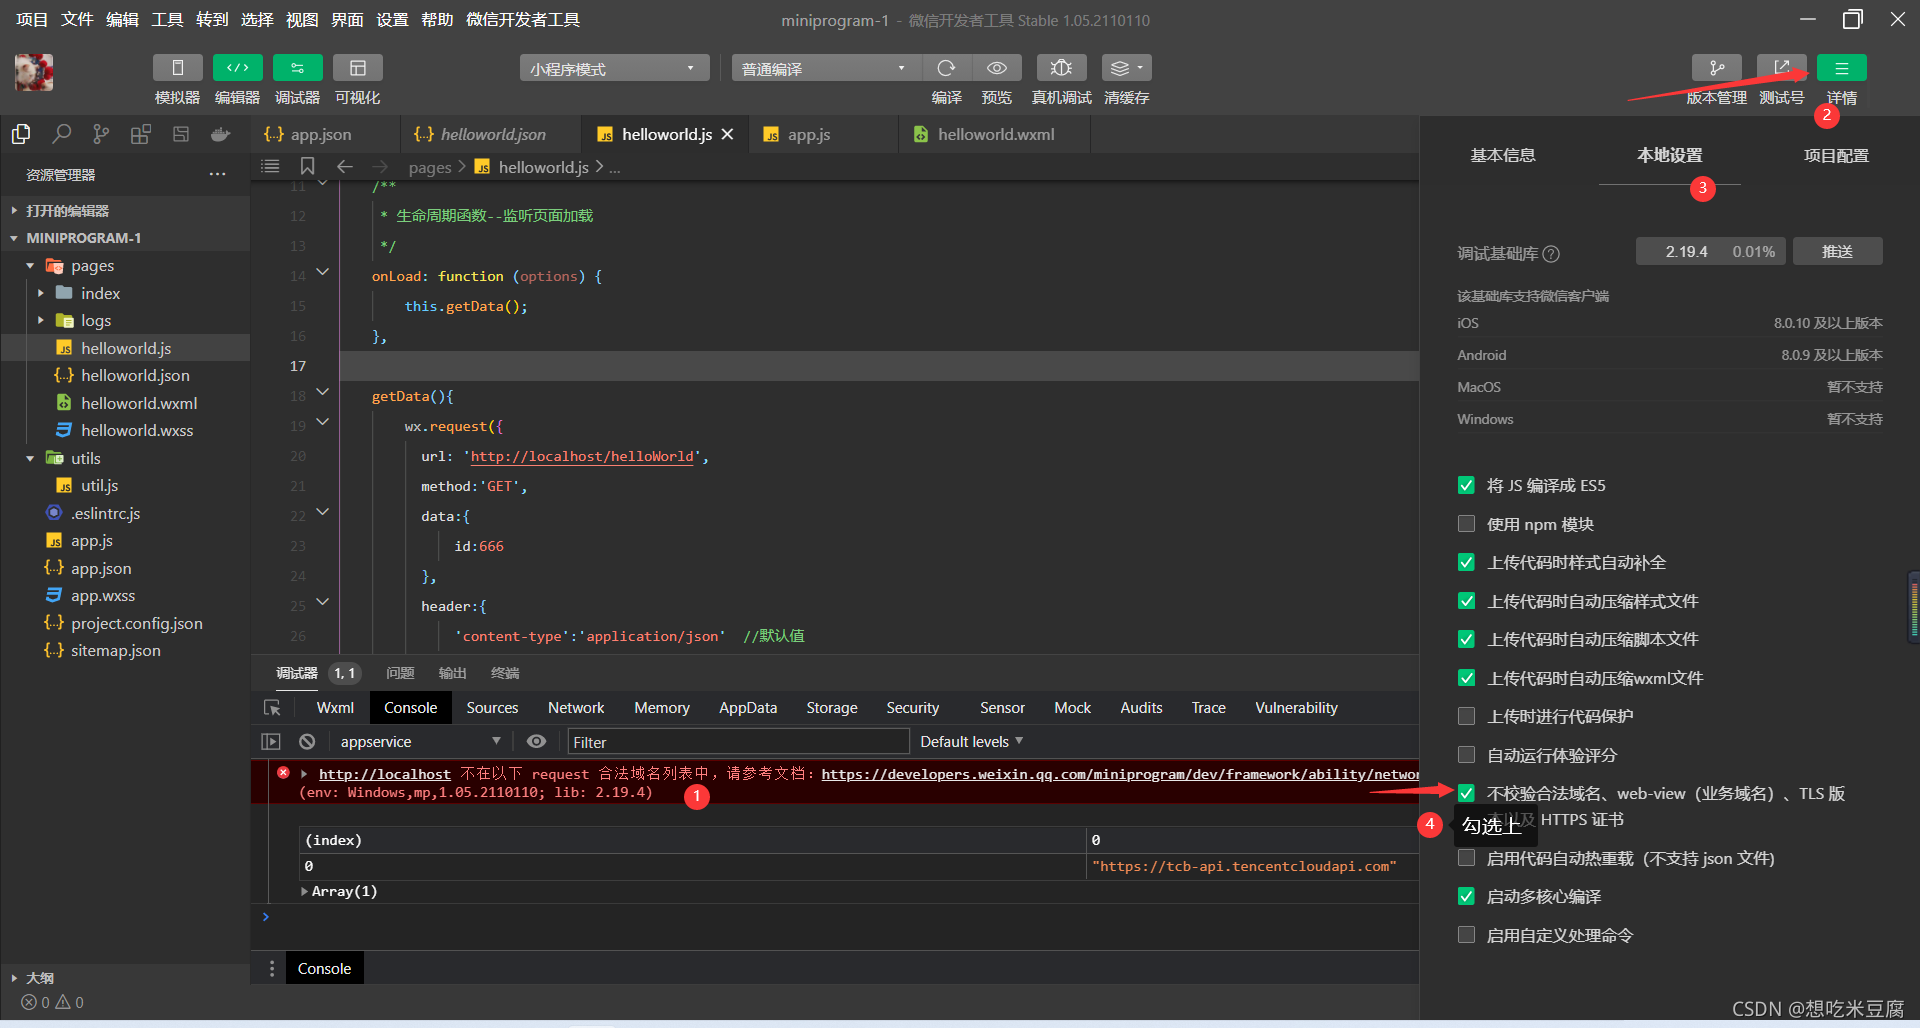
getData(that){
wx.request({
url: 'http://localhost:8080/helloWorld',
method:'GET',
data:{
id:666
},
header:{
'content-type':'application/json' //默认值
},
success(res){
console.log(res.data);
console.log(that);
that.setData({
result:res.data
})
}
})
},helloworld.wxml
<text>后端返回的数据:{{result}}</text>注意:!!!!
这里记得设置 如下图
否则会报错:
VM9 asdebug.js:1 http://localhost 不在以下 request
合法域名列表中,请参考文档:https://developers.weixin.qq.com/miniprogram/dev/framework/ability/network.html(env:
Windows,mp,1.05.2110110; lib: 2.19.4)
访问后端成功 如下图
关于微信小程序后端Java接口开发的步骤是怎么样的就分享到这里了,希望以上内容可以对大家有一定的帮助,可以学到更多知识。如果觉得文章不错,可以把它分享出去让更多的人看到。
免责声明:本站发布的内容(图片、视频和文字)以原创、转载和分享为主,文章观点不代表本网站立场,如果涉及侵权请联系站长邮箱:is@yisu.com进行举报,并提供相关证据,一经查实,将立刻删除涉嫌侵权内容。


