本篇文章给大家分享的是有关如何进行Java ShardingJDBC实战,小编觉得挺实用的,因此分享给大家学习,希望大家阅读完这篇文章后可以有所收获,话不多说,跟着小编一起来看看吧。
最近在公司手头上的项目单表达到了五千万的规模,而且日增长量每天就有10w左右,一个月就有大概300w的数据,这样一直下去过几个月以后表的数据很容易就上亿了,这样不利于管理以及在大表的情况下,对于表的DDL效率也会相对下降,和几个同事商量了下,于是乎开始做分表的技术优化。
(1)首先先确定使用场景,当前表的使用场景更多的是根据一个具体的标识值去查询,范围查询的场景频率相对低下,在这这种情况下考虑想标识值作为分片键去进行分表。 具体的算法为:通过标识值通过算法算出具体的时间季度,按季节进行拆分进行拆分,也就是一年
record_delivery_log
4个表record_order_log_202101,record_order_log_202102,record_order_log_202103,record_order_log_202104
拆分前单表数据量为 5000w
拆分后单表的数据量变成1200w,能够容忍将来4~ 5倍的增长量,符合预期范围。
(2)调研了对应的分库分表中间件,目前Sharing-jdbc是最主流的中间件,而且社区和文档较完善,故采用Sharing-jdbc作为分表的中间件。
在这里因为公司项目不好复用的原因,用一个模拟项目来模拟这次改造。
(1)参照sharing-jdbc文档对项目进行改造
引入sharing-jdbc对应的pom。
 <dependency>
            <groupId>org.apache.shardingsphere</groupId>
            <artifactId>shardingsphere-jdbc-core-spring-boot-starter</artifactId>
            <version>5.0.0-beta</version>
        </dependency>
对应的配置文件
#端口
server.port=8080

# 数据源ds0
spring.shardingsphere.datasource.name=ds0
# 数据源ds0的配置
spring.shardingsphere.datasource.ds0.type=com.alibaba.druid.pool.DruidDataSource
spring.shardingsphere.datasource.ds0.driverClassName=com.mysql.cj.jdbc.Driver
spring.shardingsphere.datasource.ds0.url=jdbc:mysql://localhost:3306/world1?characterEncoding=utf8&useSSL=false&serverTimezone=GMT%2b8
spring.shardingsphere.datasource.ds0.username=root
spring.shardingsphere.datasource.ds0.password=123456

# 分片规则,这里只分表,所以仅指定表的分片规则
spring.shardingsphere.rules.sharding.tables.record_order_log.actual-data-nodes=ds0.record_order_log_$->{2021..2031}0$->{1..4}

# 指定数据库的分片键,只有一个库所以还是用分表的分片键
spring.shardingsphere.rules.sharding.tables.record_order_log.database-strategy.standard.sharding-column=order_delivery_id
spring.shardingsphere.rules.sharding.tables.record_order_log.database-strategy.standard.sharding-algorithm-name=database-inline

# 指定分表的分片键
spring.shardingsphere.rules.sharding.tables.record_order_log.table-strategy.standard.sharding-column=order_delivery_id
spring.shardingsphere.rules.sharding.tables.record_order_log.table-strategy.standard.sharding-algorithm-name=table-inline

# Omit t_order_item table rule configuration ...
# ...

# 分片规则(默认取模)
spring.shardingsphere.rules.sharding.sharding-algorithms.database-inline.type=INLINE
spring.shardingsphere.rules.sharding.sharding-algorithms.database-inline.props.algorithm-expression=ds0
spring.shardingsphere.rules.sharding.sharding-algorithms.table-inline.type=CLASS_BASED
spring.shardingsphere.rules.sharding.sharding-algorithms.table-inline.props.strategy=STANDARD
spring.shardingsphere.rules.sharding.sharding-algorithms.table-inline.props.algorithmClassName=com.cus.shd.sharingjdbc.config.OrderDeliveryIdShardingAlgorithm
spring.shardingsphere.props.sql.show=true

#mybatis-plus??
mybatis-plus.mapper-locations=classpath:mappers/*.xml
mybatis-plus.type-aliases-package=com.cus.shd.sharingjdbc.model
mybatis-plus.configuration.map-underscore-to-camel-case=true
# sql??
mybatis-plus.configuration.log-impl=org.apache.ibatis.logging.stdout.StdOutImpl
#本地数据库链接,忽略了springboot自动加载后失效
spring.datasource.type=com.alibaba.druid.pool.DruidDataSource
spring.datasource.driverClassName=com.mysql.cj.jdbc.Driver
spring.datasource.url=jdbc:mysql://localhost:3306/world1?characterEncoding=utf8&useSSL=false&serverTimezone=GMT%2b8
spring.datasource.username=root
spring.datasource.password=123456
注意好分表键设置时候的表名。
(2)自定义分片键策略,根据order_delivery_id按季度进行存储
package com.cus.shd.sharingjdbc.config;

import org.apache.commons.lang.StringUtils;
import org.apache.shardingsphere.sharding.api.sharding.ShardingAutoTableAlgorithm;
import org.apache.shardingsphere.sharding.api.sharding.standard.PreciseShardingValue;
import org.apache.shardingsphere.sharding.api.sharding.standard.RangeShardingValue;
import org.apache.shardingsphere.sharding.api.sharding.standard.StandardShardingAlgorithm;

import java.time.LocalDateTime;
import java.time.ZoneOffset;
import java.util.Collection;

/**
 * @author ASUS
 * @Description 自定义分片策略
 * @Date 2021/11/6 22:20
 **/

public class OrderDeliveryIdShardingAlgorithm implements StandardShardingAlgorithm<Long> {

    @Override
    public String doSharding(Collection<String> availableTargetNames, PreciseShardingValue<Long> shardingValue) {
        String orderDeliveryId = shardingValue.getValue().toString();
        orderDeliveryId = orderDeliveryId.substring(0,orderDeliveryId.length() - 4);
        // 将时间戳转为当前时间
        LocalDateTime localDateTime = LocalDateTime.ofEpochSecond(Long.valueOf(orderDeliveryId)/1000, 0, ZoneOffset.ofHours(8));
        String availableTargetName;
        int month = localDateTime.getMonthValue();
        LocalDateTime nowTime = LocalDateTime.now();
        int year = nowTime.getYear();
        if(month >= 1 && month < 3){
            availableTargetName = "01";
        }else if(month >= 3 && month < 6){
            availableTargetName = "02";
        }else if(month >= 6 && month < 9){
            availableTargetName = "03";
        }else {
            availableTargetName = "04";
        }
        if(StringUtils.isEmpty(availableTargetName)){
            return null;
        }
        return String.format("%s_%s%s",shardingValue.getLogicTableName(),year,availableTargetName);
    }

    @Override
    public Collection<String> doSharding(Collection<String> availableTargetNames, RangeShardingValue<Long> shardingValue) {
        return availableTargetNames;
    }

    @Override
    public void init() {

    }

    @Override
    public String getType() {
        return "ORDER_DELIVERY_ID";
    }
}
(3)模拟提供两个接口,一个按id查询,一个插入接口。(修改的场景暂时没有,所以不考虑)
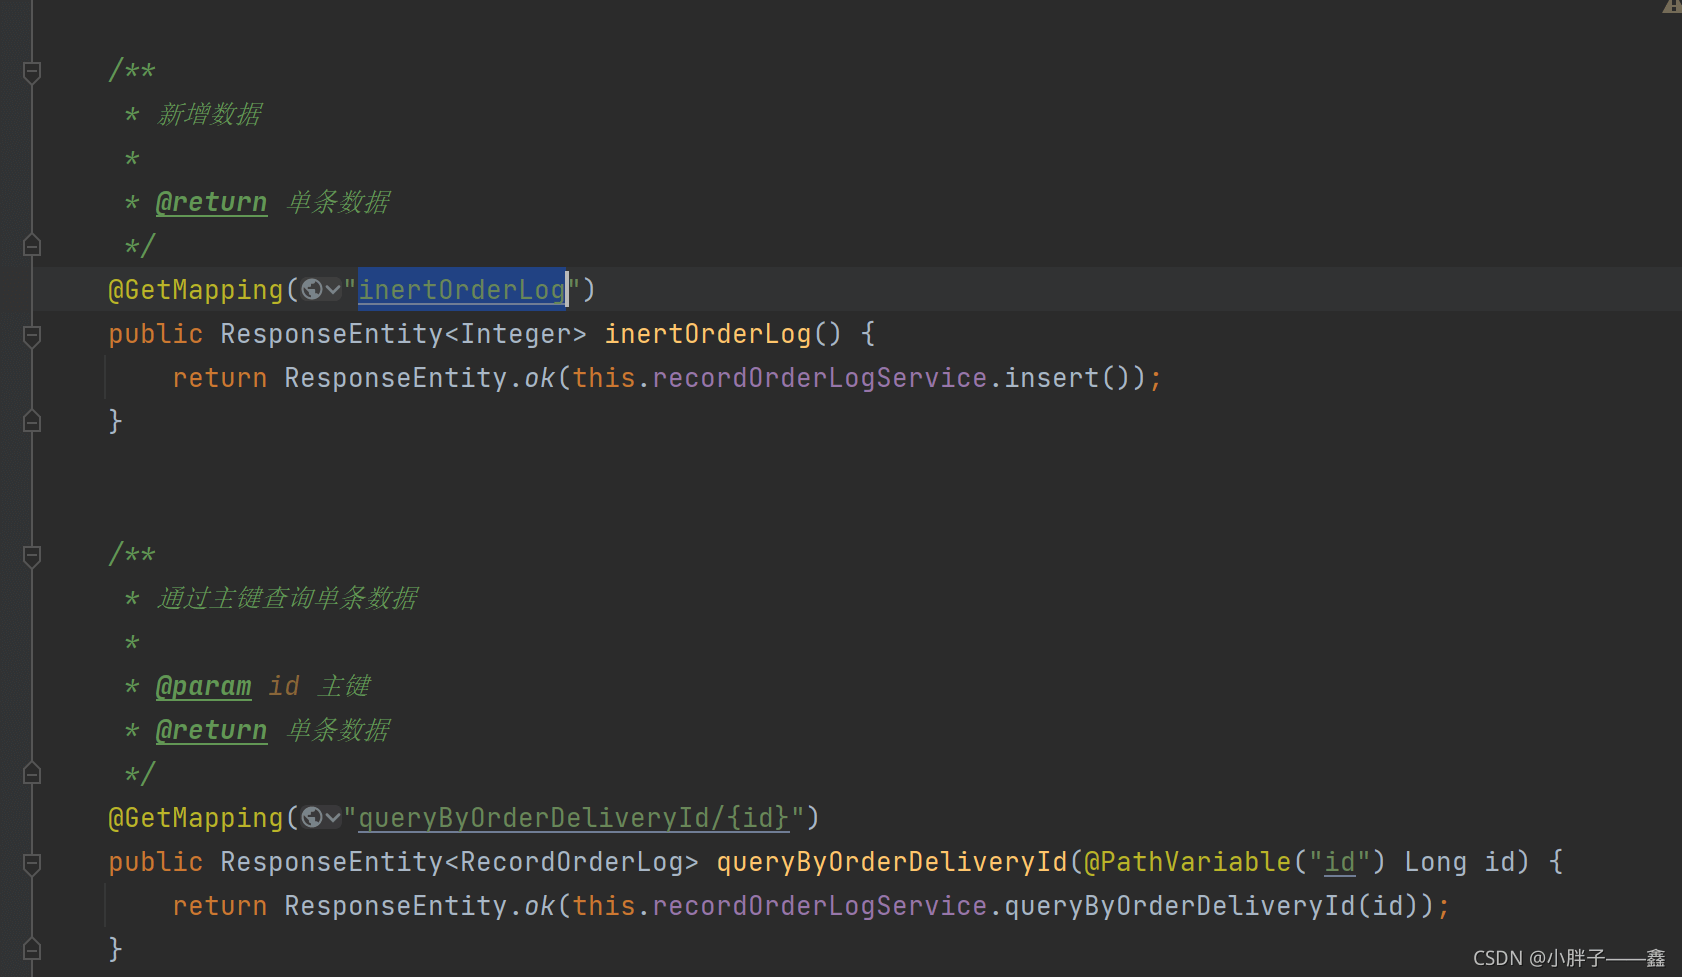
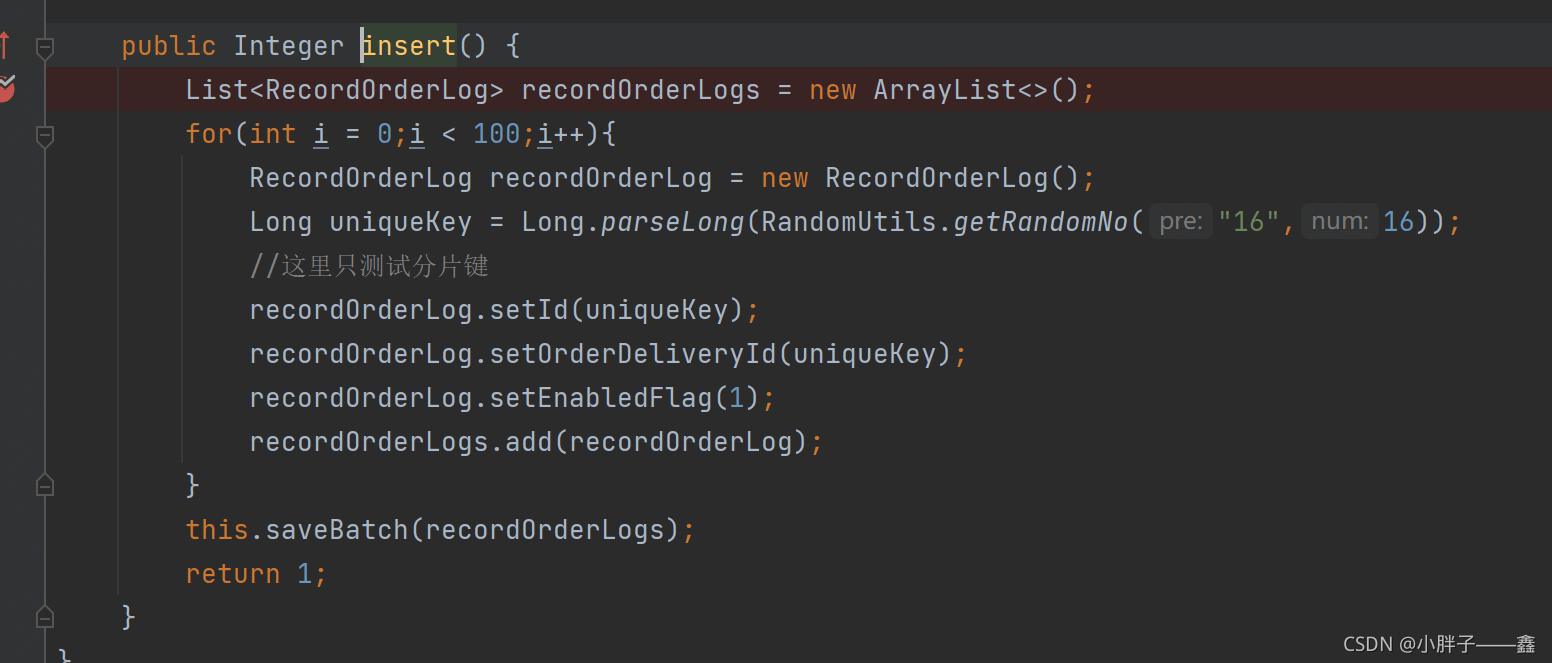
新增的时候做了模拟插入,能够根据分片算法将数据存储到对应的表,达到效果。
查询同理。
(4)sharing-jdbc 不会自动的进行创建表,所以需在后台维护一个定时任务,到了一定的季度点就要进行建表操作。(需确保生产环境的应用程序对应的数据库账号是否有建表权限)
<update id="createNewTable" parameterType="String">
        CREATE TABLE ${tableName} SELECT * FROM record_order_log WHERE 1=2
</update>1、引入sharing-jdbc包的时候报错了。这里debug到源码发现是mybatisPlus的自动启动器(MybatisPlusAutoConfiguration)有指定单一数据源类(spring中数据源不能有多个实现类)的时候才会启动,因为sharing的引入造成了多数据源(多datasource),所以这个就不会启动了,导致了实例化mapper的时候报错了。解决方案是在SpringBoot的启动类的注解加上
@SpringBootApplication(exclude = {DataSourceAutoConfiguration.class,DruidDataSourceAutoConfigure.class})忽略掉SpringBoot数据源自动装配以及Druid数据源的自动装配,把所有的数据源实例化交给sharing-jdbc


2、部分项目存在历史遗留的问题,如果是mybatis或者hibernate的情况下,不想彻底引入sharding-jdbc数据源的话,个人觉得可以使用多数据源的形式来进行改造,去扩展需要使用分表的一些数据库操作,切换对应的sharding数据源进行数据库操作。具体可以参考switchDataSource目录下的一些切换数据源的代码。
3、给自己的疑问
忽略了DataSourceAutoConfiguration.class后,sharing-jdbc是如何整合mybatis-plus的?
答:其实也不难,相当于数据源这个对象原本由SpringBoot自带的数据源自动注入进行注入,现在换成了Sharding的自动装配(ShardingSphereAutoConfiguration)来进行注入,相当于换了整个数据源的一套东西,用的也是sharding整套的东西。
所以在改造的时候需要检查一下是否对旧的项目存在影响。
以上就是如何进行Java ShardingJDBC实战,小编相信有部分知识点可能是我们日常工作会见到或用到的。希望你能通过这篇文章学到更多知识。更多详情敬请关注亿速云行业资讯频道。
免责声明:本站发布的内容(图片、视频和文字)以原创、转载和分享为主,文章观点不代表本网站立场,如果涉及侵权请联系站长邮箱:is@yisu.com进行举报,并提供相关证据,一经查实,将立刻删除涉嫌侵权内容。


