选择:vscode + typings + eslint
vscode: 宇宙最强IDE家族的最新产品
typings: 基于typescirpt的接口文件
eslint: 代码静态检查,技能检测低级的语法错误,又能规范代码格式和应用最佳实践
工具和插件
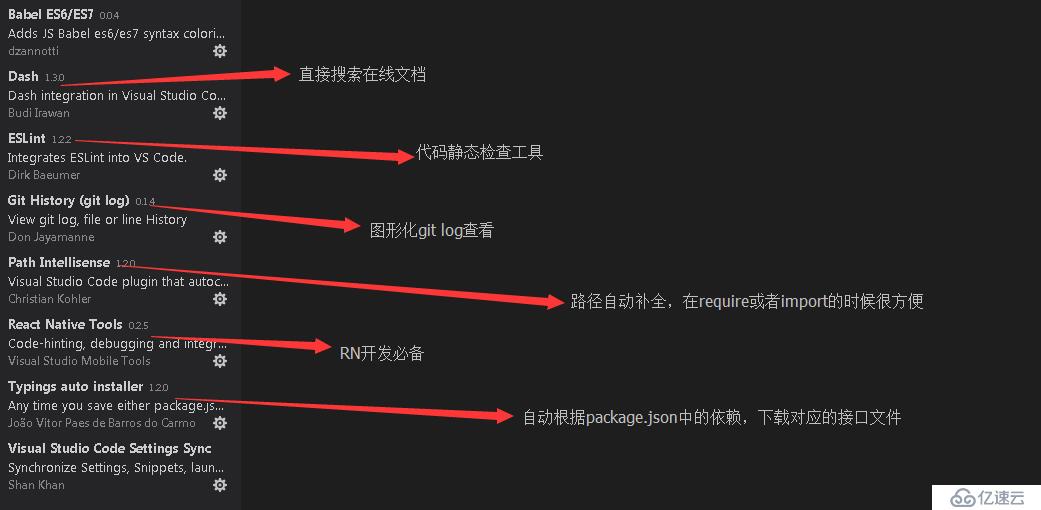
点击各个插件,会有对应的详细的说明
vscode和插件的更新频率还是比较快的,推荐及时更新
vscode的插件安装很简单,左侧最下面那个按钮就是扩展面板,直接搜索插件名字,点击安装即可
代码智能提示
对于第三方包,比如react-native:
全局安装typings:
npm install typings -g
安装react和react-native的接口说明文件:
typings install dt~react --save
typings install dt~react-native --save
等待安装完成后(会取决于包的数目和网络状况),在项目的根目录下会有一个typings目录和typings.json配置文件: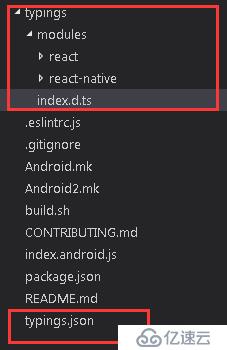
完成后重启一下code , 或者使用reload命令,现在react-native和react相关的代码就有提示说明了,效果如下:
方法智能提示: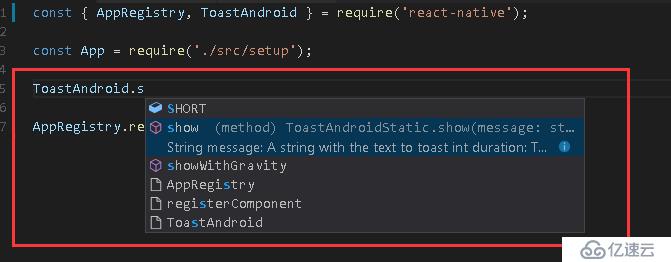
显示方法的参数: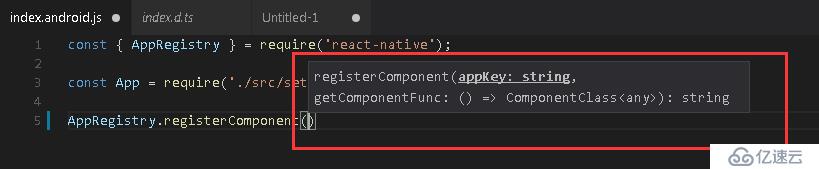
hover时显示说明:

如果是业务代码开发者:
对于规范的模块化js代码,vscode可以自动建立联系并提示的,我们只需要写好注释即可。
如果是工具包或者SDK开发者:
我们的代码是要发布给其他同学用的,则需要我们在发布时提供相应的.d.ts接口文件。
默认是包根目录下index.d.ts文件,否则需要在package.json配置中指明typings项(类似main)。
如何编写接口文件:文档
代码静态检查
代码静态借助于 eslint,它由CLI和配置文件(规则)组成。
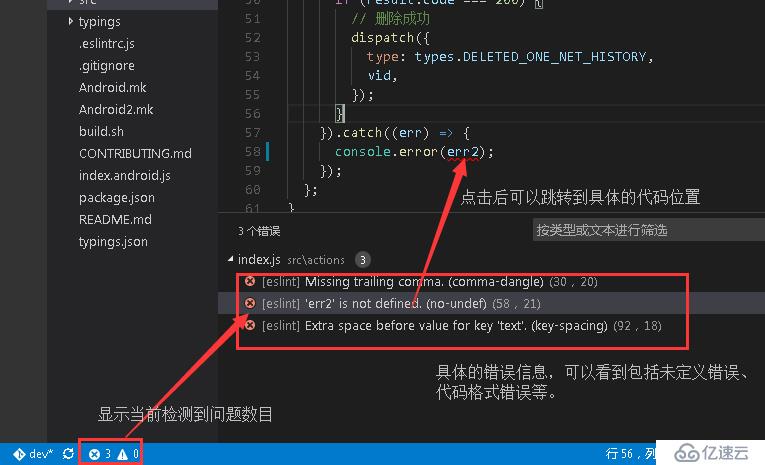
vscode中安装了对应插件后,就可以实时在编辑器上看到检测结果,不用自己运行CLI。
注:本文会涉及eslint-cli的参数,一般开发用不到,在写自动化脚本命令时查下文档。
先安装eslint cli和相关插件,项目package.json中开发依赖增加(这是比较流行的RN配置):
"devDependencies": {
"eslint": "^3.3.1",
"babel-eslint": "^6.1.2",
"eslint-config-airbnb": "^10.0.1",
"eslint-plugin-import": "^1.14.0",
"eslint-plugin-jsx-a11y": "^2.1.0",
"eslint-plugin-react": "^6.1.2"
}
然后运行npm install安装。
配置文件.eslintrc.js(这里我们采用了js格式,因为可以加注释。可选json格式)
这里可以用eslint init启动向导生成一个。
我们可直接使用现成的(好处是和团队其他项目保持一致),在项目根目录新建一个.eslintr.js文件,内容如下
module.exports = {
parser: 'babel-eslint',
parserOptions: {
sourceType: 'module'
},
extends: "airbnb",
plugins: [
"react",
"jsx-a11y",
"import"
],
rules: {
// 0 = off, 1 = warn, 2 = error
// FB配置参考:
// https://github.com/facebook/react-native/blob/8baaad9b0fbda2b02bb1834452aa63cac7910dc5/.eslintrc
"global-require": 0,
"no-use-before-define": 0,       // disallow use of variables before they are defined
"max-len": 0,                    // specify the maximum length of a line in your program (off by default)
"no-console": 0,                 // disallow use of console (off by default in the node environment)
"no-undef": 2,                   // disallow use of undeclared variables unless mentioned in a /*global */ block

"no-unused-vars": 0,
"block-scoped-var": 0,           // treat var statements as if they were block scoped (off by default)
"complexity": 0,                 // specify the maximum cyclomatic complexity allowed in a program (off by default)
"consistent-return": 0,          // require return statements to either always or never specify values

// allow async-await
'generator-star-spacing': 0,

"no-return-assign": 1,           // disallow use of assignment in return statement

"react/jsx-filename-extension": 0,
"react/self-closing-comp": 1,
"react/jsx-closing-bracket-location": 0,
"react/prop-types": 0, // 避免redux等注入属性的情况
},
// 这里设置可能用到的全局变量
"globals": {
"window": true,
"fetch": true,
"DEV": true,
"APP": true,
"ANDROID": true,
"IOS": true
}
};
这里主要配置了插件和检测规则,一些说明:
规则列表
规则后面的 0 代表关闭, 1 代表显示警告, 2 代表显示错误。有些规则可以配置参数,具体看上面的规则列表文档
有一些简单错误,vscode是可以自动修复的(如果出现小灯泡的icon,就是可以自动修复)
这里的规则基本都是实践总结的js代码编写的最佳实践,遇到检测错误时,直接搜索规则,并阅读说明。
不要随便就关闭。
安装vscode的eslint插件后:
What’s more:
可以使用pre-commit工具,在每次提交之前运行eslint监测代码,如果失败,则禁止提交。
Debug
vscode安装了react-native-tools插件后,可以代替chromDevTools调试代码。
更接近原生的调试方式。
我们常使用的方式是:
在终端开启package server
vscode选择,dbug, attach to packager
在终端上,调出调试菜单,选择 Debug JS Remotly
免责声明:本站发布的内容(图片、视频和文字)以原创、转载和分享为主,文章观点不代表本网站立场,如果涉及侵权请联系站长邮箱:is@yisu.com进行举报,并提供相关证据,一经查实,将立刻删除涉嫌侵权内容。


