这篇文章主要为大家展示了“Flutter组件状态管理的方法有哪些”,内容简而易懂,条理清晰,希望能够帮助大家解决疑惑,下面让小编带领大家一起研究并学习一下“Flutter组件状态管理的方法有哪些”这篇文章吧。
前面讲了Flutter布局,布局只是静态的。在Flutter中,组件分为StatelesslWidget和StatefulWidget。
StatelesslWidget
没有状态,是一成不变的。比如图标,文字,按钮等
StatefulWidget
有状态的组件,页面数据是动态的,或者会随着用户操作变化,比如多选框,文本输入框等。
重点来了,如何使用实现一个有状态的组件呢?
有状态的组件一般由两个类构成,一个StatefulWidget子类和一个State子类.
State类包含了组件的build()方法,并且负责维护组件状态
当这个组件的状态变化了,可以调用setState()方法来刷新页面
由谁来负责状态管理呢?是组件本身,还是他的父类,两者都有又或是其他对象?答案是都可以。也就是说有三种方法实现状态管理:
1.组件自己管理自己的状态
2.组件的父组件管理状态
3.混搭管理
那么如何决定该用那种方式来进行状态管理呢?一般来讲有以下原则:
1.如果是用户数据,比如多选框是否被选中,一般是由选择第2种方法
2.如果动效,比如放大缩小,那一般用第1种方法
PS:如果你实在迷芒,就直接选择用第2种方法,用父类管理状态。
举例
组件自己管理自己的状态
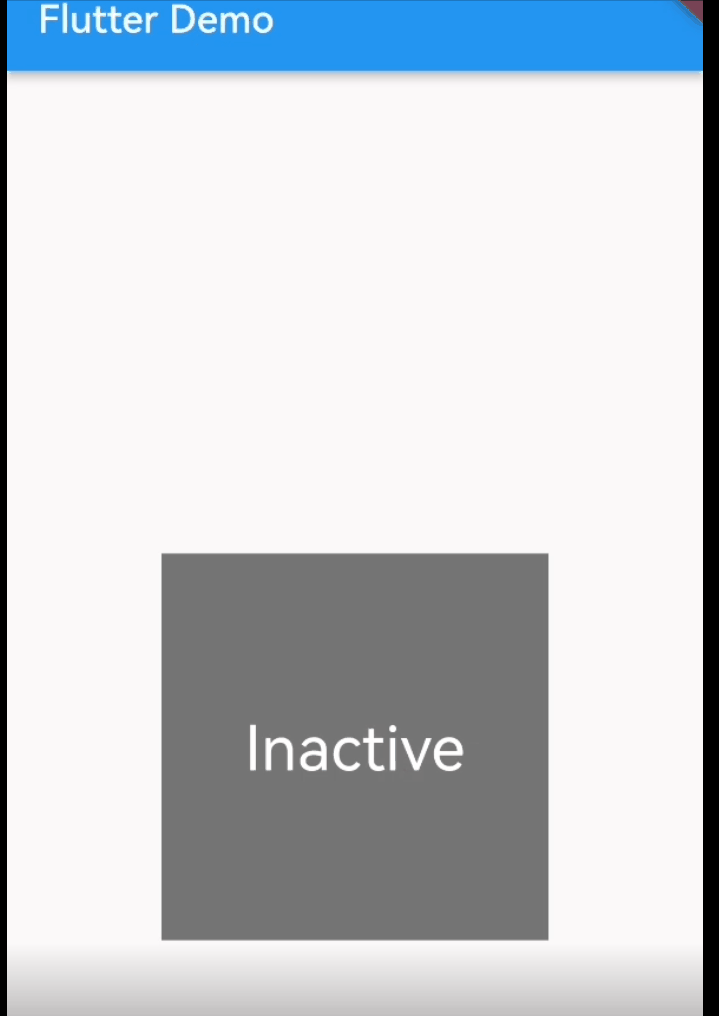
如下代码:_TapboxAState这个State子类为TapboxA维护状态,内部定义了一个_active变量来决定当前是否为激活的状态,内部还定义了一个_handleTap()回调函数,来处理用户点击后的逻辑,并且调用了setState()生命周期方法,重新刷新页面。
import 'package:flutter/material.dart';

// TapboxA 自己管理状态
void main() => runApp(const MyApp());
//------------------------- TapboxA ----------------------------------

class TapboxA extends StatefulWidget {
  const TapboxA({Key? key}) : super(key: key);
  @override
  _TapboxAState createState() => _TapboxAState();
}

class _TapboxAState extends State<TapboxA> {
  bool _active = false;

  void _handleTap() {
    setState(() {
      _active = !_active;
    });
  }

  @override
  Widget build(BuildContext context) {
    return GestureDetector(
      onTap: _handleTap,
      child: Container(
        child: Center(
          child: Text(
            _active ? 'Active' : 'Inactive',
            style: const TextStyle(fontSize: 32.0, color: Colors.white),
          ),
        ),
        width: 200.0,
        height: 200.0,
        decoration: BoxDecoration(
          color: _active ? Colors.lightGreen[700] : Colors.grey[600],
        ),
      ),
    );
  }
}

//------------------------- MyApp ----------------------------------

class MyApp extends StatelessWidget {
  const MyApp({Key? key}) : super(key: key);

  @override
  Widget build(BuildContext context) {
    return MaterialApp(
      title: 'Flutter Demo',
      home: Scaffold(
        appBar: AppBar(
          title: const Text('Flutter Demo'),
        ),
        body: const Center(
          child: TapboxA(),
        ),
      ),
    );
  }
}
父组件管理状态
更多时候我们需要父组件来决定子组件什么时候来更新状态,子组件只需要根据父组件传过来的参数进行合理的展示即可。这种情况下子组件并不需要维护状态,所以子组件是一个StatelessWidget,父组件ParentWidget才是StatefulWidget。代码如下:
父组件维护了一个_active变量用来标记是否为激活状态,并且实现了回调函数_handleTapboxChanged用来反转激活状态,供子组件调用。子组件TapboxB是一个无状态组件,只需要在被点击的时候通知父组件来管理状态。
import 'package:flutter/material.dart';

void main() => runApp(const MyApp());


class ParentWidget extends StatefulWidget {
  const ParentWidget({Key? key}) : super(key: key);

  @override
  _ParentWidgetState createState() => _ParentWidgetState();
}

class _ParentWidgetState extends State<ParentWidget> {
  bool _active = false;

  void _handleTapboxChanged(bool newValue) {
    setState(() {
      _active = newValue;
    });
  }

  @override
  Widget build(BuildContext context) {
    return SizedBox(
      child: TapboxB(
        active: _active,
        onChanged: _handleTapboxChanged,
      ),
    );
  }
}

//------------------------- TapboxB ----------------------------------

class TapboxB extends StatelessWidget {
  const TapboxB({
    Key? key,
    this.active = false,
    required this.onChanged,
  }) : super(key: key);

  final bool active;
  final ValueChanged<bool> onChanged;

  void _handleTap() {
    onChanged(!active);
  }

  @override
  Widget build(BuildContext context) {
    return GestureDetector(
      onTap: _handleTap,
      child: Container(
        child: Center(
          child: Text(
            active ? 'Active' : 'Inactive',
            style: const TextStyle(fontSize: 32.0, color: Colors.white),
          ),
        ),
        width: 200.0,
        height: 200.0,
        decoration: BoxDecoration(
          color: active ? Colors.lightGreen[700] : Colors.grey[600],
        ),
      ),
    );
  }
}

//------------------------- MyApp ----------------------------------

class MyApp extends StatelessWidget {
  const MyApp({Key? key}) : super(key: key);

  @override
  Widget build(BuildContext context) {
    return MaterialApp(
      title: 'Flutter Demo',
      home: Scaffold(
        appBar: AppBar(
          title: const Text('Flutter Demo'),
        ),
        body: const Center(
//          child: TapboxA(),
          child: ParentWidget(),

        ),
      ),
    );
  }
}
混搭管理
混搭管理状态,就是因为有些情况下我们需要父组件管理一部分状态,子组件独立管理另一部分状态。在本次,我们根据上例添加一个动效,按钮按下时要显示高亮状态(前文讲过,动效一类的状态一般要组件本身管理),抬起时取消高亮。
如下代码:ParentWidget负责维护_active状态来标志是否被激活,子组件TapboxC负责维护_highlight状态用来控制是否高亮显示。
import 'package:flutter/material.dart';

void main() => runApp(const MyApp());


class ParentWidget extends StatefulWidget {
  const ParentWidget({Key? key}) : super(key: key);

  @override
  _ParentWidgetState createState() => _ParentWidgetState();
}

class _ParentWidgetState extends State<ParentWidget> {
  bool _active = false;

  void _handleTapboxChanged(bool newValue) {
    setState(() {
      _active = newValue;
    });
  }

  @override
  Widget build(BuildContext context) {
    return SizedBox(
      child: TapboxC(
        active: _active,
        onChanged: _handleTapboxChanged,
      ),
    );
  }
}

//----------------------------- TapboxC ------------------------------

class TapboxC extends StatefulWidget {
  const TapboxC({
    Key? key,
    this.active = false,
    required this.onChanged,
  }) : super(key: key);

  final bool active;
  final ValueChanged<bool> onChanged;

  @override
  _TapboxCState createState() => _TapboxCState();
}

class _TapboxCState extends State<TapboxC> {
  bool _highlight = false;

  void _handleTapDown(TapDownDetails details) {
    setState(() {
      _highlight = true;
    });
  }

  void _handleTapUp(TapUpDetails details) {
    setState(() {
      _highlight = false;
    });
  }

  void _handleTapCancel() {
    setState(() {
      _highlight = false;
    });
  }

  void _handleTap() {
    widget.onChanged(!widget.active);
  }

  @override
  Widget build(BuildContext context) {
    return GestureDetector(
      onTapDown: _handleTapDown, // Handle the tap events in the order that
      onTapUp: _handleTapUp, // they occur: down, up, tap, cancel
      onTap: _handleTap,
      onTapCancel: _handleTapCancel,
      child: Container(
        child: Center(
          child: Text(widget.active ? 'Active' : 'Inactive',
              style: const TextStyle(fontSize: 32.0, color: Colors.white)),
        ),
        width: 200.0,
        height: 200.0,
        decoration: BoxDecoration(
          color: _highlight?Colors.lightGreen :widget.active ? Colors.lightGreen[700] : Colors.grey[600],
        ),
      ),
    );
  }
}
//------------------------- MyApp ----------------------------------

class MyApp extends StatelessWidget {
  const MyApp({Key? key}) : super(key: key);

  @override
  Widget build(BuildContext context) {
    return MaterialApp(
      title: 'Flutter Demo',
      home: Scaffold(
        appBar: AppBar(
          title: const Text('Flutter Demo'),
        ),
        body: const Center(
//          child: TapboxA(),
          child: ParentWidget(),

        ),
      ),
    );
  }
}
当然你也可以把高亮显示的状态交给父组件来管理,但是当你开发完这个组件交给同事来用的时候,别人可能只会关注业务逻辑上的处理,不会关注的动效处理。
其他交互组件
Flutter内部预置了很多交互组件,甚至还有IOS风格的组件,都可以拿来用。如果有必要的话,可以向上面的例子一样自定义组件使用。
以上是“Flutter组件状态管理的方法有哪些”这篇文章的所有内容,感谢各位的阅读!相信大家都有了一定的了解,希望分享的内容对大家有所帮助,如果还想学习更多知识,欢迎关注亿速云行业资讯频道!
免责声明:本站发布的内容(图片、视频和文字)以原创、转载和分享为主,文章观点不代表本网站立场,如果涉及侵权请联系站长邮箱:is@yisu.com进行举报,并提供相关证据,一经查实,将立刻删除涉嫌侵权内容。


