工程实例代码:https://github.com/chocolateBlack/multi_env_folder_maven
利用Maven、Jenkins实现项目自动化部署,能够按照bin、conf、lib文件进行打包,并能够通过Jenkins按照环境一键发不到服务器上
path=${hdfs.path}profile的配置如下:
<profiles>
<profile>
    <id>dev</id>
    <properties>
            <active.profile>dev</active.profile>
            <!-- 业务配置信息 -->
            <hdfs.path>/dev/wh/source/tp</hdfs.path>
    </properties>
    <activation>
            <activeByDefault>true</activeByDefault>
    </activation>
</profile>
<profile>
    <id>test</id>
    <properties>
            <active.profile>dev</active.profile>
            <!-- 业务配置信息 -->
            <hdfs.path>/test/wh/source/tp</hdfs.path>
    </properties>
</profile>
</profiles>
接下来就需要让maven能够解析conf文件夹中Maven属性,这就是maven-resources-plugin要做的事情。
开启资源过滤,并指定过滤的目录。以下配置指定src/main/conf目录下所有类型的文件开启资源过滤,并将解析后的文件指定输出到target/class/conf目录下
<resources>
        <resource>
                <directory>src/main/conf/</directory>
                <filtering>true</filtering>
                <includes>
                        <include>**/*.*</include>
                </includes>
                <targetPath>conf</targetPath><!-- 最终打包的目录是target/class/conf,用户assembly插件从这个目录中读取编译好的配置文件 -->
        </resource>
</resources>
2.其次,利用maven-assembly-plugin插件,将编译好的项目分成bin、conf、lib目录。
<plugin>
    <groupId>org.apache.maven.plugins</groupId>
    <artifactId>maven-assembly-plugin</artifactId>
    <version>2.6</version>
    <executions><execution><!-- 配置执行器 -->
            <id>make-assembly</id>
            <phase>package</phase><!-- 绑定到package生命周期阶段上 -->
            <goals>
                    <goal>single</goal><!-- 只运行一次 -->
            </goals>
            <configuration>
                    <archive>
                            <manifest>
                                    <!-- 此处指定main方法入口的class -->
                                    <mainClass>com.test.HelloMaven</mainClass>
                            </manifest>
                    </archive>
                    <descriptorRefs>
                            <descriptorRef>jar-with-dependencies</descriptorRef>
                    </descriptorRefs>
                    <finalName>${project.name}</finalName>
                    <descriptor>src/main/assembly/assembly.xml</descriptor><!--配置描述文件路径-->
            </configuration>
    </execution>
    </executions>
</plugin>
关于文件分发的assembly.xml配置:
<fileSets>
        <!-- 将src/main/bin下的文件,打包到目标目录的bin文件夹下 -->
        <fileSet>
                <directory>src/main/bin</directory>
                <outputDirectory>bin</outputDirectory>
                <fileMode>755</fileMode>
        </fileSet>
        <!-- 经过maven-resources-plugin插件生成的配置文件位于target/classes/conf/中 -->
        <fileSet>
                <directory>target/classes/conf/</directory>
                <outputDirectory>conf</outputDirectory>
                <fileMode>755</fileMode>
                <lineEnding>unix</lineEnding>
                <excludes>
                        <exclude>*.formatted</exclude>
                </excludes>
        </fileSet>
</fileSets>
<dependencySets>
        <!-- 工程单独的jar,分发到lib目录中 -->
        <dependencySet>
                <fileMode>755</fileMode>
                <outputFileNameMapping>${project.artifactId}-${project.version}.jar</outputFileNameMapping>
                <outputDirectory>/lib/</outputDirectory>
                <scope>runtime</scope>
                <includes>
                        <include>${project.groupId}:${project.artifactId}</include>
                </includes>
        </dependencySet>
        <!-- jar-with-dependencies方式,包含依赖jar的大包,放到lib目录下 -->
        <dependencySet>
                <fileMode>755</fileMode>
                <outputFileNameMapping>${project.name}-jar-with-dependencies.jar</outputFileNameMapping>
                <outputDirectory>/lib/</outputDirectory>
                <scope>runtime</scope>
        </dependencySet>
</dependencySets>
项目结构图: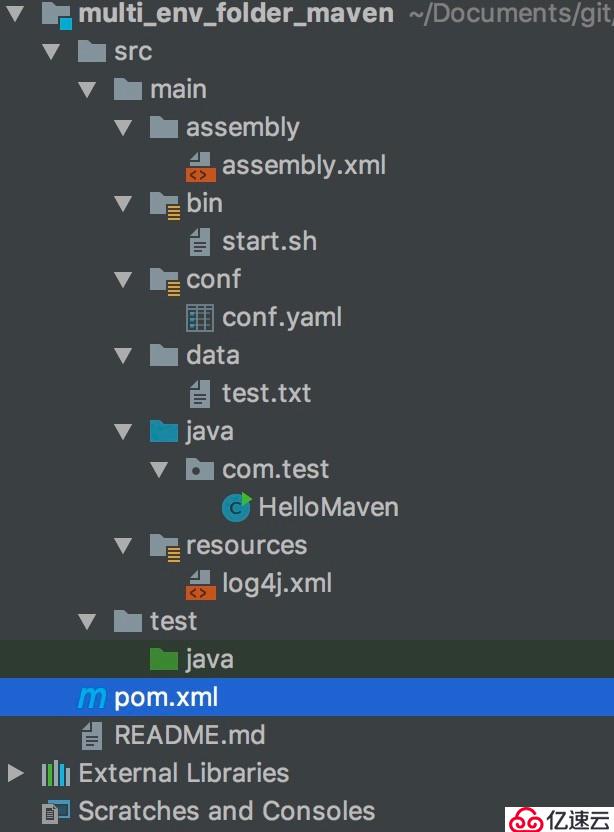
通过mvn package -Pdev命令打包后conf中的配置文件是按照dev环境生成的结果
解析后的conf.yamlpath=/dev/wh/source/tp
target目录下的结构图,红框标记的就是期待的结构目录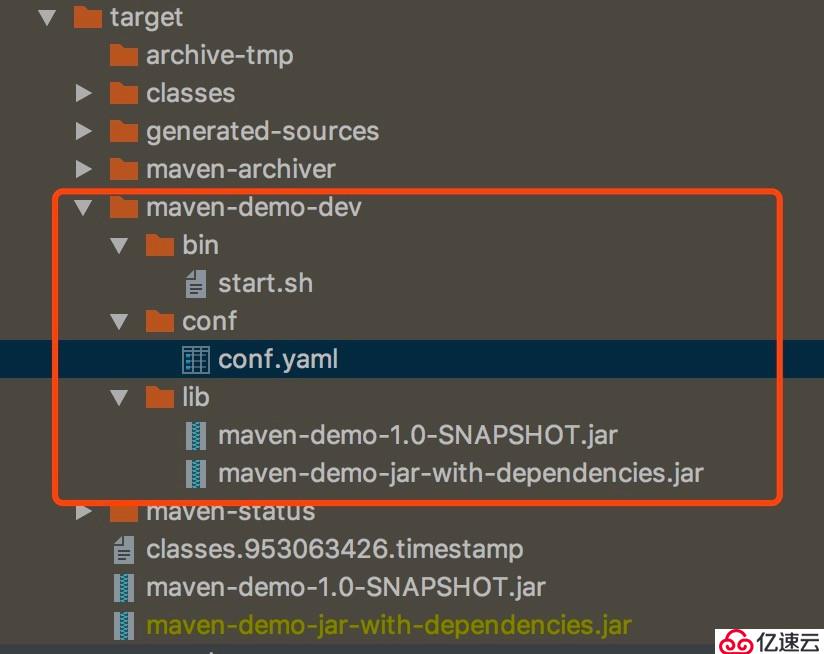
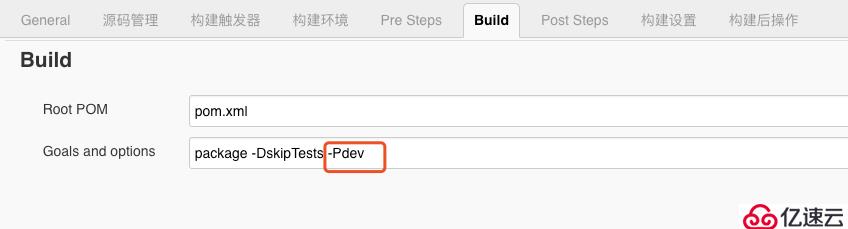
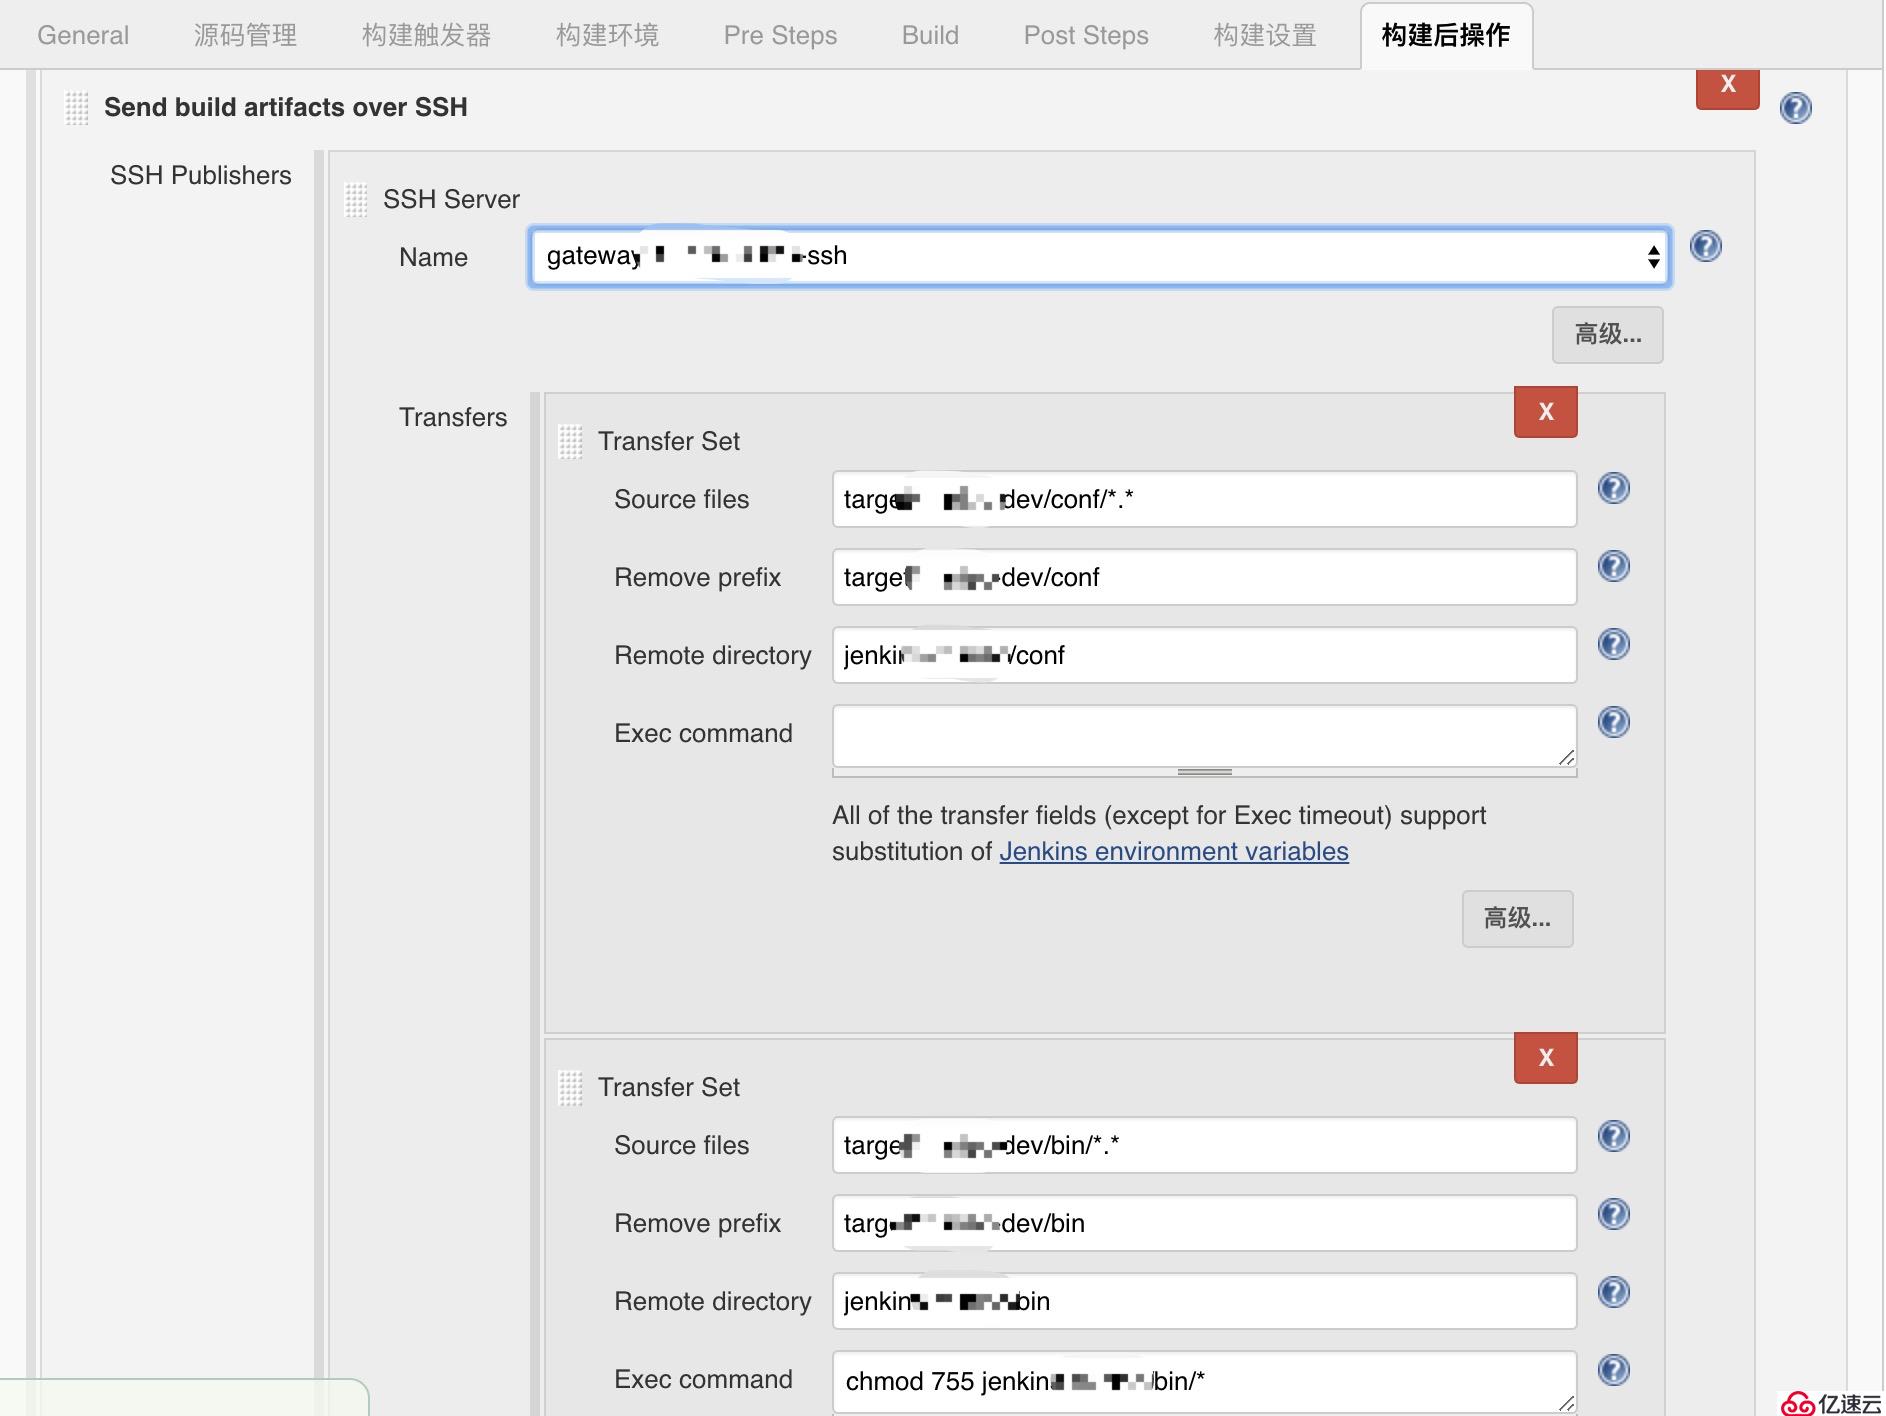
3.项目按bin、conf、lib生成部署结构,剩下的事情就交给Jenkins,通过Jenkins以及其插件,将打包结果上传目标服务器
如下主要描述Jenkins配置的主要几个位置
免责声明:本站发布的内容(图片、视频和文字)以原创、转载和分享为主,文章观点不代表本网站立场,如果涉及侵权请联系站长邮箱:is@yisu.com进行举报,并提供相关证据,一经查实,将立刻删除涉嫌侵权内容。


