小编给大家分享一下Android如何实现仿微信底部菜单栏+顶部菜单栏,希望大家阅读完这篇文章之后都有所收获,下面让我们一起去探讨吧!
采用ViewPage来做,每一个 page对应一个XML,当手指在ViewPage左右滑动时,就相应显示不同的page(其实就是xml)并且同时改变底部菜单按钮的图片变暗或变亮, 同时如果点击底部菜单按钮,左右滑动page(其实就是xml)并且改变相应按钮的亮度。
最终效果:×××
一、布局
1、顶部菜单布局,命名为top_layout.xml,放在layout文件夹下
<?xml version="1.0" encoding="utf-8"?>
<RelativeLayout xmlns:android="http://schemas.android.com/apk/res/android"
    android:layout_width="match_parent"
    android:layout_height="45dp"
    android:background="@drawable/title_bar" >
    <TextView
        android:layout_width="wrap_content"
        android:layout_height="wrap_content"
        android:layout_marginLeft="20dp"
        android:text="微信"
        android:layout_centerVertical="true"
        android:textColor="#ffffff"
        android:textSize="20sp"
        android:textStyle="bold"
        />
    <ImageButton
        android:id="@+id/top_add"
        android:layout_width="wrap_content"
        android:layout_height="wrap_content"
        android:background="@drawable/top_add"
        android:layout_centerVertical="true"
        android:layout_alignParentRight="true"
        />
       <ImageButton
        android:id="@+id/top_search"
        android:layout_width="wrap_content"
        android:layout_height="wrap_content"
        android:background="@drawable/top_search"
        android:layout_centerVertical="true"
        android:layout_toLeftOf="@id/top_add"
        />
</RelativeLayout>
效果:
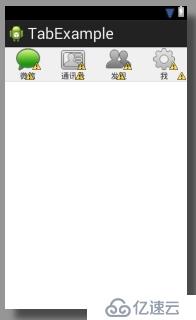
2、底部菜单布局bottom_layout.xml
<?xml version="1.0" encoding="utf-8"?>
<LinearLayout xmlns:android="http://schemas.android.com/apk/res/android"
    android:layout_width="match_parent"
    android:layout_height="60dp"
    android:background="@drawable/bottom_bar"
    android:orientation="horizontal" >

    <LinearLayout
        android:id="@+id/id_tab_weixin"
        android:layout_width="0dp"
        android:layout_height="match_parent"
        android:layout_weight="1"
        android:gravity="center"
        android:orientation="vertical" >
 <!-- android:clickable="false" 是为了防止ImageButton截取了触摸事件 ,这里事件要给它的上一级linearlayout-->
        <ImageButton
             android:id="@+id/id_tab_weixin_img"
            android:layout_width="wrap_content"
            android:layout_height="wrap_content"
            android:background="#00000000"
            android:clickable="false"
            android:src="@drawable/tab_weixin_pressed" />

        <TextView
            android:layout_width="wrap_content"
            android:layout_height="wrap_content"
            android:text="微信"
          />
    </LinearLayout>

    <LinearLayout
         android:id="@+id/id_tab_address"
        android:layout_width="0dp"
        android:layout_height="match_parent"
        android:layout_weight="1"
        android:gravity="center"
        android:orientation="vertical" >

        <ImageButton
             android:id="@+id/id_tab_address_img"
            android:layout_width="wrap_content"
            android:layout_height="wrap_content"
            android:background="#00000000"
             android:clickable="false"
            android:src="@drawable/tab_address_normal" />

        <TextView
            android:layout_width="wrap_content"
            android:layout_height="wrap_content"
            android:text="通讯录"
          />
    </LinearLayout>

    <LinearLayout
        android:id="@+id/id_tab_frd"
        android:layout_width="0dp"
        android:layout_height="match_parent"
        android:layout_weight="1"
        android:gravity="center"
        android:orientation="vertical" >

        <ImageButton
             android:id="@+id/id_tab_frd_img"
            android:layout_width="wrap_content"
            android:layout_height="wrap_content"
            android:background="#00000000"
             android:clickable="false"
            android:src="@drawable/tab_find_frd_normal" />

        <TextView
            android:layout_width="wrap_content"
            android:layout_height="wrap_content"
            android:text="发现"
   />
    </LinearLayout>

    <LinearLayout
        android:id="@+id/id_tab_settings"
        android:layout_width="0dp"
        android:layout_height="match_parent"
        android:layout_weight="1"
        android:gravity="center"
        android:orientation="vertical" >

        <ImageButton
             android:id="@+id/id_tab_settings_img"
            android:layout_width="wrap_content"
            android:layout_height="wrap_content"
            android:background="#00000000"
            android:clickable="false"
            android:src="@drawable/tab_settings_normal" />

        <TextView
            android:layout_width="wrap_content"
            android:layout_height="wrap_content"
            android:text="我"
            />
    </LinearLayout>

</LinearLayout>
效果:
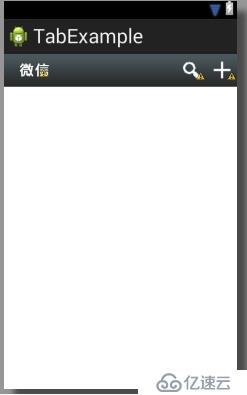
3、整体布局
将上面两个加到activity_main.xml中去
<LinearLayout xmlns:android="http://schemas.android.com/apk/res/android"
    xmlns:tools="http://schemas.android.com/tools"
    android:layout_width="match_parent"
    android:layout_height="match_parent"
    android:orientation="vertical" >

    <include layout="@layout/top_layout" />

    <android.support.v4.view.ViewPager
        android:id="@+id/id_viewpage"
        android:layout_width="fill_parent"
        android:layout_height="0dp"
        android:layout_weight="1" >
    </android.support.v4.view.ViewPager>
"

    <include layout="@layout/bottom_layout" />

</LinearLayout>
效果:
效果还可以,底下菜单栏是有背景的,有点儿白色的,所以看得不是很清,一来微信是选中的
4、定义ViewPage的四个布局
因为要用ViewPage要加四个page,每个page对应一个xml,所以这里定义四个xml.
tab01.xml
<?xml version="1.0" encoding="utf-8"?>
<LinearLayout xmlns:android="http://schemas.android.com/apk/res/android"
    android:layout_width="match_parent"
    android:layout_height="match_parent"
    android:gravity="center"
    android:orientation="vertical" >
      <TextView
        android:layout_width="wrap_content"
        android:layout_height="wrap_content"
        android:text="这里是微信"
        android:layout_centerVertical="true"
        android:textColor="#000000"
        android:textSize="40sp"
        android:textStyle="bold"
        />

</LinearLayout>
效果:

tab02.xml
<?xml version="1.0" encoding="utf-8"?>
<LinearLayout xmlns:android="http://schemas.android.com/apk/res/android"
    android:layout_width="match_parent"
    android:layout_height="match_parent"
    android:gravity="center"
    android:orientation="vertical" >
      <TextView
        android:layout_width="wrap_content"
        android:layout_height="wrap_content"
        android:text="这里是通讯录"
        android:layout_centerVertical="true"
        android:textColor="#000000"
        android:textSize="40sp"
        android:textStyle="bold"
        />

</LinearLayout>
效果:效果和上面一样,只是文字改了一下
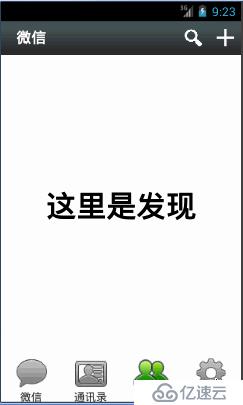
tab03.xml
<?xml version="1.0" encoding="utf-8"?>
<LinearLayout xmlns:android="http://schemas.android.com/apk/res/android"
    android:layout_width="match_parent"
    android:layout_height="match_parent"
    android:gravity="center"
    android:orientation="vertical" >
      <TextView
        android:layout_width="wrap_content"
        android:layout_height="wrap_content"
        android:text="这里是发现"
        android:layout_centerVertical="true"
        android:textColor="#000000"
        android:textSize="40sp"
        android:textStyle="bold"
        />

</LinearLayout>
效果:效果和上面一样,只是文字改了一下
tab04.xml
<?xml version="1.0" encoding="utf-8"?>
<LinearLayout xmlns:android="http://schemas.android.com/apk/res/android"
    android:layout_width="match_parent"
    android:layout_height="match_parent"
    android:gravity="center"
    android:orientation="vertical" >
      <TextView
        android:layout_width="wrap_content"
        android:layout_height="wrap_content"
        android:text="这里是我"
        android:layout_centerVertical="true"
        android:textColor="#000000"
        android:textSize="40sp"
        android:textStyle="bold"
        />

</LinearLayout>
效果:效果和上面一样,只是文字改了一下
二、代码
1. MainActivity中把控件和ViewPage初始化
package com.example.tabexample;

import java.util.ArrayList;
import java.util.List;
import android.os.Bundle;
import android.app.Activity;
import android.support.v4.view.PagerAdapter;
import android.support.v4.view.ViewPager;
import android.support.v4.view.ViewPager.OnPageChangeListener;
import android.view.LayoutInflater;
import android.view.View;
import android.view.ViewGroup;
import android.view.Window;
import android.widget.ImageButton;
import android.widget.LinearLayout;

public class MainActivity extends Activity implements
        android.view.View.OnClickListener {

    private ViewPager mViewPager;// 用来放置界面切换
    private PagerAdapter mPagerAdapter;// 初始化View适配器
    private List<View> mViews = new ArrayList<View>();// 用来存放Tab01-04
    // 四个Tab,每个Tab包含一个按钮
    private LinearLayout mTabWeiXin;
    private LinearLayout mTabAddress;
    private LinearLayout mTabFrd;
    private LinearLayout mTabSetting;
    // 四个按钮
    private ImageButton mWeiXinImg;
    private ImageButton mAddressImg;
    private ImageButton mFrdImg;
    private ImageButton mSettingImg;

    @Override
    protected void onCreate(Bundle savedInstanceState) {
        super.onCreate(savedInstanceState);
        requestWindowFeature(Window.FEATURE_NO_TITLE);
        setContentView(R.layout.activity_main);
        initView();
        initViewPage();
        initEvent();
    }

    private void initEvent() {
        mTabWeiXin.setOnClickListener(this);
        mTabAddress.setOnClickListener(this);
        mTabFrd.setOnClickListener(this);
        mTabSetting.setOnClickListener(this);
        mViewPager.setOnPageChangeListener(new OnPageChangeListener() {
            /**
            *ViewPage左右滑动时
            */
            @Override
            public void onPageSelected(int arg0) {
                int currentItem = mViewPager.getCurrentItem();
                switch (currentItem) {
                case 0:
                     resetImg();
                    mWeiXinImg.setImageResource(R.drawable.tab_weixin_pressed);
                    break;
                case 1:
                     resetImg();
                    mAddressImg.setImageResource(R.drawable.tab_address_pressed);
                    break;
                case 2:
                     resetImg();
                    mFrdImg.setImageResource(R.drawable.tab_find_frd_pressed);
                    break;
                case 3:
                     resetImg();
                    mSettingImg.setImageResource(R.drawable.tab_settings_pressed);
                    break;
                default:
                    break;
                }
            }

            @Override
            public void onPageScrolled(int arg0, float arg1, int arg2) {

            }

            @Override
            public void onPageScrollStateChanged(int arg0) {

            }
        });
    }

    /**
     * 初始化设置
     */
    private void initView() {
        mViewPager = (ViewPager) findViewById(R.id.id_viewpage);
        // 初始化四个LinearLayout
        mTabWeiXin = (LinearLayout) findViewById(R.id.id_tab_weixin);
        mTabAddress = (LinearLayout) findViewById(R.id.id_tab_address);
        mTabFrd = (LinearLayout) findViewById(R.id.id_tab_frd);
        mTabSetting = (LinearLayout) findViewById(R.id.id_tab_settings);
        // 初始化四个按钮
        mWeiXinImg = (ImageButton) findViewById(R.id.id_tab_weixin_img);
        mAddressImg = (ImageButton) findViewById(R.id.id_tab_address_img);
        mFrdImg = (ImageButton) findViewById(R.id.id_tab_frd_img);
        mSettingImg = (ImageButton) findViewById(R.id.id_tab_settings_img);
    }

    /**
     * 初始化ViewPage
     */
    private void initViewPage() {

        // 初妈化四个布局
        LayoutInflater mLayoutInflater = LayoutInflater.from(this);
        View tab01 = mLayoutInflater.inflate(R.layout.tab01, null);
        View tab02 = mLayoutInflater.inflate(R.layout.tab02, null);
        View tab03 = mLayoutInflater.inflate(R.layout.tab03, null);
        View tab04 = mLayoutInflater.inflate(R.layout.tab04, null);

        mViews.add(tab01);
        mViews.add(tab02);
        mViews.add(tab03);
        mViews.add(tab04);

        // 适配器初始化并设置
        mPagerAdapter = new PagerAdapter() {

            @Override
            public void destroyItem(ViewGroup container, int position,
                    Object object) {
                container.removeView(mViews.get(position));

            }

            @Override
            public Object instantiateItem(ViewGroup container, int position) {
                View view = mViews.get(position);
                container.addView(view);
                return view;
            }

            @Override
            public boolean isViewFromObject(View arg0, Object arg1) {

                return arg0 == arg1;
            }

            @Override
            public int getCount() {

                return mViews.size();
            }
        };
        mViewPager.setAdapter(mPagerAdapter);
    }

    /**
     * 判断哪个要显示,及设置按钮图片
     */
    @Override
    public void onClick(View arg0) {

        switch (arg0.getId()) {
        case R.id.id_tab_weixin:
            mViewPager.setCurrentItem(0);
            resetImg();
            mWeiXinImg.setImageResource(R.drawable.tab_weixin_pressed);
            break;
        case R.id.id_tab_address:
            mViewPager.setCurrentItem(1);
            resetImg();
            mAddressImg.setImageResource(R.drawable.tab_address_pressed);
            break;
        case R.id.id_tab_frd:
            mViewPager.setCurrentItem(2);
            resetImg();
            mFrdImg.setImageResource(R.drawable.tab_find_frd_pressed);
            break;
        case R.id.id_tab_settings:
            mViewPager.setCurrentItem(3);
            resetImg();
            mSettingImg.setImageResource(R.drawable.tab_settings_pressed);
            break;
        default:
            break;
        }
    }

    /**
     * 把所有图片变暗
     */
    private void resetImg() {
        mWeiXinImg.setImageResource(R.drawable.tab_weixin_normal);
        mAddressImg.setImageResource(R.drawable.tab_address_normal);
        mFrdImg.setImageResource(R.drawable.tab_find_frd_normal);
        mSettingImg.setImageResource(R.drawable.tab_settings_normal);
    }

}
代码量很短,只有几百行,功能就可以实现了,注意这里去掉程序原本的标题栏我直接用了
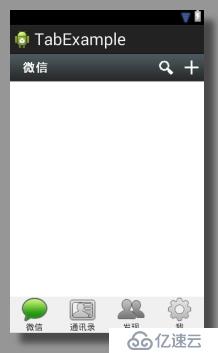
2、效果:
三、思路说明
1、分别为顶部菜单栏和底部菜单栏新建一个布局
2、中间是ViewPage,然后里面放四个Page(tab01-tab04.xml),注意,要通过适配器给ViewPage提供内容.
3、监听ViewPage和底部菜单栏按钮的事件(注意,这里的按钮放在一个LinearLayout中,所以我们监听了LinearLayout的触摸事件,而屏蔽了Imgaebutton的触摸事件)
4、
public void onClick(View arg0)
这里面监听的是底部菜单的触摸事件,根据触摸的控件,改变自身的亮度、改变ViewPage显示的内容
mViewPager.setOnPageChangeListener(new OnPageChangeListener()
这里监听的是ViewPage左右滑动的事件,改变相应控件的亮度、改变ViewPage显示的内容四、不足之处
1、最新版微信上应该是左右滑动是有部分亮度变化的,这里直接转变过去了。
2、最新版微信文字也要跟着变化,这里没做改变
解决方法:底部的图片渐变 ,可以调整两张重叠图片的透明度来实现。
看完了这篇文章,相信你对“Android如何实现仿微信底部菜单栏+顶部菜单栏”有了一定的了解,如果想了解更多相关知识,欢迎关注亿速云行业资讯频道,感谢各位的阅读!
免责声明:本站发布的内容(图片、视频和文字)以原创、转载和分享为主,文章观点不代表本网站立场,如果涉及侵权请联系站长邮箱:is@yisu.com进行举报,并提供相关证据,一经查实,将立刻删除涉嫌侵权内容。


