AndroidеҲҮиҝ‘е®һжҲҳ(е…«)
еӨ©еҶ·дәҶпјҢиҖҒеӨ«иҰҒжҠҠдјҷйЈҹжҗһдёҠеҺ»пјҢиҝҷдёҚжңҖиҝ‘еңЁиҪҜ件еӣӯдәҢжҘјеҗғпјҢдјҷйЈҹ15еқ—пјҢжқ жқ зҡ„гҖӮ


зҫҺеҢ…еҢ…пјҢдёҚиҜҙдәҶпјҢиҝӣе…ҘжӯЈйўҳгҖӮд»ҠеӨ©иҖҒеӨ«иҰҒи®Ізҡ„жҳҜиҜ»еҸ–иҒ”зі»дәәпјҢе…¶е®һжҲ‘еҒҡиҝҷдёӘзҡ„еҲқиЎ·жҳҜжғіеҒҡдёҖдёӘзҹӯдҝЎжӢҰжҲӘпјҢз”өиҜқжӢҰжҲӘзҡ„еҠҹиғҪгҖӮ
жҲ‘们е…ҲзңӢдёҖдёӢз•ҢйқўпјҢиҝҳжҳҜдёҚй”ҷзҡ„пјҢжҢәз»ҡдёҪзҡ„гҖӮ
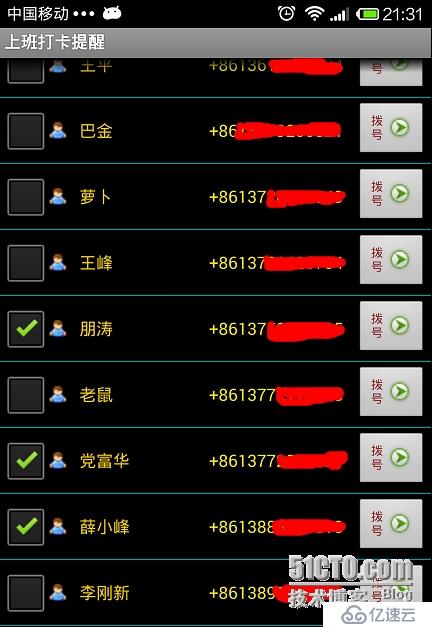
OKпјҢжҲ‘们дёҖзңӢе°ұзҹҘйҒ“пјҢиҝҷеҸҲжҳҜдёҖдёӘListViewгҖӮзӣ®еүҚзҡ„еҠҹиғҪжҳҜеҪ“дҪ еңЁеӨҚйҖүжЎҶжү“й’©пјҢзӮ№еҮ»еҗҺйқўзҡ„жӢЁеҸ·е°ұдјҡе°Ҷз”өиҜқжү“еҮәеҺ»гҖӮеҰӮжһңдёҚжү“й’©пјҢз”өиҜқеҲҷдёҚдјҡжӢЁеҮәеҺ»гҖӮOKпјҢжҲ‘们е…ҲзңӢзңӢйЎөйқўеёғеұҖ
<?xml version="1.0" encoding="utf-8"?>
<LinearLayout xmlns:android="http://schemas.android.com/apk/res/android"
	android:layout_width="match_parent" android:layout_height="match_parent"
	android:orientation="vertical">
	<ListView android:id="@+id/contactListView"
		android:descendantFocusability="blocksDescendants"
		android:layout_width="fill_parent"
		android:layout_height="fill_parent"
		android:divider="@color/teal"
		android:dividerHeight="1dp">
	</ListView>
	<LinearLayout
		android:orientation="horizontal"
		android:layout_width="fill_parent"
		android:layout_height="wrap_content">
		<Button android:id="@+id/btnSelAll"
			android:text="@string/btnSelAll"
			android:textColor="@color/teal"
			android:textSize="14dp"
			android:textStyle="bold"
			android:layout_weight="1"
			android:layout_width="fill_parent"
			android:layout_height="fill_parent"></Button>
		<Button android:id="@+id/btnInverseSel"
			android:text="@string/btnSelInverse"
			android:textColor="@color/teal"
			android:layout_marginLeft="1dp"
			android:layout_weight="1"
			android:textSize="14dp"
			android:textStyle="bold"
			android:layout_width="fill_parent"
			android:layout_height="fill_parent"></Button>
		<Button android:id="@+id/btnSet"
			android:text="@string/btnSet"
			android:layout_weight="1"
			android:textColor="@color/teal"
			android:layout_marginLeft="1dp"
			android:textSize="14dp"
			android:textStyle="bold"
			android:layout_width="fill_parent"
			android:layout_height="fill_parent"></Button>
	</LinearLayout>
</LinearLayout>
жҲ‘们еҶҚзңӢзңӢListViewиҰҒеҠ иҪҪзҡ„жЁЎзүҲ
<?xml version="1.0" encoding="utf-8"?>
<LinearLayout xmlns:android="http://schemas.android.com/apk/res/android"
	android:layout_width="fill_parent" android:layout_height="wrap_content"
	android:id="@+id/contactTemplate">
	<TableLayout android:id="@+id/tabContatMain"
		android:layout_width="fill_parent" android:layout_height="wrap_content"
		android:stretchColumns="2" android:shrinkColumns="2" android:padding="3dip">
		<TableRow>
			<CheckBox android:id="@+id/chkContactUser"
				android:layout_gravity="center_vertical"></CheckBox>
			<ImageView android:id="@+id/imgContactPhoto"
				android:layout_gravity="center_vertical"
				android:scaleType="fitCenter"></ImageView>
			<TextView android:id="@+id/txtContactName"
				android:layout_marginLeft="10dp"
				android:layout_gravity="center_vertical"
				android:textColor="@color/teal1"></TextView>
			<TextView android:id="@+id/txtContactTelNumber"
				android:layout_marginLeft="4dp"
				android:gravity="right"
				android:layout_gravity="center_vertical"
				android:textColor="@color/yellow"></TextView>
			<Button android:id="@+id/btnDail"
				android:text="@string/btnDail"
				android:textSize="10dp"
				android:layout_marginLeft="10dp"
				android:width="60dp"
				android:drawableRight="@drawable/dail"
				android:layout_gravity="center_vertical"
				android:textColor="@color/purplered"></Button>
		</TableRow>
	</TableLayout>
</LinearLayout>
дҫқ然жҳҜTableLayoutеёғеұҖпјҢжҲ‘们и®ҫзҪ®е®ғзҡ„收缩еҲ—дёә第дәҢеҲ—пјҢдјёеұ•еҲ—д№ҹжҳҜ第дәҢеҲ—гҖӮиҝҷж ·еҰӮжһң第дәҢеҲ—дёҚеӨҹжҳҫзӨәеҲҷдјҡ收缩гҖӮOKпјҢжҲ‘们зңӢдёҖдёӢеҗҺеҸ°д»Јз Ғ
public void onCreate(Bundle savedInstanceState) {
		super.onCreate(savedInstanceState);
		setContentView(R.layout.punchinalarm);

		owner = this;
		btnSelAll = (Button) this.findViewById(R.id.btnSelAll);
		btnSelInverse = (Button) this.findViewById(R.id.btnInverseSel);
		btnSet = (Button) this.findViewById(R.id.btnSet);
		contactUserListView = (ListView) this
				.findViewById(R.id.contactListView);

		dataList = new ArrayList<Map<String, Object>>();
		this.InitData();
}еңЁOnCreateж–№жі•дёӯпјҢжҲ‘们еҲқе§ӢеҢ–ж•°жҚ®гҖӮ
private void InitData() {
String phoneUserName = null;
String phoneNumber = null;
Long contactId = null;
Long photoId = null;
Map<String, Object> dataMap = null;
ContentResolver resolver = this.getApplicationContext()
.getContentResolver();
/*
* иҺ·еҸ–SimеҚЎиҒ”зі»дәә Uri uri = Uri.parse("content://icc/adn");
*/
Cursor phoneCursor = resolver.query(Phone.CONTENT_URI,
				PHONE_PROJECTION, null, null, null);
if (phoneCursor != null) {
while (phoneCursor.moveToNext()) {
dataMap = new HashMap<String, Object>();
phoneUserName = phoneCursor.getString(0);
				phoneNumber = phoneCursor.getString(1);
				photoId = phoneCursor.getLong(2);
				contactId = phoneCursor.getLong(3);
if (phoneNumber == null || phoneNumber.trim().length() < 11) {
continue;
}
Bitmap contactPhoto = null;
if (photoId > 0) {
Uri uri = ContentUris.withAppendedId(
ContactsContract.Contacts.CONTENT_URI, contactId);
InputStream input = ContactsContract.Contacts
.openContactPhotoInputStream(resolver, uri);
contactPhoto = BitmapFactory.decodeStream(input);
} else {
contactPhoto = BitmapFactory.decodeResource(getResources(),
R.drawable.usersmall);
}
dataMap.put("UserName", phoneUserName);
dataMap.put("UserPhoneNumber", phoneNumber);
dataMap.put("UserPhoto", contactPhoto);
dataList.add(dataMap);
}
if (dataList != null && dataList.size() > 0) {
customAdapter simpleAdapter = new customAdapter(this, dataList,
R.layout.contactdetailtemplate, new String[] {
"UserPhoto", "UserName", "UserPhoneNumber" },
new int[] { R.id.chkContactUser, R.id.imgContactPhoto,
R.id.txtContactName, R.id.txtContactTelNumber,
R.id.btnDail });
this.contactUserListView.setAdapter(simpleAdapter);
}
}
}жҲ‘们зҹҘйҒ“еӨ–з•Ңзҡ„зЁӢеәҸйҖҡиҝҮContentResolverжҺҘеҸЈеҸҜд»Ҙи®ҝй—®ContentProviderжҸҗдҫӣзҡ„ж•°жҚ®пјҢеңЁActivityеҪ“дёӯйҖҡиҝҮgetContentResolver()еҸҜд»Ҙеҫ—еҲ°еҪ“еүҚеә”з”Ёзҡ„ ContentResolverе®һдҫӢгҖӮеӣ дёәйҖҡи®ҜеҪ•е’Ңзҹӯж¶ҲжҒҜйғҪеҸҜд»ҘйҖҡиҝҮжҺҘеҸЈи®ҝй—®пјҢжүҖд»ҘжҲ‘们е°ұеҸҜд»ҘйҖҡиҝҮgetContentResolverи®ҝй—®SIMеҚЎе’ҢжүӢжңәдёӯзҡ„иҒ”зі»дәәдҝЎжҒҜгҖӮ
жҲ‘们主иҰҒеҲ°дёӢйқўзҡ„иҝҷеҸҘ
Cursor phoneCursor = resolver.query(Phone.CONTENT_URI,
PHONE_PROJECTION, null, null, null);
йҖҡиҝҮжҺҘеҸЈжҹҘиҜўпјҢжҲ‘们дјҡеҫ—еҲ°дёҖдёӘCursorгҖӮйҖҡиҝҮжҹҘзңӢCursorзҡ„е®ҡд№үпјҢжҲ‘们еҸ‘зҺ°е®ғжҳҜдёӘжҠҪиұЎзұ»
public abstract interface android.database.Cursor
жҲ‘们еҸ‘зҺ°е®ғжҸҗдҫӣдәҶдёҖдәӣж–№жі•пјҢеҰӮдёӢ
з”ұжӯӨеҸҜи§ҒпјҢе®ғжҳҜдёҖдёӘж—ўеҸҜд»ҘеүҚиҝӣеҸҲеҸҜд»ҘеҗҺйҖҖзҡ„ж— еҗ‘жёёж ҮпјҢзұ»дјјдәҺSqlServerдёӯзҡ„жёёж ҮгҖӮиҝҷж ·зҡ„иҜқжҲ‘们дёҚи®әжҳҜиҜ»еҸ–иҒ”зі»дәәдҝЎжҒҜпјҢиҝҳжҳҜиҜ»еҸ–зҹӯж¶ҲжҒҜпјҢйғҪеҸҜд»ҘйҡҸж—¶е®ҡдҪҚжёёж ҮгҖӮ
еңЁдёҠйқўжҲ‘们зңӢеҲ°Queryзҡ„еҮ дёӘеҸӮж•°,Phone.Content_URI,иҺ·еҸ–иҒ”зі»дәәзҡ„ж—¶еҖҷйңҖиҰҒеҺ»иҝҷдёӘURIеҺ»еҸ–ж•°жҚ®гҖӮе…¶е®һиҝҷйҮҢзҡ„Phone.Content_URIзҡ„еҖјжҳҜcontent://com.android.contacts/contactsгҖӮе®ғзҡ„е®ҡд№үеҰӮдёӢ
public static final android.net.Uri CONTENT_URI;
okпјҢжҲ‘们жӢҝеҲ°иҒ”зі»дәәд№ӢеҗҺпјҢжҲ‘们иҝӣиЎҢеҫӘзҺҜпјҢжёёж ҮдёӢ移пјҢжӢҝеҮәжүҖжңүзҡ„жңүз”өиҜқеҸ·з Ғзҡ„иҒ”зі»дәәзҡ„ж•°жҚ®гҖӮеӣ дёәжҲ‘д»¬дј е…Ҙзҡ„PHONE_PROJECTIONзҡ„йЎәеәҸжҳҜ姓еҗҚпјҢз”өиҜқеҸ·з ҒпјҢз…§зүҮIDпјҢд»ҘеҸҠдёҖдёӘContactIDгҖӮжүҖд»ҘжҲ‘们зңӢеҲ°еҸ–ж•°жҚ®зҡ„йЎәеәҸеҰӮдёӢ
phoneUserName = phoneCursor.getString(0);
phoneNumber = phoneCursor.getString(1);
photoId = phoneCursor.getLong(2);
contactId = phoneCursor.getLong(3);
жӢҝеҲ°PhotoIDд№ӢеҗҺпјҢжҲ‘们еҲӨж–ӯжҳҜеҗҰеӨ§дәҺ0пјҢеҰӮжһңеӨ§дәҺ0пјҢжҲ‘们дјҡиҺ·еҸ–з”ЁжҲ·еӣҫеғҸгҖӮ
иҺ·еҸ–з”ЁжҲ·еӣҫеғҸзҡ„ж—¶еҖҷпјҢе…ҲйҖҡиҝҮдёӢйқўзҡ„д»Јз Ғе°ҶURIе’ҢеҸӮж•°иҝһжҺҘиө·жқҘ
ContentUris.withAppendedId(
							ContactsContract.Contacts.CONTENT_URI, contactId)
е…¶е®һиҝҷдёӘзұ»дјјдәҺGetж–№ејҸзҡ„APIпјҢжҜ”еҰӮContactUser/100,ж„ҸжҖқжҳҜиҺ·еҸ–зј–еҸ·дёә100зҡ„дәәзҡ„дҝЎжҒҜгҖӮ
OKпјҢURIжһ„йҖ еҘҪд№ӢеҗҺпјҢжҲ‘们иҺ·еҸ–еӣҫеғҸ
InputStream input = ContactsContract.Contacts
							.openContactPhotoInputStream(resolver, uri);
					contactPhoto = BitmapFactory.decodeStream(input);
жңҖеҗҺеҠ е…ҘList<Map<String,Object>>пјҢеҜ№ListViewиҝҗз”ЁйҖӮй…ҚеҷЁгҖӮ
class customAdapter extends BaseAdapter {
		private List<Map<String, Object>> dataList;
		private LayoutInflater mInflater;
		private Context context;
		private String[] keyString;
		private int[] valueViewID;
		Holder holder;

		public customAdapter(Context context,
				List<Map<String, Object>> dataList, int resource,
				String[] from, int[] to) {
			this.dataList = dataList;
			this.context = context;
			mInflater = (LayoutInflater) this.context
					.getSystemService(Context.LAYOUT_INFLATER_SERVICE);
			keyString = new String[from.length];
			valueViewID = new int[to.length];
			System.arraycopy(from, 0, keyString, 0, from.length);
			System.arraycopy(to, 0, valueViewID, 0, to.length);
		}

		@Override
		public int getCount() {
			return dataList.size();
		}

		@Override
		public Object getItem(int position) {
			return dataList.get(position);
		}

		@Override
		public long getItemId(int position) {
			return position;
		}

		public void removeItem(int position) {
			dataList.remove(position);
			this.notifyDataSetChanged();
		}

		public View getView(int position, View convertView, ViewGroup parent) {

			if (convertView != null) {
				holder = (Holder) convertView.getTag();
			} else {
				convertView = mInflater.inflate(R.layout.contactdetailtemplate,
						null);
				holder = new Holder();
				holder.chkContactUser = (CheckBox) convertView
						.findViewById(valueViewID[0]);
				holder.imgUserPhoto = (ImageView) convertView
						.findViewById(valueViewID[1]);
				holder.labUserName = (TextView) convertView
						.findViewById(valueViewID[2]);
				holder.labPhoneNumber = (TextView) convertView
						.findViewById(valueViewID[3]);
				holder.btnDail = (Button) convertView
						.findViewById(valueViewID[4]);

				convertView.setTag(holder);
			}

			Map<String, Object> appInfo = dataList.get(position);
			if (appInfo != null) {
				String userName = appInfo.get(keyString[1]).toString();
				String userPhoneNumber = appInfo.get(keyString[2]) == null ? ""
						: appInfo.get(keyString[2]).toString();
				Bitmap userPhoto = (Bitmap) appInfo.get(keyString[0]);

				holder.labUserName.setText(userName);
				holder.labPhoneNumber.setText(userPhoneNumber);
				holder.imgUserPhoto.setImageBitmap(userPhoto);
				holder.btnDail.setOnClickListener(new ViewButtonListener(
						position, holder.chkContactUser));
			}
			return convertView;
		}
	}

	class Holder {
		public TextView labUserName;
		public TextView labPhoneNumber;
		public ImageView imgUserPhoto;
		public Button btnDail;
		public CheckBox chkContactUser;
}иҝҷйҮҢпјҢе…¶е®һеҫҲз®ҖеҚ•пјҢжҲ‘们е°ұжҳҜжӢҝеҲ°жҺ§д»¶пјҢ然еҗҺж №жҚ®PositionпјҢжӢҝеҲ°Listдёӯзҡ„жҹҗиЎҢж•°жҚ®пјҢ然еҗҺиөӢеҖјгҖӮ
жңҖеҗҺжҲ‘们зңӢзңӢжҢүй’®зҡ„ClickдәӢ件пјҢжҲ‘д»¬дј е…ҘдәҶPositionе’ҢжҜҸиЎҢзҡ„CheckBoxгҖӮ
class ViewButtonListener implements OnClickListener {
		private int position;
		Object phoneNumber;
		CheckBox chkContactUser;

		ViewButtonListener(int position,CheckBox chkContactUser) {
			this.position = position;
			this.phoneNumber = dataList.get(position).get("UserPhoneNumber");
			this.chkContactUser= chkContactUser;
		}

		@Override
		public void onClick(View view) {
			int vid = view.getId();
			if (vid == R.id.btnDail&&chkContactUser.isChecked()) {
				Intent dialIntent = new Intent(Intent.ACTION_CALL, Uri
						.parse("tel:" + phoneNumber));
				startActivity(dialIntent);
			}
		}
}еңЁOnClickдёӯпјҢжҲ‘们еҲӨж–ӯеҰӮжһңжҳҜжӢЁеҸ·жҢү钮并且еҲ—еӨҙзҡ„CheckBoxжҳҜеӢҫйҖүзҡ„пјҢеҲҷдјҡжӢЁеҸ·пјҢеҗҰеҲҷдёҚдјҡжӢЁеҸ·гҖӮOKпјҢжңҖеҗҺжҲ‘们еёҢжңӣеңЁжҢүеӣһйҖҖй”®зҡ„ж—¶еҖҷпјҢеј№еҮәжҳҜеҗҰйҖҖеҮәзҡ„жҸҗзӨә
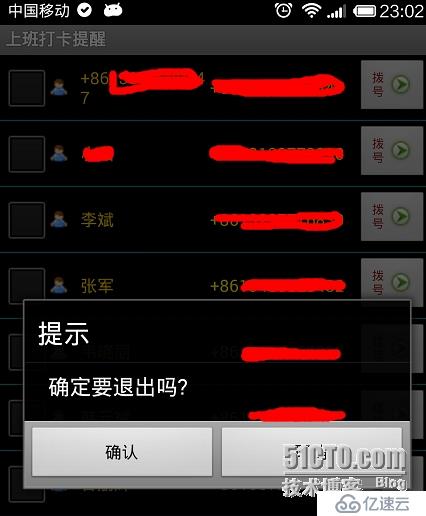
okпјҢд»Јз ҒеҰӮдёӢ
public boolean onKeyDown(int keyCode, KeyEvent event) {
if ((keyCode == KeyEvent.KEYCODE_BACK && event.getRepeatCount() == 0)) {
dialog();
return true;
}
return true;
}
protected void dialog() {
AlertDialog.Builder builder = new Builder(punchinalarm.this);
builder.setMessage("зЎ®е®ҡиҰҒйҖҖеҮәеҗ—?");
builder.setTitle("жҸҗзӨә");
builder.setPositiveButton("зЎ®и®Ө", new DialogInterface.OnClickListener() {
@Override
public void onClick(DialogInterface dialog, int which) {
dialog.dismiss();
android.os.Process.killProcess(android.os.Process.myPid());
}
});
builder.setNegativeButton("еҸ–ж¶Ҳ",
new android.content.DialogInterface.OnClickListener() {
@Override
public void onClick(DialogInterface dialog, int which) {
dialog.dismiss();
}
});
builder.create().show();
}
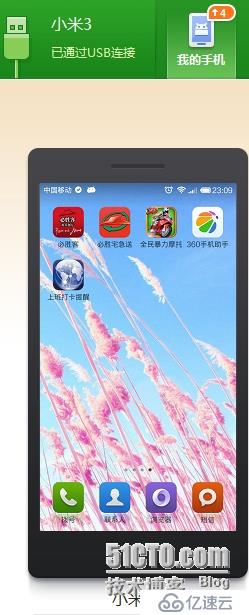
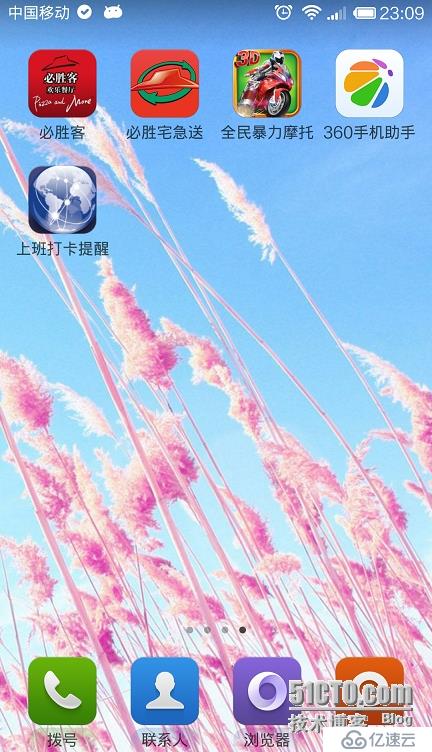
жңҖеҗҺпјҢе“Ҙ们зҡ„еҚҡе®ўжҳҜиҙ§зңҹд»·е®һпјҢе°Ҹзұі3жөӢиҜ•жңәгҖӮ