(一)Dialog简介
Dialog是Android开发中需要经常使用的系统组件之一,AlertDialog可以显示一个、两个等多个按钮,使用setMessage()方法可以只显示字符串提示信息,当然用户也可以自定义自己的AlertDialog。
构造方法
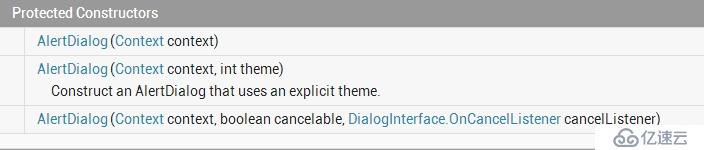
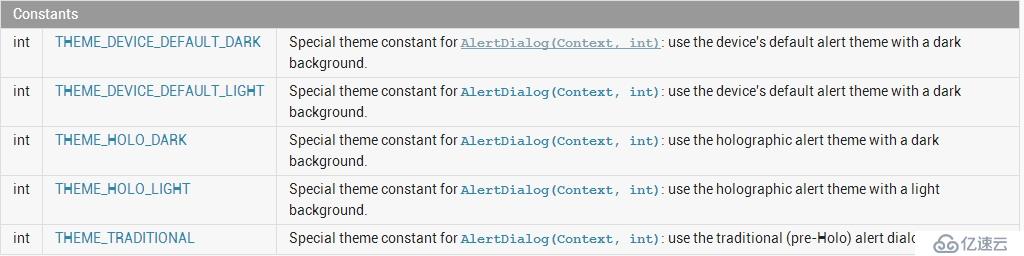
更改主题
2. 常用方法

(二)代码实现
MainActivity代码
package com.example.mydialog;
import java.util.ArrayList;
import java.util.HashMap;
import android.app.Activity;
import android.app.AlertDialog;
import android.content.DialogInterface;
import android.os.Bundle;
import android.util.Log;
import android.view.Menu;
import android.widget.ListAdapter;
import android.widget.SimpleAdapter;
public class MainActivity extends Activity {
private ArrayList<HashMap<String, Object>> listItem;
protected void onCreate(Bundle savedInstanceState) {
super.onCreate(savedInstanceState);
setContentView(R.layout.activity_main);
openDialog();
}
@Override
public boolean onCreateOptionsMenu(Menu menu) {
// Inflate the menu; this adds items to the action bar if it is present.
getMenuInflater().inflate(R.menu.main, menu);
return true;
}
public void openDialog() {
new AlertDialog.Builder(MainActivity.this).setTitle("自定义Dialog")
.setIcon(R.drawable.albums)
.setAdapter(getAdaper(), new DialogInterface.OnClickListener() {
@Override
public void onClick(DialogInterface dialog, int which) {
// TODO Auto-generated method stub
// 获取选中项的内容
Log.d("测试", listItem.get(which).get("ItemManager")
.toString());
}
}).show();
}
public ListAdapter getAdaper() {
listItem = new ArrayList<HashMap<String, Object>>();
HashMap<String, Object> map1 = new HashMap<String, Object>();
map1.put("ImageManager", R.drawable.compose);
map1.put("ItemManager", "录入");
listItem.add(map1);
HashMap<String, Object> map2 = new HashMap<String, Object>();
map2.put("ImageManager", R.drawable.camera);
map2.put("ItemManager", "拍照");
listItem.add(map2);
HashMap<String, Object> map4 = new HashMap<String, Object>();
map4.put("ImageManager", R.drawable.delete1);
map4.put("ItemManager", "删除");
listItem.add(map4);
SimpleAdapter listItemAdapter = new SimpleAdapter(this, listItem,
R.layout.mydialog,
new String[] { "ImageManager", "ItemManager" }, new int[] {
R.id.p_w_picpath, R.id.text });
return listItemAdapter;
}
}
mydialog.xml文件
<?xml version="1.0" encoding="utf-8"?>
<RelativeLayout xmlns:android="http://schemas.android.com/apk/res/android"
android:layout_width="fill_parent"
android:layout_height="fill_parent"
android:orientation="horizontal"
android:gravity="center_vertical"
>
<ImageView android:id="@+id/p_w_picpath"
android:layout_width="38dp"
android:layout_height="38dp"
/>
<TextView
android:id="@+id/text"
android:layout_width="wrap_content"
android:layout_height="wrap_content"
android:layout_alignParentRight="true"
android:layout_centerVertical ="true"
android:textColor="#000000" />
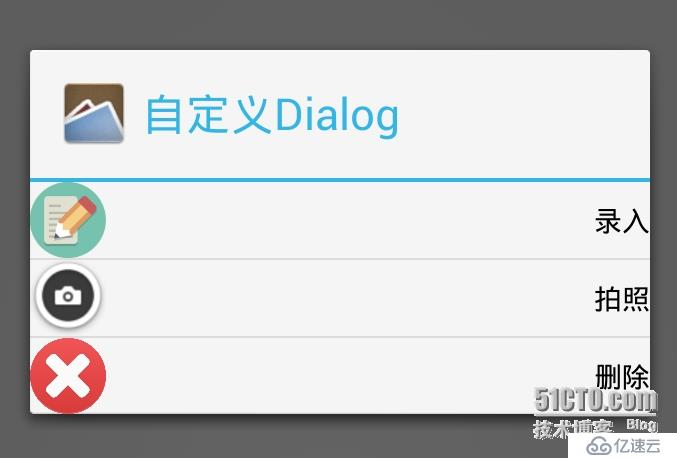
</RelativeLayout>效果如下:
免责声明:本站发布的内容(图片、视频和文字)以原创、转载和分享为主,文章观点不代表本网站立场,如果涉及侵权请联系站长邮箱:is@yisu.com进行举报,并提供相关证据,一经查实,将立刻删除涉嫌侵权内容。


