androidзӣ‘еҗ¬еә”з”ЁжҳҜеҗҰиў«еҚёиҪҪзҡ„ж–№жі•
иҝҷзҜҮж–Үз« дё»иҰҒд»Ӣз»ҚдәҶandroidзӣ‘еҗ¬еә”з”ЁжҳҜеҗҰиў«еҚёиҪҪзҡ„ж–№жі•пјҢе…·жңүдёҖе®ҡеҖҹйүҙд»·еҖјпјҢйңҖиҰҒзҡ„жңӢеҸӢеҸҜд»ҘеҸӮиҖғдёӢгҖӮеҰӮдёӢиө„ж–ҷжҳҜе…ідәҺandroidе®һзҺ°зӣ‘еҗ¬зҡ„иҜҰз»ҶжӯҘйӘӨеҶ…е®№гҖӮ
дёҖ ж•Ҳжһңжј”зӨә
жү“ејҖеә”з”Ёж•Ҳжһңеӣҫпјҡ
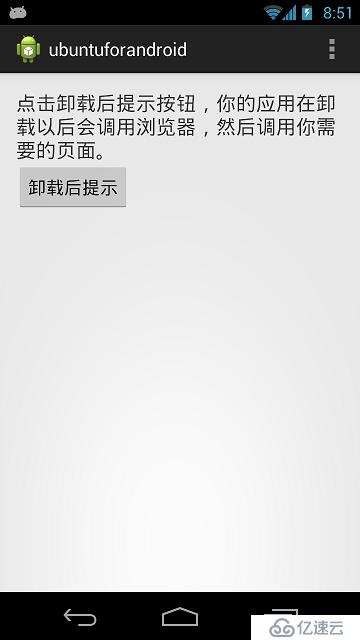
еӣҫ1
зӮ№еҮ»еҚёиҪҪеҗҺжҸҗзӨәпјҢеҰӮдёӢеӣҫпјҡ
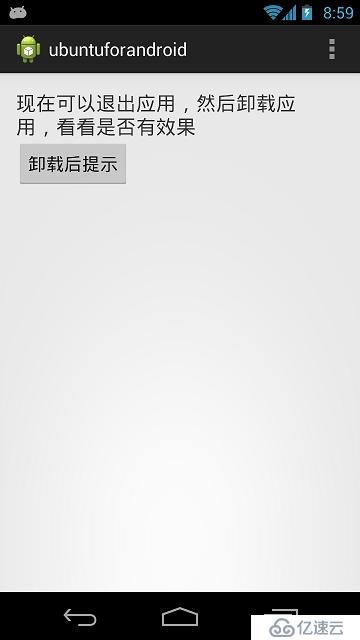
еӣҫ2
然еҗҺйҖҖеҮәеә”з”ЁпјҢеҚёиҪҪзЁӢеәҸпјҢдјҡеҸ‘зҺ°еҪ“еә”з”Ёиў«еҚёиҪҪд»ҘеҗҺпјҢдјҡеј№еҮәи°ғз”ЁжөҸи§ҲеҷЁзҡ„жҸҗзӨәпјҢиҝҷйҮҢйҡҸдҫҝж”ҫдәҶдёҖдёӘжҗңзӢҗжөҸи§ҲйЎөйқўпјҢеңЁиҮӘе·ұзҡ„еә”з”Ёдёӯеә”иҜҘи°ғз”Ёзҡ„дёҖиҲ¬йғҪжҳҜи°ғжҹҘйЎөйқўгҖӮеҰӮдёӢеӣҫпјҡ

еӣҫ3
okпјҢж•ҲжһңеүҚйқўе·Із»Ҹжј”зӨәдәҶпјҢзҺ°еңЁйңҖиҰҒи®Ёи®әдёҖдёӢе…¶е…·дҪ“е®һзҺ°дәҶгҖӮ
йҰ–е…ҲпјҢйҖҡиҝҮadb shellиҝӣе…ҘжүӢжңәпјҢ然еҗҺ第дёҖж¬Ўиҝӣе…Ҙеә”з”ЁпјҢеғҸеӣҫ1дёҖж ·пјҢдёҚзӮ№еҮ»жҢүй’®пјҢйҖҡиҝҮ ps | busybox grep ubuntu зңӢиҝҷдёӘеә”з”Ёзҡ„иҝӣзЁӢдҝЎжҒҜпјҢеҰӮдёӢеӣҫпјҡ

иҝҷдёӘж—¶еҖҷеҸӘжңү
u0_a108 2953 124 490956 47792 ffffffff 40052a40 S com.example.ubuntuforandroid
2953 иҝҷдёҖдёӘиҝӣзЁӢ
зӮ№еҮ» еҚёиҪҪеҗҺжҸҗзӨә жҢүй’®еҶҚж¬ЎпјҢжү§иЎҢеҲҡжүҚжү§иЎҢзҡ„psе‘Ҫд»ӨпјҢеҸ‘зҺ°е·Із»ҸжңүдёӨдёӘиҝӣзЁӢдәҶеҰӮдёӢеӣҫпјҡ

е…¶е®һж–°дә§з”ҹзҡ„иҝӣзЁӢжҳҜйҖҡиҝҮзЁӢеәҸи°ғз”ЁjniжҺҘеҸЈ
public static native int Reguninstall(String path,String url);
иҝҷдёӘжҺҘеҸЈforkдәҶдёҖдёӘиҝӣзЁӢпјҢиҖҢж–°forkзҡ„иҝӣзЁӢиҙҹиҙЈзӣ‘еҗ¬жң¬еә”з”ЁжҳҜеҗҰиў«еҚёиҪҪдәҶ
дәҢ жәҗз ҒеҲҶжһҗ
javaеұӮзҡ„д»Јз ҒеҰӮдёӢпјҢеҫҲз®ҖеҚ•пјҢе°ұжҳҜи°ғз”ЁдёҖдёӢjniжҺҘеҸЈ
protected void onCreate(Bundle savedInstanceState) {
super.onCreate(savedInstanceState);
setContentView(R.layout.activity_main);
initInjectFunction("testfile");
test = (TextView)this.findViewById(R.id.testview);
test.setText("зӮ№еҮ»еҚёиҪҪеҗҺжҸҗзӨәжҢүй’®пјҢдҪ зҡ„еә”з”ЁеңЁеҚёиҪҪд»ҘеҗҺдјҡи°ғз”ЁжөҸи§ҲеҷЁпјҢ然еҗҺи°ғз”ЁдҪ йңҖиҰҒзҡ„йЎөйқўгҖӮ");
btn = (Button)this.findViewById(R.id.testbtn);
btn.setOnClickListener(new View.OnClickListener() {
@Override
public void onClick(View v) {
// TODO Auto-generated method stub
String directory = MainActivity.this.getFilesDir().getAbsolutePath();
String url = "http://www.sohu.com/";
JniExec.Reguninstall(directory,url);
test.setText("зҺ°еңЁеҸҜд»ҘйҖҖеҮәеә”з”ЁпјҢ然еҗҺеҚёиҪҪеә”з”ЁпјҢзңӢзңӢжҳҜеҗҰжңүж•Ҳжһң");
}
});
}
дёҖзӣ®дәҶ然пјҢдёҚз”ЁеӨҡиЁҖдәҶ
зҺ°еңЁе°ұеҲҶжһҗ
package com.example.ubuntuforandroid;
public class JniExec {
    static {
        System.loadLibrary("uninstall");
    }

    public static native int Reguninstall(String path,String url);

}
Reguninstall иҝҷдёӘjniжҺҘеҸЈйҮҢйқўеҒҡдәҶд»Җд№ҲдәӢжғ…пјҢиғҪеӨҹиҫҫеҲ°зӣ‘еҗ¬жң¬иә«еә”з”ЁеҚёиҪҪзҡ„ж•ҲжһңгҖӮ
nativeд»Јз ҒеҲҶжһҗ
jint Java_com_example_ubuntuforandroid_JniExec_Reguninstall(JNIEnv* env, jobject thiz, jstring path,
jstring url)
{
LOGI("Java_com_example_ubuntuforandroid_JniExec_Reguninstall");
char *listenpath = (char*) (*env)->GetStringUTFChars(env,path, 0);
char *jumpurl = (char*) (*env)->GetStringUTFChars(env,url, 0);
LOGI("notify path is %s",listenpath);
LOGI("jumpurl is %s",jumpurl);
pid_t pid;
pid = fork();
if(pid == 0)
{
//еӯҗиҝӣзЁӢ
inotify_main(listenpath,jumpurl);
}
//зҲ¶иҝӣзЁӢдёҚйҳ»еЎһи°ғз”Ё waitpid ok еӯҗиҝӣзЁӢеҸҳжҲҗдәҶеӯӨе„ҝиҝӣзЁӢпјҢиў«initиҝӣзЁӢ收养дәҶ
pid = waitpid(-1,0,1);
LOGI("father bye bye");
return 0;
}
иҝҷдёӘжҺҘеҸЈйҮҢйқўжңҖе…ій”®зҡ„жҳҜи°ғз”ЁдәҶ inotify_main иҝҷдёӘеҮҪж•°гҖӮеҰӮжһңзңӢиҝҷж®өд»Јз ҒжҜ”иҫғиҙ№еҠӣзҡ„иҜқпјҢе»әи®®е…Ҳеј„жё…жҘҡlinux дёӢзҡ„forkжңәеҲ¶пјҢжҗһжё…жҘҡ еӯӨе„ҝиҝӣзЁӢ еғөе°ёиҝӣзЁӢиҝҷдәӣеҰӮдҪ•дә§з”ҹзҡ„жғ…еҶөгҖӮ
дёӢйқўзңӢ inotify_main иҝҷдёӘеҮҪж•°
void inotify_main(char *path,char *url)
{
struct pollfd poll_list[2];
poll_list[0].fd = inotify_init();
poll_list[0].events = POLLIN;
int wd = inotify_add_watch(poll_list[0].fd, path, IN_DELETE | IN_CREATE);
if(wd < 0) {
fprintf(stderr, "could not add watch for %s, %s\n", path, strerror(errno));
return ;
}
int retval;
while(1)
{
retval = poll(poll_list,(unsigned long)1,-1);
/* retval жҖ»жҳҜеӨ§дәҺ0жҲ–дёә-1пјҢеӣ дёәжҲ‘们еңЁйҳ»еЎһдёӯе·ҘдҪң */
LOGI("retval = %d\n",retval);
if(retval < 0)
{
fprintf(stderr,"pollй”ҷиҜҜ: %s/n",strerror(errno));
return;
}
if((poll_list[0].revents & POLLIN) == POLLIN)
{
LOGI("poll_list[0].revents&POLLIN\n");
inotify_handle(poll_list[0].fd,url);
}
}
inotify_rm_watch(poll_list[0].fd,wd);
}
иҝҷдёӘеҮҪж•°пјҢиҝҷйҮҢйқўз”ЁеҲ°дәҶ inotify_init inotify_add_watch inotify_rm_watch иҝҷеҮ дёӘlinuxжҺҘеҸЈпјҢиҝҷеҮ дёӘжҺҘеҸЈдё»иҰҒзҡ„дҪңз”Ёе°ұжҳҜзӣ‘еҗ¬жҢҮе®ҡзҡ„зӣ®еҪ•пјҢе…¶й…ҚеҗҲpollеҮҪж•°пјҢиғҪеӨҹзӣ‘еҗ¬зӣ®еҪ•дёӢзҡ„д»»дҪ•ж”№еҠЁпјҢеҪ“иҰҒзӣ‘еҗ¬зҡ„зӣ®еҪ•жңүд»»дҪ•ж”№еҠЁзҡ„ж—¶еҖҷпјҢдјҡи§ҰеҸ‘pollеҮҪж•°зҡ„ POLLIN жңүеҸҜиҜ»ж•°жҚ®еҲ°жқҘдәӢ件гҖӮ
еңЁжң¬еә”з”ЁдёӯпјҢзӣ‘еҗ¬зҡ„жҳҜ /data/data/com.example.ubuntuforandroid/files/ иҝҷдёӘзӣ®еҪ•пјҢеӣ дёәеңЁеҚёиҪҪзҡ„ж—¶еҖҷеҚёиҪҪзЁӢеәҸдјҡеҲ йҷӨзӣ‘еҗ¬зӣ®еҪ•зҡ„пјҢиҖҢforkеҮәжқҘзҡ„е®ҲжҠӨиҝӣзЁӢеҪ“еҸ‘зҺ°иҮӘиә«еә”з”Ёзҡ„зӣ®еҪ•иў«еҚёиҪҪзЁӢеәҸеҲ йҷӨдәҶд№ҹе°ұжҳҜеҚёиҪҪдәҶпјҢиҝҷдёӘж—¶еҖҷи°ғз”Ё inotify_handle иҝҷдёӘеҮҪж•°пјҢ然еҗҺи°ғз”Ё amе‘Ҫд»ӨеҗҜеҠЁжөҸи§ҲеҷЁпјҢи°ғз”ЁиҮӘе·ұйңҖиҰҒи°ғз”Ёз•ҢйқўгҖӮ
еҪ“然пјҢеңЁи°ғз”ЁamжҢҮд»Өд»ҘеҗҺпјҢи®°еҫ—иҮӘиә«е®ҲжҠӨиҝӣзЁӢзҡ„дҪҝе‘Ҫд№ҹе®ҢжҲҗдәҶпјҢйңҖиҰҒexitйҖҖеҮәдёҖдёӢгҖӮ
inotifyжҺҘеҸЈзҡ„з”ЁеӨ„еҫҲеӨҡпјҢжү©еұ•дёҖдёӢпјҢд№ҹеҸҜд»Ҙз”ЁдәҺе®ҲжҠӨиҝӣзЁӢпјҢжҜ”еҰӮAиҝӣзЁӢе’ҢBиҝӣзЁӢжҳҜе…ұз”ҹе…ұжӯ»зҡ„пјҢиҝҷйҮҢжңүдёҖз§Қе®һзҺ°зҡ„ж–№ејҸе°ұжҳҜ AиҝӣзЁӢз”Ёinotify зӣ‘еҗ¬ /proc/BиҝӣзЁӢidзӣ®еҪ•пјҢеҪ“BиҝӣзЁӢз»“жқҹзҡ„ж—¶еҖҷпјҢAиҝӣзЁӢе°ұиғҪзҹҘйҒ“BиҝӣзЁӢдёҚеңЁдәҶпјҢд»ҺиҖҢз»“жқҹиҮӘе·ұгҖӮ
дёҠж–ҮжҸҸиҝ°зҡ„е°ұжҳҜandroidзӣ‘еҗ¬еә”з”ЁжҳҜеҗҰиў«еҚёиҪҪзҡ„ж–№жі•пјҢе…·дҪ“дҪҝз”Ёжғ…еҶөиҝҳйңҖиҰҒеӨ§е®¶иҮӘе·ұеҠЁжүӢе®һйӘҢдҪҝз”ЁиҝҮжүҚиғҪйўҶдјҡгҖӮеҰӮжһңжғідәҶи§ЈжӣҙеӨҡзӣёе…іеҶ…е®№пјҢж¬ўиҝҺе…іжіЁдәҝйҖҹдә‘иЎҢдёҡиө„и®Ҝйў‘йҒ“пјҒ


