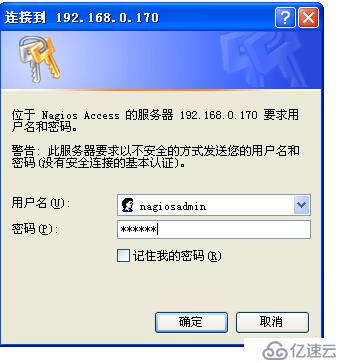
因为要登入nagios的web界面,所以要生成文件而且要指定登入的帐号:
htpasswd -c /usr/local/nagios/etc/htpasswd.users nagiosadmin
这里我们设置的密码是123456
注意:插件版本与nagios版本的关联并不大
tar zxvf nagios-plugins-1.4.15.tar.gz
cd nagios-plugins-1.4.15
./configure --with-nagios-user=nagios --with-nagios-group=nagios --enable-perl-modules
make && make install
5.安装nagios的中文汉化插件:
tar xvfj nagios-cn-3.2.0.tar.bz2
cd nagios-cn-3.2.0
./configure
make all
make install
这样nagios的web界面就是是中文了!!
6.设置apache的配置文件
vi /etc/httpd/conf/httpd.conf +231 //查看是否为apache用户
vi /etc/httpd/conf/httpd.conf +265 //在下面添加ServerName 127.0.0.1:80
然后找到
DirectoryIndex index.html index.html.var
修改为
DirectoryIndex index.html index.php
接着增加如下内容:
AddType application/x-httpd-php .php
7.启动apache服务器
service httpd start
8.配置nagios的配置文件:
#添加监控报警接收邮件
vi /usr/local/nagios/etc/objects/contacts.cfg +35
把nagios@localhost改成自己的邮箱fantefei@163.com
#修改nagios 的主配置文件nagios.cfg
#vi /usr/local/nagios/etc/nagios.cfg
去掉这几行前的#
cfg_file=/usr/local/nagios/etc/contactgroups.cfg //联系组配置文件路径
cfg_file=/usr/local/nagios/etc/contacts.cfg //联系人配置文件路径
cfg_file=/usr/local/nagios/etc/hostgroups.cfg //主机组配置文件路径
cfg_file=/usr/local/nagios/etc/hosts.cfg //主机配置文件路径
cfg_file=/usr/local/nagios/etc/services.cfg //服务配置文件路径
cfg_file=/usr/local/nagios/etc/timeperiods.cfg //监视时段配置文件路径
注释掉就说明不使用这个文件,去掉了注释就是需要使用这个文件.
改check_external_commands=0 为check_external_commands=1 .
这行的作用是允许在web 界面下执行重启nagios、停止主机/服务检查等操作。
把command_check_interval 的值从默认的1改成command_check_inte
rval=10s (根据自己的情况定这个命令检查时间间隔,不要太长也不要太短)。
主配置文件要改的基本上就是这些。
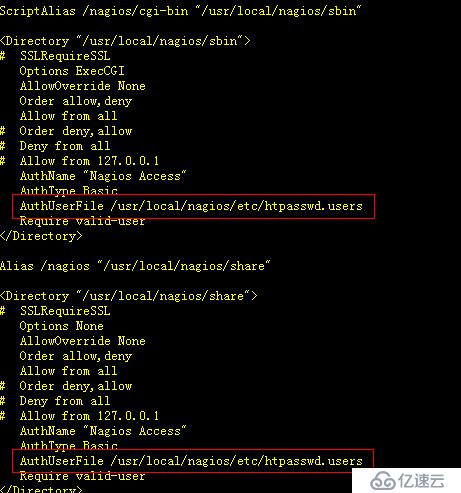
#修改CGI 脚本控制文件cgi.cfg
vi /usr/local/nagios/etc/objects/cgi.cfg
第二个要修改的配置文件是cgi.cfg,它的作用是控制相关cgi 脚本。先确保use
_authentication=1。曾看过不少的文章,都是建议把use_authentication
的值设置成”0”来取消验证,这是一个十分糟糕的想法。接下来修改default_u
ser_name=test ,再后面的修改在下表列出:
authorized_for_system_information=nagiosadmin,test
authorized_for_configuration_information=nagiosadmin,test
authorized_for_system_commands=nagiosadmin,test //多个用户之间用逗号隔开
authorized_for_all_services=nagiosadmin,test
authorized_for_all_hosts=nagiosadmin,test
authorized_for_all_service_commands=nagiosadmin,test
authorized_for_all_host_commands=nagiosadmin,test
那么上述用户名打那里来的呢?是执行命令/usr/local/apache/bin/htpass
wd /usr/local/nagios/etc/htpasswd test 所生成的,这个要注意,不能
随便加没有存在的验证用户,为了安全起见,不要添加过多的验证用户。
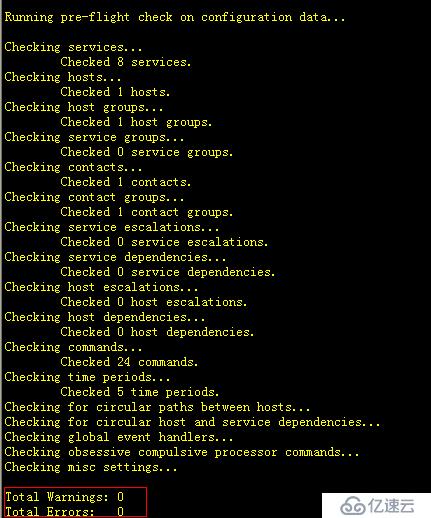
#检查nagios的配置文件是否正确
/usr/local/nagios/bin/nagios -v /usr/local/nagios/etc/nagios.cfg
如果看到下面的界面证明没有问题:
9.启动nagios
service nagios start
10.现在在浏览器里输入http://127.0.0.1/nagios
会看到如下的界面就证明启动成功了:

免责声明:本站发布的内容(图片、视频和文字)以原创、转载和分享为主,文章观点不代表本网站立场,如果涉及侵权请联系站长邮箱:is@yisu.com进行举报,并提供相关证据,一经查实,将立刻删除涉嫌侵权内容。


