看了一堆自动补齐的例子,大多都是只有前台没有后台,有后台也是在后台写死的数据,所以不具有真实的实用性,拿来学习还是可以的,但也是仅仅限于jquery的学习。
接下来我要写一个从后台数据库生成lucene索引文件,在struts2Action中查根据key值查询索引文件,获取到部分符合关键字(key值)的数据,通过json格式返回到前台页面,在使用jquery完成自动补齐的完整例子。
首先第一步从数据库中获取索引文件。
- package com.net263.boss.charge.action;
- import java.util.ArrayList;
- import java.util.List;
- import org.apache.log4j.Logger;
- import org.apache.lucene.analysis.standard.StandardAnalyzer;
- import org.apache.lucene.document.Document;
- import org.apache.lucene.document.Field;
- import org.apache.lucene.index.IndexWriter;
- import org.quartz.JobExecutionContext;
- import org.quartz.JobExecutionException;
- import org.springframework.scheduling.quartz.QuartzJobBean;
- import com.net263.boss.business.service.ICustomerService;
- public class CreateSearchIndex extends QuartzJobBean {
- /*
- * (non-Javadoc)
- *
- * @see
- * org.springframework.scheduling.quartz.QuartzJobBean#executeInternal(org
- * .quartz.JobExecutionContext)
- */
- private ICustomerService customerService;
- /**
- * @return the customerService
- */
- public ICustomerService getCustomerService() {
- return customerService;
- }
- /**
- * @param customerService the customerService to set
- */
- public void setCustomerService(ICustomerService customerService) {
- this.customerService = customerService;
- }
- private static Logger logger = Logger.getLogger(CreateSearchIndex.class);
- public void executeInternal(JobExecutionContext context)
- throws JobExecutionException {
- String path = this.getClass().getClassLoader().getResource("").getPath().replace(" ","\" \"")+"index";
- logger.info("begin...");
- //path=path.substring(1).trim();
- logger.info("index path is :"+path);
- List<String> list = new ArrayList<String>();
- IndexWriter writer;
- try {
- list = customerService.queryCustomerName();
- logger.info("get index successfully.");
- } catch (Exception e) {
- e.printStackTrace();
- }
- try {
- writer = new IndexWriter(path,new StandardAnalyzer(),true);
- for(String tempC : list)
- {
- if(tempC==null || "".equals(tempC))
- {
- continue;
- }
- else
- {
- Document docA = new Document();
- Field fieldA = new Field("content",tempC,Field.Store.YES,Field.Index.TOKENIZED);
- docA.add(fieldA);
- writer.addDocument(docA);
- }
- }
- //如果对海量数据进行创建索引的时候,需要对索引进行优化,以便提高速度
- writer.optimize();
- //跟数据库类似,打开一个连接,使用完后,要关闭它
- writer.close();
- logger.info("end...");
- } catch (Exception e) {
- e.printStackTrace();
- logger.info("error...");
- }
- }
- }
以上代码是通过Quartz来进行启动的,每分钟进行一次索引文件的同步。
配置文件如下:
- <bean id="jobCreateTask" class="org.springframework.scheduling.quartz.JobDetailBean">
- <property name="jobClass" value="com.net263.boss.charge.action.CreateSearchIndex"/>
- <property name="jobDataAsMap">
- <map>
- <entry key="customerService" value-ref="customerService"/>
- </map>
- </property>
- </bean>
- <bean id="CreateTasktrigger" class="org.springframework.scheduling.quartz.CronTriggerBean">
- <property name="jobDetail" ref="jobCreateTask"/>
- <property name="cronExpression" value="0 0/1 0-23 * * ?"/>
- </bean>
好了,创建索引文件就基本完成了啊。
下面,我们来通过Action获取到所需的自动补全信息。
- import java.util.ArrayList;
- import java.util.Date;
- import java.util.List;
- import net.sf.json.JSONArray;
- import org.apache.log4j.Logger;
- import org.apache.lucene.analysis.standard.StandardAnalyzer;
- import org.apache.lucene.queryParser.QueryParser;
- import org.apache.lucene.search.Hits;
- import org.apache.lucene.search.IndexSearcher;
- import org.apache.lucene.search.Query;
- import org.apache.struts2.json.annotations.JSON;
- import com.net263.boss.util.JsonUtils;
- import com.opensymphony.xwork2.ActionSupport;
- public class QueryCustomerNameAction extends ActionSupport {
- String path = this.getClass().getClassLoader().getResource("").getPath().replace(" ","\" \"")+"index";
- private String customerName;
- List<String> list =new ArrayList<String>();
- /**
- * @return the list
- */
- public List<String> getList() {
- return list;
- }
- /**
- * @param list the list to set
- */
- public void setList(List<String> list) {
- this.list = list;
- }
- private static final Logger LOGGER = Logger.getLogger(QueryCustomerNameAction.class);
- public void setKey(String customerName) {
- this.customerName = customerName;
- }
- public Query queryParser(String key){
- //content 为默认搜索的Field列名
- QueryParser queryParser = new QueryParser("content", new StandardAnalyzer());
- try {
- Query query = queryParser.parse(key);
- return query;
- } catch (Exception e) {
- e.printStackTrace();
- }
- return null;
- }
- public String searchName()
- {
- Date startTime,endTime;
- try {
- IndexSearcher search = new IndexSearcher(path);
- startTime = new Date();
- //抽象的查询对象
- if(customerName!=null && !("".equals(customerName)))
- {
- Query query = queryParser(customerName);
- //搜索结果集Hits
- Hits hits = search.search(query);
- for (int i = 0; i < hits.length(); i++) {
- int beginIndex=hits.doc(i).toString().indexOf(":");
- int endIndex=hits.doc(i).toString().indexOf(">");
- list.add(hits.doc(i).toString().substring(beginIndex+1, endIndex));
- System.out.println(hits.doc(i).toString().substring(beginIndex+1, endIndex));
- if(i>8)
- {
- break;
- }
- }
- }
- endTime = new Date();
- System.out.println("本次搜索用时:" + (endTime.getTime() - startTime.getTime()) + "毫秒");
- LOGGER.info("本次搜索用时:" + (endTime.getTime() - startTime.getTime()) + "毫秒");
- LOGGER.info("list:"+JsonUtils.listToJson(list));
- } catch (Exception e) {
- LOGGER.info("没有搜索到对应分词");
- //e.printStackTrace();
- }
- return "success";
- }
- }
这里面用到了struts2的json插件,这个插件很好用,它会把Action中所要返回的数据自动封装成json格式的,本例子中需要返回list,就会讲list中存放的数据json化。
需要特别提示的是:
- <package name="searchname" namespace="/business/customer" extends="json-default">
- <action name="search" class="com.net263.boss.business.action.QueryCustomerNameAction" method="searchName">
- <!-- 返回List对象的-->
- <result name="success" type="json">
- <param name="root">list</param>
- </result>
- </action>
- </package>
需要继承json-default
这样,我们的后台基本就写完了。现在总结一下:后台主要完成的功能就是数据库到索引文件的同步和通过key查询索引文件返回json结果集的这么一个过程。
最后,我们来写前台jquery,这个大部分例子有用了,我就不再详细叙述了,只把代码贴出来。还要说明一点,大多数例子所捕获的键盘信息严重不足,我多加捕获了一些,包括输入汉字时输入法前的数字1-5,当然可以捕获更多。
- var highlightindex =-1;
- $(document).ready(function() {
- var wordInput=$("#customerName");
- var wordInputOffset=wordInput.offset();
- var auto=$("#autoComplete").hide().css("border","3px white solid").css("background-color" ,"white")
- .css("position","absolute")
- .css("top",wordInputOffset.top+wordInput.height()+12+"px")
- .css("left",wordInputOffset.left+"px").width(wordInput.width()+6);
- wordInput.keyup(function(event){
- var myEvent =event || window.event;
- var keyCode = myEvent.keyCode;
- var wordText =$("#customerName").val();
- var actionurl="search.action";
- if(keyCode>=65 && keyCode<=90 ||keyCode==8 || keyCode==46 || keyCode==32 || keyCode==49 || keyCode==50 || keyCode==51 || keyCode==52 || keyCode==53)
- {
- if(wordText != ""){
- $.ajax({
- url : actionurl,
- data : {key : wordText},
- type : 'POST',
- dataType : 'json',
- success : function(data) {
- $(auto).empty();
- $.each(data,function(index,term){
- var newDwNode = $("<div>").attr("id",index);
- newDwNode.html(term).appendTo(auto);
- //鼠标移入
- newDwNode.mouseover(function(){
- if (highlightindex != -1) {
- var autoNodes = $(auto).children("div");
- autoNodes.eq(highlightindex).css("background-color" ,"white").css("font-weight","normal");
- }
- highlightindex = $(this).attr("id");
- $(this).css("background-color","#CCCCFF").css("font-weight", "800");
- });
- //鼠标移出
- newDwNode.mouseout(function(){
- $(this).css("background-color" ,"white").css("font-weight","normal");
- });
- //鼠标单击
- newDwNode.click(function(){
- var dataText = $(this).text();
- wordInput.val(dataText);
- $(auto).hide();
- });
- });
- if(data.length>0)
- {
- $(auto).show();
- }
- else
- {
- $(auto).hide();
- parseInt(highlightindex) =-1;
- }
- }
- });
- }
- else
- {
- $(auto).hide();
- parseInt(highlightindex) =-1;
- }
- }
- else if(keyCode==38 || keyCode==40)
- {
- if(keyCode==38)//向上
- {
- var autoNodes = $(auto).children("div");
- if (highlightindex!= -1) {
- autoNodes.eq(highlightindex).css("background-color" ,"white").css("font-weight","normal");
- highlightindex=highlightindex-1;
- } else {
- parseInt(highlightindex)=autoNodes.length-1;
- }
- if (highlightindex == -1) {
- highlightindex=autoNodes.length-1;
- }
- var dataText = autoNodes.eq(highlightindex).css("background-color","#CCCCFF").css("font-weight", "800").text();
- wordInput.val(dataText);
- }
- if(keyCode==40)//向下
- {
- var autoNodes = $(auto).children("div");
- if (parseInt(highlightindex) != -1) {
- autoNodes.eq(highlightindex).css("background-color" ,"white").css("font-weight","normal");
- }
- highlightindex=parseInt(highlightindex)+1;
- if (highlightindex == autoNodes.length) {
- highlightindex=0;
- }
- var dataText = autoNodes.eq(highlightindex).css("background-color","#CCCCFF").css("font-weight", "800").text();
- wordInput.val(dataText);
- }
- }else if(keyCode==13)//回车
- {
- $(auto).hide();
- highlightindex =-1;
- }
- })
- })
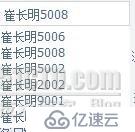
最后显示效果如下:
免责声明:本站发布的内容(图片、视频和文字)以原创、转载和分享为主,文章观点不代表本网站立场,如果涉及侵权请联系站长邮箱:is@yisu.com进行举报,并提供相关证据,一经查实,将立刻删除涉嫌侵权内容。


