小编给大家分享一下怎么制作HTML登录页面,希望大家阅读完这篇文章后大所收获,下面让我们一起去探讨吧!
制作登录页面需要用到很多CSS属性和HTML标签,如有不清楚的同学可以看看我以前的文章,之前都有介绍过,或者访问CSS视频教程, HTML视频教程,这些都是基础,一定要掌握。
实例:制作一个HTML登录页面,包含邮箱,登录密码,立即注册,忘记密码等,代码如下:
HTML部分:
<div class="dowebok">
         <div class="logo"></div>
         <div class="form-item">
             <input id="username" type="text" autocomplete="off" placeholder="邮箱">
         </div>
         <div class="form-item">
             <input id="password" type="password" autocomplete="off" placeholder="登录密码">
         </div>
         <div class="form-item"><button id="submit">登 录</button></div>
         <div class="reg-bar">
             <a class="reg" href="javascript:">立即注册</a>
             <a class="forget" href="javascript:">忘记密码</a>
         </div>
     </div>
CSS部分:
* { margin: 0; padding: 0; }
         html { height: 100%; }
         body { height: 100%; background: #fff url(img/backgroud.png) 50% 50% no-repeat; background-size: cover;}
         .dowebok { position: absolute; left: 50%; top: 50%; width: 430px; height: 550px; margin: -300px 0 0 -215px; border: 1px solid #fff; border-radius: 20px; overflow: hidden;}
         .logo { width: 104px; height: 104px; margin: 50px auto 80px; background: url(img/login.png) 0 0 no-repeat; }
         .form-item { position: relative; width: 360px; margin: 0 auto; padding-bottom: 30px;}
         .form-item input { width: 288px; height: 48px; padding-left: 70px; border: 1px solid #fff; border-radius: 25px; font-size: 18px; color: #fff; background-color: transparent; outline: none;}
         .form-item button { width: 360px; height: 50px; border: 0; border-radius: 25px; font-size: 18px; color: #1f6f4a; outline: none; cursor: pointer; background-color: #fff; }
         #username { background: url(img/emil.png) 20px 14px no-repeat; }
         #password { background: url(img/password.png) 23px 11px no-repeat; }
         .tip { display: none; position: absolute; left: 20px; top: 52px; font-size: 14px; color: #f50; }
         .reg-bar { width: 360px; margin: 20px auto 0; font-size: 14px; overflow: hidden;}
         .reg-bar a { color: #fff; text-decoration: none; }
         .reg-bar a:hover { text-decoration: underline; }
         .reg-bar .reg { float: left; }
         .reg-bar .forget { float: right; }
         .dowebok ::-webkit-input-placeholder { font-size: 18px; line-height: 1.4; color: #fff;}
         .dowebok :-moz-placeholder { font-size: 18px; line-height: 1.4; color: #fff;}
         .dowebok ::-moz-placeholder { font-size: 18px; line-height: 1.4; color: #fff;}
         .dowebok :-ms-input-placeholder { font-size: 18px; line-height: 1.4; color: #fff;}

         @media screen and (max-width: 500px) {
             * { box-sizing: border-box; }
             .dowebok { position: static; width: auto; height: auto; margin: 0 30px; border: 0; border-radius: 0; }
             .logo { margin: 50px auto; }
             .form-item { width: auto; }
             .form-item input, .form-item button, .reg-bar { width: 100%; }
         }
效果如图所示:
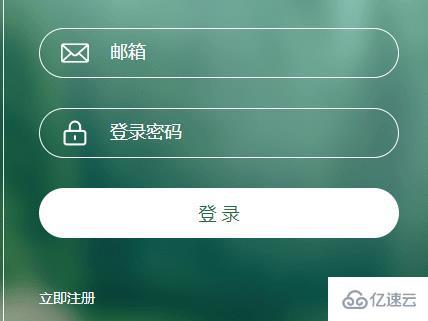
看完了这篇文章,相信你对怎么制作HTML登录页面有了一定的了解,想了解更多相关知识,欢迎关注亿速云行业资讯频道,感谢各位的阅读!
免责声明:本站发布的内容(图片、视频和文字)以原创、转载和分享为主,文章观点不代表本网站立场,如果涉及侵权请联系站长邮箱:is@yisu.com进行举报,并提供相关证据,一经查实,将立刻删除涉嫌侵权内容。


