在windows server 2012下安装Exchange 2013:
1) 系统组件准备(在Windows Server 2012 PowerShell中执行如下命令)
Install-WindowsFeature AS-HTTP-Activation, Desktop-Experience, NET-Framework-45-Features, RPC-over-HTTP-proxy, RSAT-Clustering, RSAT-Clustering-CmdInterface, Web-Mgmt-Console, WAS-Process-Model, Web-Asp-Net45, Web-Basic-Auth, Web-Client-Auth, Web-Digest-Auth, Web-Dir-Browsing, Web-Dyn-Compression, Web-Http-Errors, Web-Http-Logging, Web-Http-Redirect, Web-Http-Tracing, Web-ISAPI-Ext, Web-ISAPI-Filter, Web-Lgcy-Mgmt-Console, Web-Metabase, Web-Mgmt-Console, Web-Mgmt-Service, Web-Net-Ext45, Web-Request-Monitor, Web-Server, Web-Stat-Compression, Web-Static-Content, Web-Windows-Auth, Web-WMI, Windows-Identity-Foundation,RSAT-ADDS –Restart
2) 软件准备
在安装操作系统角色和功能后,安装以下软件:
◆ Microsoft Unified Communications Managed API 4.0, Core Runtime 64bit (http://www.microsoft.com/en-us/download/details.aspx?id=34992)
install the Unified Communications Managed API 4.0:
Start-BitsTransfer -Source http://download.microsoft.com/download/2/C/4/2C47A5C1-A1F3-4843-B9FE-84C0032C61EC/UcmaRuntimeSetup.exe -Destination c:\temp
c:\temp\UcmaRuntimeSetup.exe /q
3.PrepareAD
Setup.exe /PrepareSchema /IacceptExchangeServerLicenseTerms
Setup.exe /PrepareAD /OrganizationName:NBIS /IacceptExchangeServerLicenseTerms
Setup.exe /PrepareDomain /IAcceptExchangeServerLicenseTerms
4. Install exchange 2013
Setup.exe /Mode:Install /Roles:Mailbox,ClientAccess /Mdbname:MDB01 /DbFilePath D:\Exchange\MDB01\DBFiles\MDB01.edb /LogFolderPath D:\Exchange\MDB01\LogFiles /IacceptExchangeServerLicenseTerm
5. Post-Installation Tasks:
1) Creating accepted domains
New-AcceptedDomain –Name aplusnb -DomainName aplusnb.com -DomainType Authoritative
2) Creating an email address policy
New-EmailAddressPolicy –Name aplusnb -IncludedRecipients AllRecipients -EnabledEmailAddressTemplates "SMTP:@aplusnb.com"
Update-EmailAddressPolicy -Identity aplusnb
3)Configuring connectors
1. Send Connector:
New-SendConnector -Name "To Internet Send Connector" -Internet -AddressSpaces "*" -DNSRoutingEnabled:$TRUE -SourceTransportServers "NIP-Exch35"
4) Configuring SSL certificates
$Data = New-ExchangeCertificate -FriendlyName "aplusnb SSL Certificate" -GenerateRequest -SubjectName "c=CN, o=aplusnb, cn=mail.aplusnb.com" -DomainName mail.aplusnb.com,autodiscover.aplusnb.com,ca.aplusnb.com,aplusnb.com,mail.nipc.com.cn,autodiscover.nipc.com.cn,nip-exch35.nipc.com.cn,nip-exch08.nipc.com.cn,localhost,nip-exch75.nipc.com.cn,mx1.nipc.com.cn,exchange.nipc.com.cn,mail.nip.com.cn,mx1.nip.com.cn,autodiscover.nip.com.cn,exchange.nip.com.cn,nip-exch08.nipc.bid,nip-exch35.nipc.bid,nip-exch75.nipc.bid,mail.nipc.bid,nipc.bid,autodiscover.nipc.bid -PrivateKeyExportable $true
Set-Content -path "\\NIP-Exch35\C$\SSLCertRequest.req" -Value $Data
You can use the contents of the SSLCertRequest.req file to request an SSL certificate from a certificate authority (CA),open web: http://NIP-S-CA/Certsrv To Request an SSL Certificate and save to \\NIP-Exch35\C$\Excertnew.cer
Import-ExchangeCertificate –Server NIP-Exch35 -FileData ([Byte[]]$(Get-Content -Path "\\NIP-Exch35\C$\Excertnew.cer" -Encoding byte -ReadCount 0)) | Enable-ExchangeCertificate -Server NIP-Exch35 -Services "IIS,POP,IMAP,SMTP"
5)Configuring Outlook Anywhere
Get-OutlookAnywhere -Server NIP-Exch35 | Set-OutlookAnywhere -ExternalHostname mail.aplusnb.com -ExternalClientsRequireSsl:$true -ExternalClientAuthenticationMethod:Basic -InternalHostName NIP-Exch35.nipc.com.cn -InternalClientsRequireSsl:$true -InternalClientAuthenticationMethod:Basic
6)Enabling MapiHttp
MapiHttp is the new protocol for Outlook that was introduced in Exchange 2013 SP1. For Outlook, you need to use Outlook 2013 SP1 as well,To enable MapiHttp for Exchange 2013 SP1:
Set-OrganizationConfig -MapiHttpEnabled $true
that it can take up to three hours for the changes to take effect
Enable imap4 and pop3
Set-ADServerSettings -PreferredServer "NIP-DC05.nipc.com.cn"
[PS] C:\Windows\system32>Set-ExchangeServer -Identity NIP-Exch08 -StaticGlobalCatalogs "NIP-DC05.nipc.com.cn,NOS-S-DC01.nipc.com.cn" -StaticDomainControllers "NIP-DC05.nipc.com.cn,NOS-S-DC01.nipc.com.cn" -StaticConfigDomainController "NIP-D
C05.nipc.com.cn"
get-exchangeserver -identity NIP-Exch08 -status | fl current,static
混合部署:https://support.office.com/zh-cn/article/%E4%BD%BF%E7%94%A8%E7%94%B1%E4%B8%96%E7%BA%AA%E4%BA%92%E8%81%94%E8%BF%90%E8%90%A5%E7%9A%84-office-365-%E9%85%8D%E7%BD%AE-exchange-%E6%B7%B7%E5%90%88%E9%83%A8%E7%BD%B2%E5%8A%9F%E8%83%BD-26e7cc26-c980-4cc5-a082-c333de544b6d?ui=zh-CN&rs=zh-CN&ad=CN
对于此过程,您必须为您的 Exchange Online 组织指定一个经过验证的域。 此域应与基于云的电子邮件帐户使用的主 SMTP 域是同一个域。 此域在以下过程中称为 <您的经过验证的域>。
在您的本地 Exchange 组织中在 Exchange 命令行管理程序中运行以下命令。
New-AuthServer -Name "MicrosoftAzureACS" -AuthMetadataUrl https://accounts.accesscontrol.chinacloudapi.cn/<your verified-domain>/metadata/json/1
New-AuthServer -Name "MicrosoftAzureACS" -AuthMetadataUrl https://accounts.accesscontrol.chinacloudapi.cn/aplusnb.com/metadata/json/1

在您的本地 Exchange 组织中在 Exchange PowerShell 中运行以下命令。
Get-PartnerApplication | ?{$_.ApplicationIdentifier -eq "00000002-0000-0ff1-ce00-000000000000"-and $_.Realm -eq ""} | Set-PartnerApplication -Enabled $true

在此步骤中,您必须运行 PowerShell 脚本导出本地授权证书,该证书随后在下一步骤中将导入您的 Exchange Online 组织中。
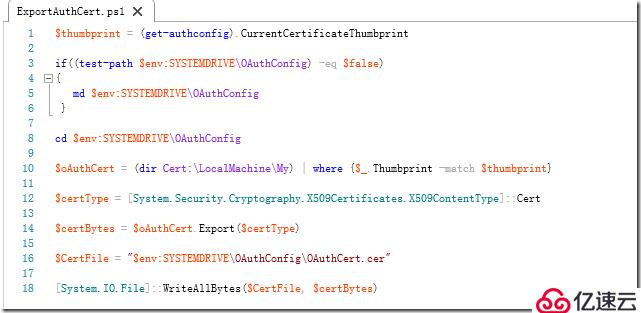
将以下文本保存到一个 PowerShell 脚本文件中,例如将脚本文件命名为 ExportAuthCert.ps1。
$thumbprint = (get-authconfig).CurrentCertificateThumbprint
if((test-path $env:SYSTEMDRIVE\OAuthConfig) -eq $false)
{
md $env:SYSTEMDRIVE\OAuthConfig
}
cd $env:SYSTEMDRIVE\OAuthConfig
$oAuthCert = (dir Cert:\LocalMachine\My) | where {$_.Thumbprint -match $thumbprint}
$certType = [System.Security.Cryptography.X509Certificates.X509ContentType]::Cert
$certBytes = $oAuthCert.Export($certType)
$CertFile = "$env:SYSTEMDRIVE\OAuthConfig\OAuthCert.cer"
[System.IO.File]::WriteAllBytes($CertFile, $certBytes)
在您的本地 Exchange 组织中在 Exchange PowerShell 中运行在上一步骤中创建的 PowerShell 脚本。例如:
.\ExportAuthCert.ps1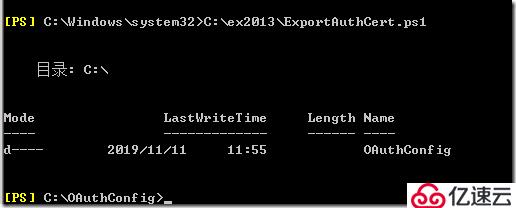
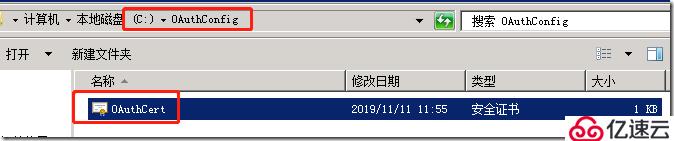
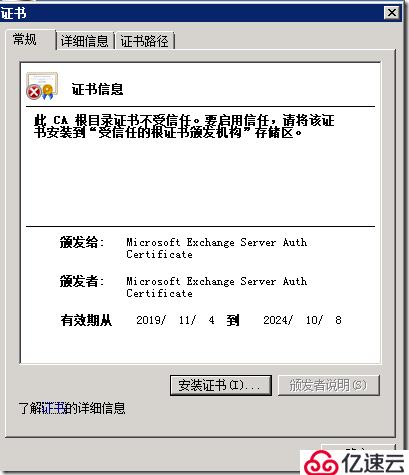
导出的证书:
您必须使用 Windows PowerShell 将在上一步中导出的本地授权证书上载到 Microsoft Azure Active Directory 访问控制服务 (ACS)。为此,必须安装用于 Windows PowerShell cmdlet 的 Microsoft Azure Active Directory (AD) 模块。
安装 Microsoft Azure AD 模块:https://www.microsoft.com/zh-CN/download/details.aspx?id=41950
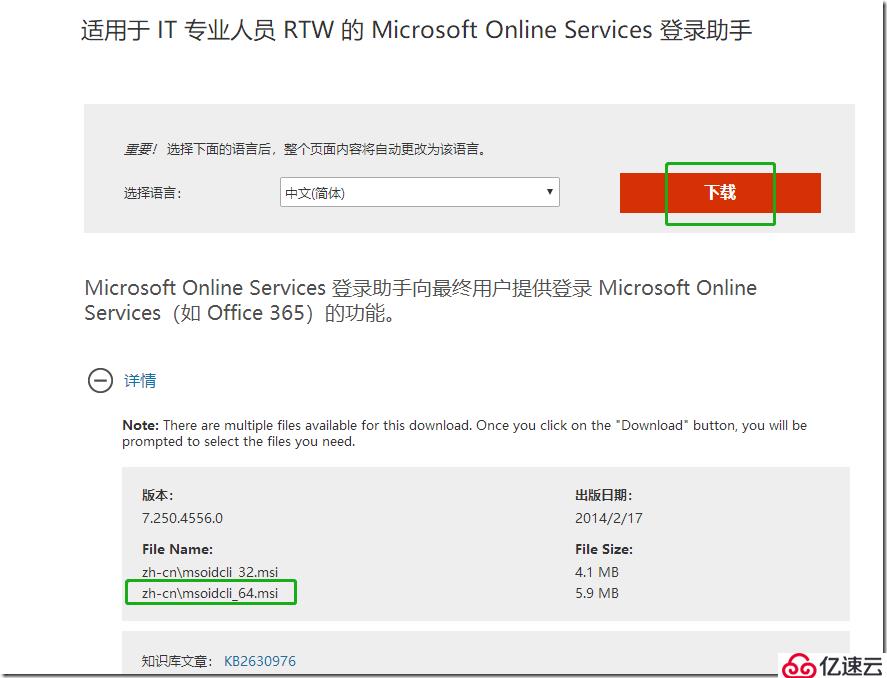
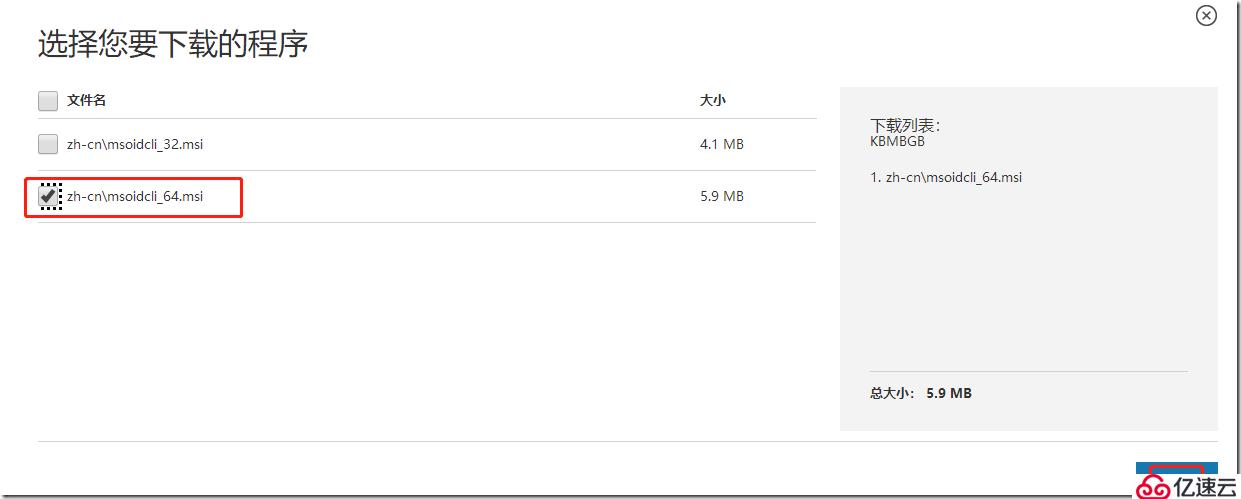
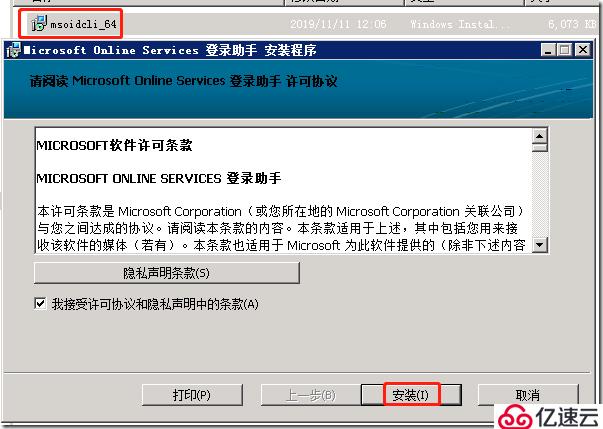
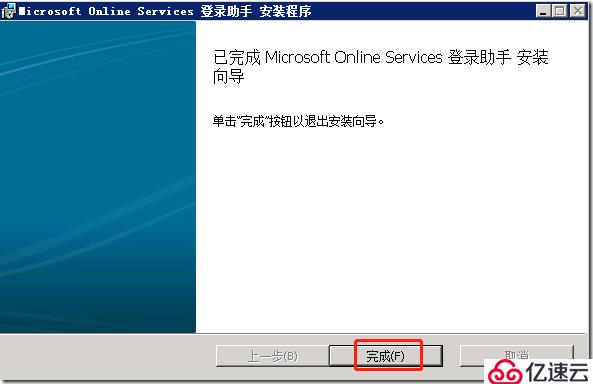
install the Microsoft Online Services Sign-In Assistant for IT Professionals RTW from the Microsoft Download Center. Then install the Azure Active Directory Module for Windows PowerShell (64-bit version), and click Run to run the installer package.
单击用于 Windows PowerShell 的 Microsoft AzureActive Directory 模块的快捷方式,以打开已安装 Microsoft Azure AD cmdlet 的 Windows PowerShell 工作区。此步骤中的所有命令都将通过用于 Microsoft Azure Active Directory 的 Windows PowerShell 控制台运行。
安装用于 Windows PowerShell 的 Microsoft Azure Active Directory 模块,具体步骤如下:
Install-Module MSOnline
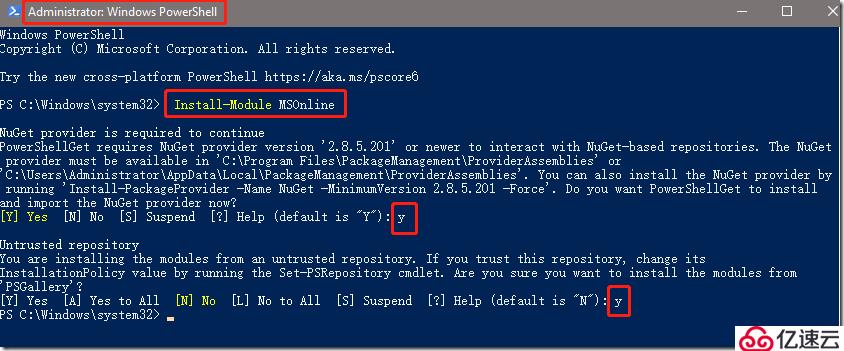
Connect-MsolService -AzureEnvironment AzureChinaCloud
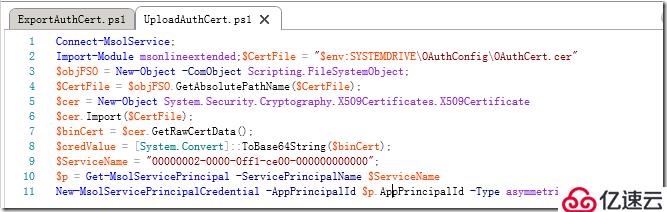
将以下文本保存到一个 PowerShell 脚本文件中,例如将脚本文件命名为 UploadAuthCert.ps1:
UploadAuthCert.ps1:
Connect-MsolService -AzureEnvironment AzureChinaCloud;
Import-Module msonlineextended;$CertFile = "$env:SYSTEMDRIVE\OAuthConfig\OAuthCert.cer"
$objFSO = New-Object -ComObject Scripting.FileSystemObject;
$CertFile = $objFSO.GetAbsolutePathName($CertFile);
$cer = New-Object System.Security.Cryptography.X509Certificates.X509Certificate
$cer.Import($CertFile);
$binCert = $cer.GetRawCertData();
$credValue = [System.Convert]::ToBase64String($binCert);
$ServiceName = "00000002-0000-0ff1-ce00-000000000000";
$p = Get-MsolServicePrincipal -ServicePrincipalName $ServiceName
New-MsolServicePrincipalCredential -AppPrincipalId $p.AppPrincipalId -Type asymmetric -Usage Verify -Value $credValue
免责声明:本站发布的内容(图片、视频和文字)以原创、转载和分享为主,文章观点不代表本网站立场,如果涉及侵权请联系站长邮箱:is@yisu.com进行举报,并提供相关证据,一经查实,将立刻删除涉嫌侵权内容。


