SpringbootдёӯеҰӮдҪ•ж•ҙеҗҲActivemq
жң¬зҜҮеҶ…е®№д»Ӣз»ҚдәҶвҖңSpringbootдёӯеҰӮдҪ•ж•ҙеҗҲActivemqвҖқзҡ„жңүе…ізҹҘиҜҶпјҢеңЁе®һйҷ…жЎҲдҫӢзҡ„ж“ҚдҪңиҝҮзЁӢдёӯпјҢдёҚе°‘дәәйғҪдјҡйҒҮеҲ°иҝҷж ·зҡ„еӣ°еўғпјҢжҺҘдёӢжқҘе°ұи®©е°Ҹзј–еёҰйўҶеӨ§е®¶еӯҰд№ дёҖдёӢеҰӮдҪ•еӨ„зҗҶиҝҷдәӣжғ…еҶөеҗ§пјҒеёҢжңӣеӨ§е®¶д»”з»Ҷйҳ…иҜ»пјҢиғҪеӨҹеӯҰжңүжүҖжҲҗпјҒ
1 еҜје…Ҙж•ҙеҗҲжүҖйңҖиҰҒзҡ„дҫқиө–пјҡ
<dependency>
      <groupId>org.springframework.boot</groupId>
      <artifactId>spring-boot-starter-activemq</artifactId>
    </dependency>
2 еҲӣе»әapplication.propertiesж–Ү件
spring.activemq.broker-url=tcp://127.0.0.1:61616
spring.activemq.user=admin
spring.activemq.password=admin
server.port=8080
queue=myqueue
3.иҮӘе®ҡд№үй…ҚзҪ®ж–Ү件QueueConfig иҜ»еҸ–й…ҚзҪ®ж–Ү件зҡ„йҳҹеҲ—еҗҚпјҢж №жҚ®йҳҹеҲ—еҗҚеӯ—еҲӣе»әдёҖдёӘQueue
package com.example.demo;

import javax.jms.Queue;

import org.apache.activemq.ActiveMQConnectionFactory;
import org.apache.activemq.command.ActiveMQQueue;
import org.springframework.beans.factory.annotation.Value;
import org.springframework.context.annotation.Bean;
import org.springframework.context.annotation.Configuration;
import org.springframework.jms.config.DefaultJmsListenerContainerFactory;
import org.springframework.jms.core.JmsTemplate;

@Configuration
public class QueueConfig {

  @Value("${queue}")
  private String queue;

  @Bean
  public Queue logQueue() {
    return new ActiveMQQueue(queue);
}}4.еҲӣе»әз”ҹдә§иҖ…пјҢеҸҜд»ҘзӣҙжҺҘдҪҝз”ЁжҸҗдҫӣзҡ„жЁЎжқҝJmsMessagingTemplate иҝӣиЎҢж¶ҲжҒҜзҡ„еҸ‘йҖҒпјҡ
package com.example.demo.producter;
import javax.jms.Queue;
import org.slf4j.Logger;
import org.slf4j.LoggerFactory;
import org.springframework.beans.factory.annotation.Autowired;
import org.springframework.jms.core.JmsMessagingTemplate;
import org.springframework.stereotype.Component;
import com.example.demo.SpringbootActivemqApplication;
@Component
public class Producter {
@Autowired
private JmsMessagingTemplate jmsMessagingTemplate;
@Autowired
private Queue queue;
private static Logger logger = LoggerFactory.getLogger(
Producter
.class); public void send() { String str = "з”ҹдә§иҖ…з”ҹдә§ж•°жҚ®пјҡ" + System.currentTimeMillis(); jmsMessagingTemplate.convertAndSend(queue, str); logger.info("з”ҹдә§иҖ…ж•°жҚ®:{}", str); } }5.еҗҜеҠЁзұ»пјҡ
package com.example.demo;
import org.springframework.beans.factory.annotation.Autowired;
import org.springframework.boot.SpringApplication;
import org.springframework.boot.autoconfigure.SpringBootApplication;
import org.springframework.context.ApplicationListener;
import org.springframework.context.event.ContextRefreshedEvent;
import org.springframework.scheduling.annotation.EnableScheduling;
import com.example.demo.producter.Producter;
import com.example.demo.producter.consumer.Consumer;
@SpringBootApplication
@EnableScheduling
public class SpringbootActivemqApplication implements ApplicationListener<ContextRefreshedEvent> {
@Autowired
public Producter producter;
@Autowired
public Consumer consumer;
public static void main(String[] args) {
SpringApplication.run(SpringbootActivemqApplication.class, args);
//onApplicationEventж–№жі• еңЁеҗҜеҠЁspringbootзҡ„ж—¶еҖҷ дјҡиҝҗиЎҢиҜҘж–№жі•,еҸҜж №жҚ®йЎ№зӣ®е®һйҷ…жғ…еҶө йҖүжӢ©еҗҲйҖӮи°ғз”Ёж¶ҲжҒҜеҸ‘йҖҒж–№жі•
}
@Override
public void onApplicationEvent(ContextRefreshedEvent event) {
producter.send();
}
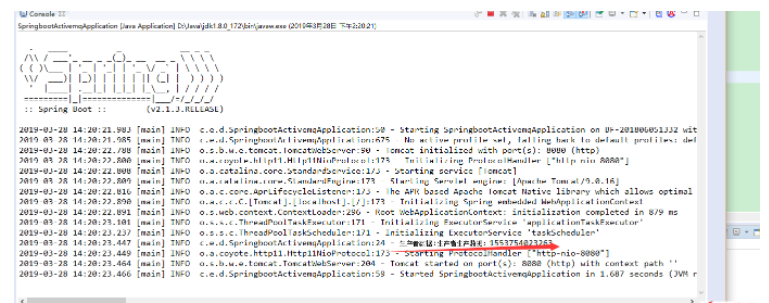
}6.еҗҜеҠЁйЎ№зӣ®,жҺ§еҲ¶еҸ°иҫ“еҮәеҶ…е®№пјҡ
7.еҲӣе»әж¶Ҳиҙ№иҖ…пјҢеҲӣе»әж¶Ҳиҙ№иҖ…жҜ”иҫғе®№жҳ“пјҢеҸӘйңҖиҰҒзӣ‘еҗ¬йҳҹеҲ—е°ұеҸҜд»Ҙпјҡ
package com.example.demo.producter.consumer;
import org.springframework.jms.annotation.JmsListener;
import org.springframework.stereotype.Component;
@Component
public class Consumer {
@JmsListener(destination = "${queue}")
public void receive(String msg) {
System.out.println("зӣ‘еҗ¬еҷЁж”¶еҲ°msg:" + msg);
}
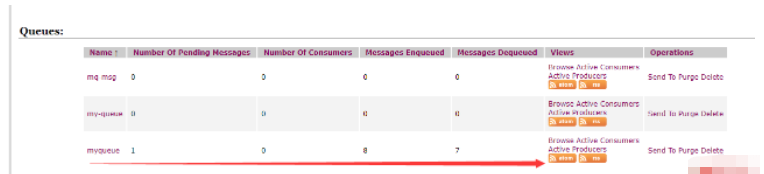
}8.жңҖеҗҺз»“жһңпјҡ

вҖңSpringbootдёӯеҰӮдҪ•ж•ҙеҗҲActivemqвҖқзҡ„еҶ…е®№е°ұд»Ӣз»ҚеҲ°иҝҷйҮҢдәҶпјҢж„ҹи°ўеӨ§е®¶зҡ„йҳ…иҜ»гҖӮеҰӮжһңжғідәҶи§ЈжӣҙеӨҡиЎҢдёҡзӣёе…ізҡ„зҹҘиҜҶеҸҜд»Ҙе…іжіЁдәҝйҖҹдә‘зҪ‘з«ҷпјҢе°Ҹзј–е°ҶдёәеӨ§е®¶иҫ“еҮәжӣҙеӨҡй«ҳиҙЁйҮҸзҡ„е®һз”Ёж–Үз« пјҒ


