mlflow的搭建使用是怎样的,相信很多没有经验的人对此束手无策,为此本文总结了问题出现的原因和解决方法,通过这篇文章希望你能解决这个问题。
mlflow是Databrick开源的机器学习管理平台,它很好的解藕了算法训练和算法模型服务,使得算法工程师专注于模型的训练,而不需要过多的关注于服务的,
而且在我们公司已经有十多个服务稳定运行了两年多。
mlflow的搭建主要是mlflow tracking server的搭建,tracking server主要是用于模型的元数据以及模型的数据存储
我们这次以minio作为模型数据的存储后台,mysql作为模型元数据的存储,因为这种模式能满足线上的需求,不仅仅是用于测试
minio的搭建
MinIO的搭建使用,并且创建名为mlflow的bucket,便于后续操作
mlflow的搭建
# 创建conda环境 并安装 python 3.6
conda create -n mlflow-1.11.0 python==3.6
#激活conda环境
conda activate mlflow-1.11.0
# 安装mlfow tracking server python需要的依赖包
pip install mlflow==1.11.0
pip install mysqlclient
pip install boto3
暴露出minio url以及需要的ID和KEY,因为mlflow tracking server在上传模型文件时需要
export AWS_ACCESS_KEY_ID=AKIAIOSFODNN7EXAMPLE
export AWS_SECRET_ACCESS_KEY=wJalrXUtnFEMI/K7MDENG/bPxRfiCYEXAMPLEKEY
export MLFLOW_S3_ENDPOINT_URL=http://localhost:9001
mlflow server \
   --backend-store-uri mysql://root:AO,h07ObIeH-@localhost/mlflow_test \
   --host 0.0.0.0 -p 5002 \
   --default-artifact-root s3://mlflow
访问localhost:5002, 就能看到如下界面:
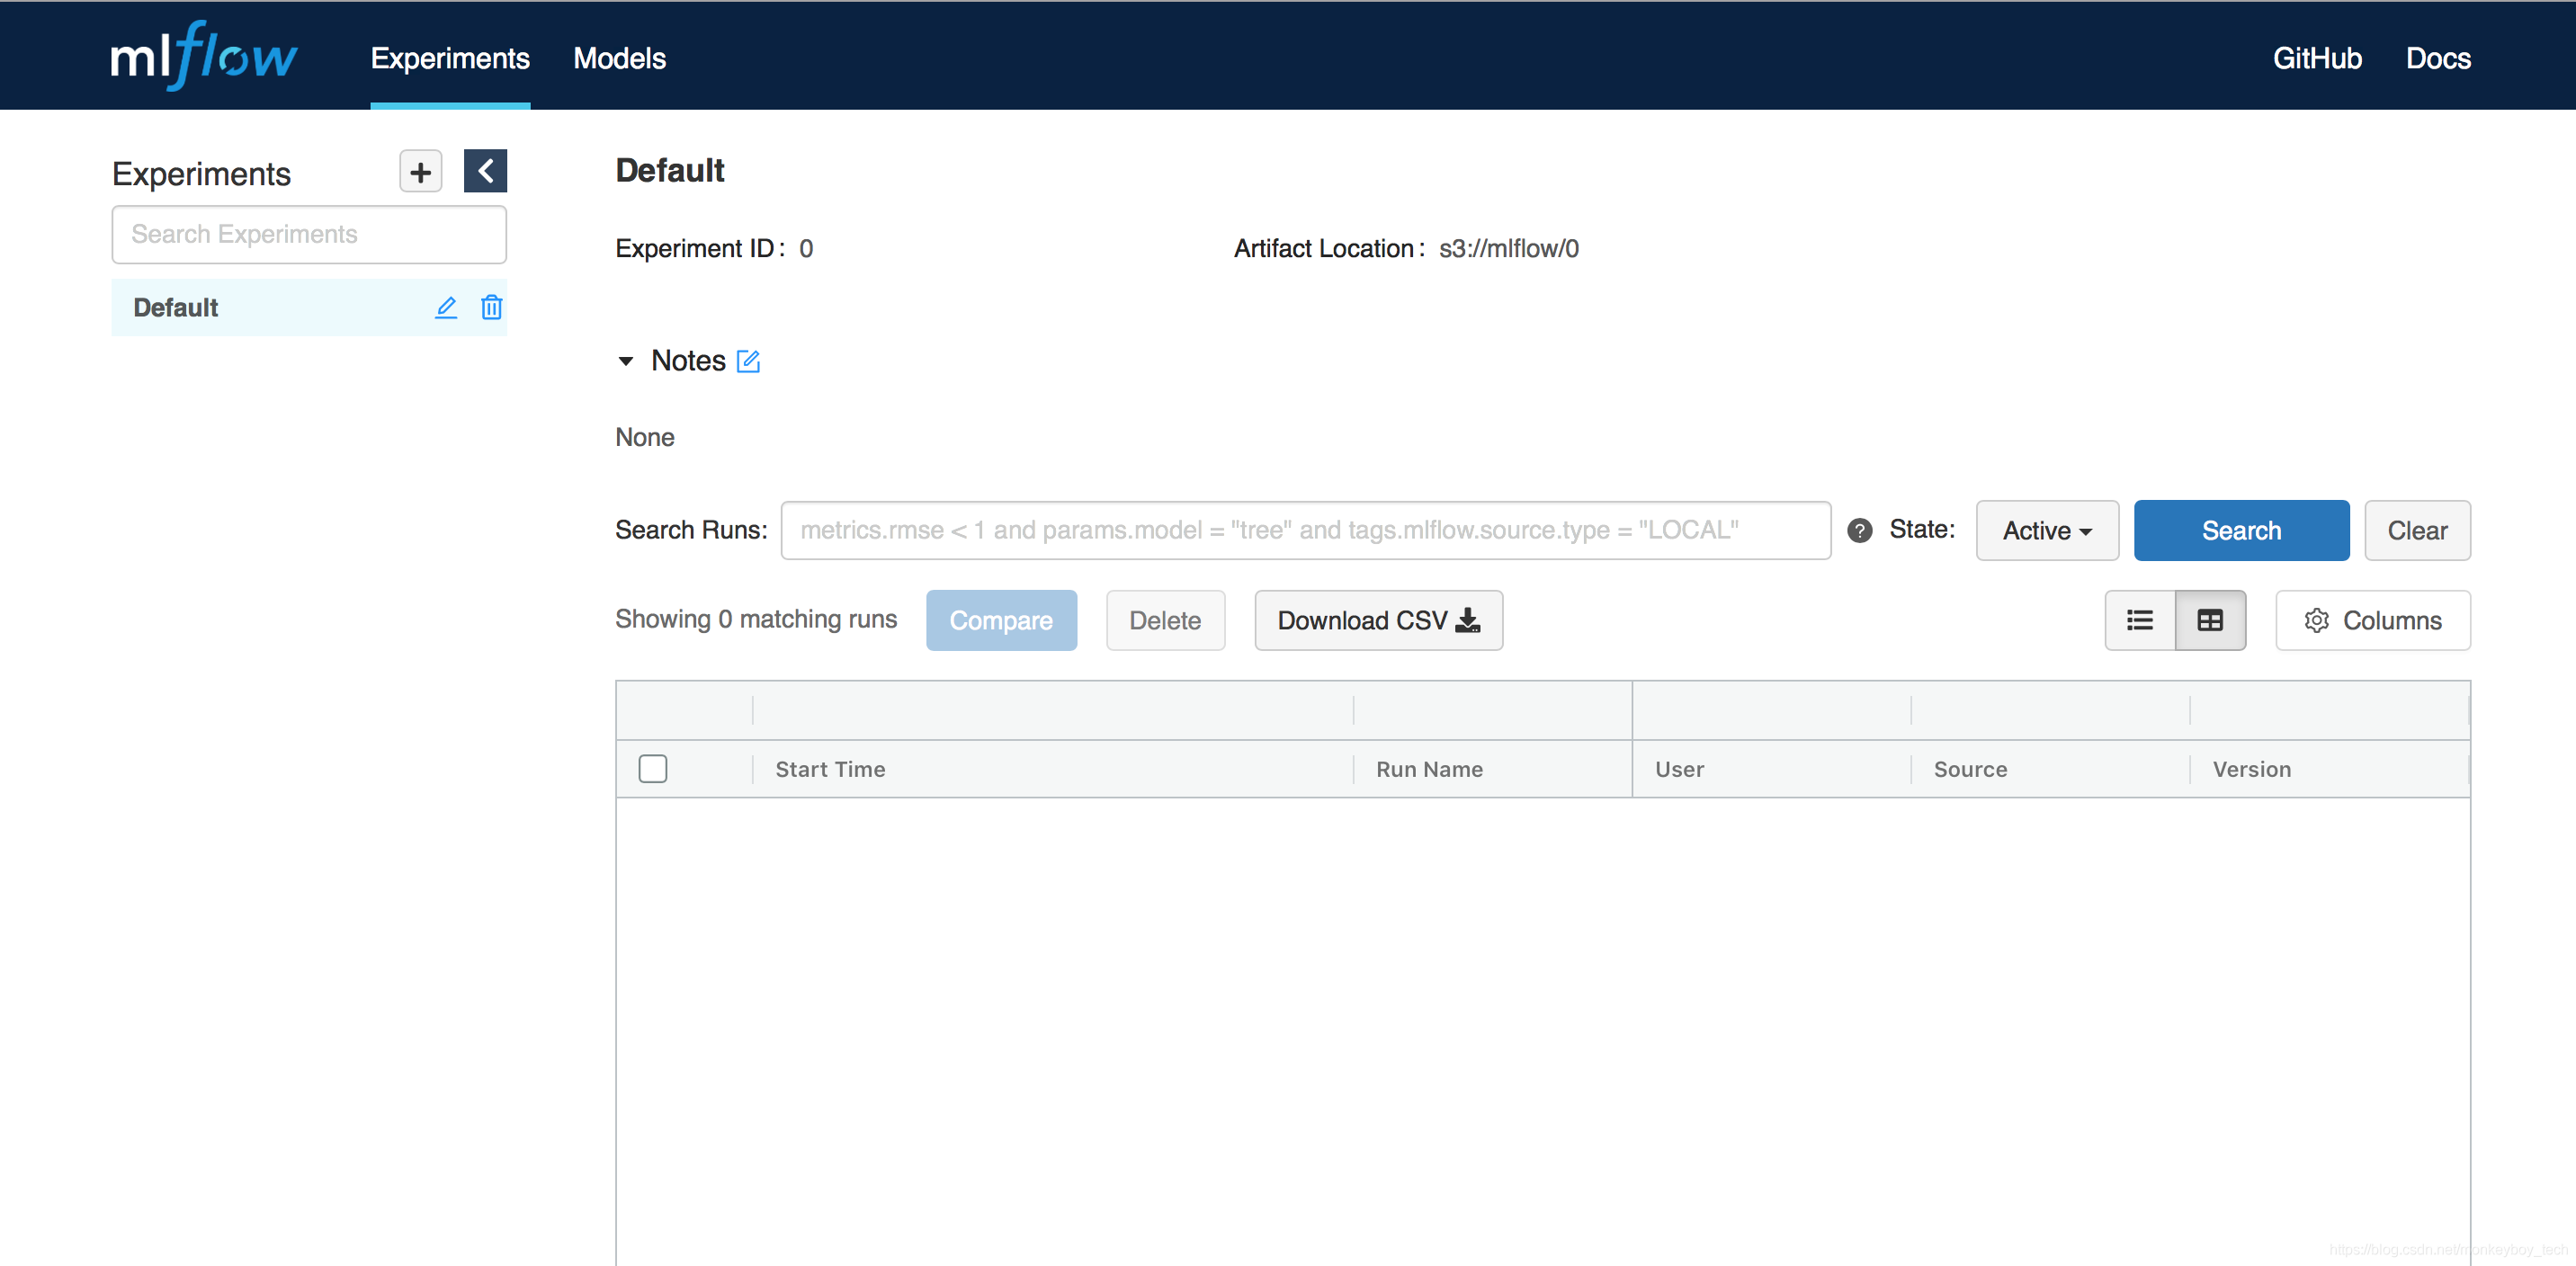
mlflow tracking server的启动
conda的安装
参照install conda,根据自己的系统安装不同的conda环境
mlfow tracking server安装
拷贝以下的wine.py文件
import os
import warnings
import sys

import pandas as pd
import numpy as np
from sklearn.metrics import mean_squared_error, mean_absolute_error, r2_score
from sklearn.model_selection import train_test_split
from sklearn.linear_model import ElasticNet
import mlflow.sklearn


def eval_metrics(actual, pred):
  rmse = np.sqrt(mean_squared_error(actual, pred))
  mae = mean_absolute_error(actual, pred)
  r2 = r2_score(actual, pred)
  return rmse, mae, r2


if __name__ == "__main__":
  warnings.filterwarnings("ignore")
  np.random.seed(40)

  # Read the wine-quality csv file (make sure you're running this from the root of MLflow!)
  wine_path = os.path.join(os.path.dirname(os.path.abspath(__file__)), "wine-quality.csv")
  data = pd.read_csv(wine_path)

  # Split the data into training and test sets. (0.75, 0.25) split.
  train, test = train_test_split(data)

  # The predicted column is "quality" which is a scalar from [3, 9]
  train_x = train.drop(["quality"], axis=1)
  test_x = test.drop(["quality"], axis=1)
  train_y = train[["quality"]]
  test_y = test[["quality"]]

  alpha = float(sys.argv[1]) if len(sys.argv) > 1 else 0.5
  l1_ratio = float(sys.argv[2]) if len(sys.argv) > 2 else 0.5
  mlflow.set_tracking_uri("http://localhost:5002")
  client = mlflow.tracking.MlflowClient()
  mlflow.set_experiment('http_metrics_test')
  with mlflow.start_run():
      lr = ElasticNet(alpha=alpha, l1_ratio=l1_ratio, random_state=42)
      lr.fit(train_x, train_y)

      predicted_qualities = lr.predict(test_x)

      (rmse, mae, r2) = eval_metrics(test_y, predicted_qualities)

      print("Elasticnet model (alpha=%f, l1_ratio=%f):" % (alpha, l1_ratio))
      print("  RMSE: %s" % rmse)
      print("  MAE: %s" % mae)
      print("  R2: %s" % r2)

      mlflow.log_param("alpha", alpha)
      mlflow.log_param("l1_ratio", l1_ratio)
      mlflow.log_metric("rmse", rmse)
      mlflow.log_metric("r2", r2)
      mlflow.log_metric("mae", mae)

      mlflow.sklearn.log_model(lr, "model")
注意:
1.mlflow.set_tracking_uri("http://localhost:5002") 设置为刚才启动的mlflow tracking server的地址
2.mlflow.set_experiment('http_metrics_test') 设置实验的名字
3.安装该程序所依赖的python包
4.如果不是在同一个conda环境中,还得执行
    export AWS_ACCESS_KEY_ID=AKIAIOSFODNN7EXAMPLE
    export AWS_SECRET_ACCESS_KEY=wJalrXUtnFEMI/K7MDENG/bPxRfiCYEXAMPLEKEY
    export MLFLOW_S3_ENDPOINT_URL=http://localhost:9001
便于python客户端上传模型文件以及模型元数据
直接执行 python wine.py 如果成功,访问mlflow tracking server ui下有如下
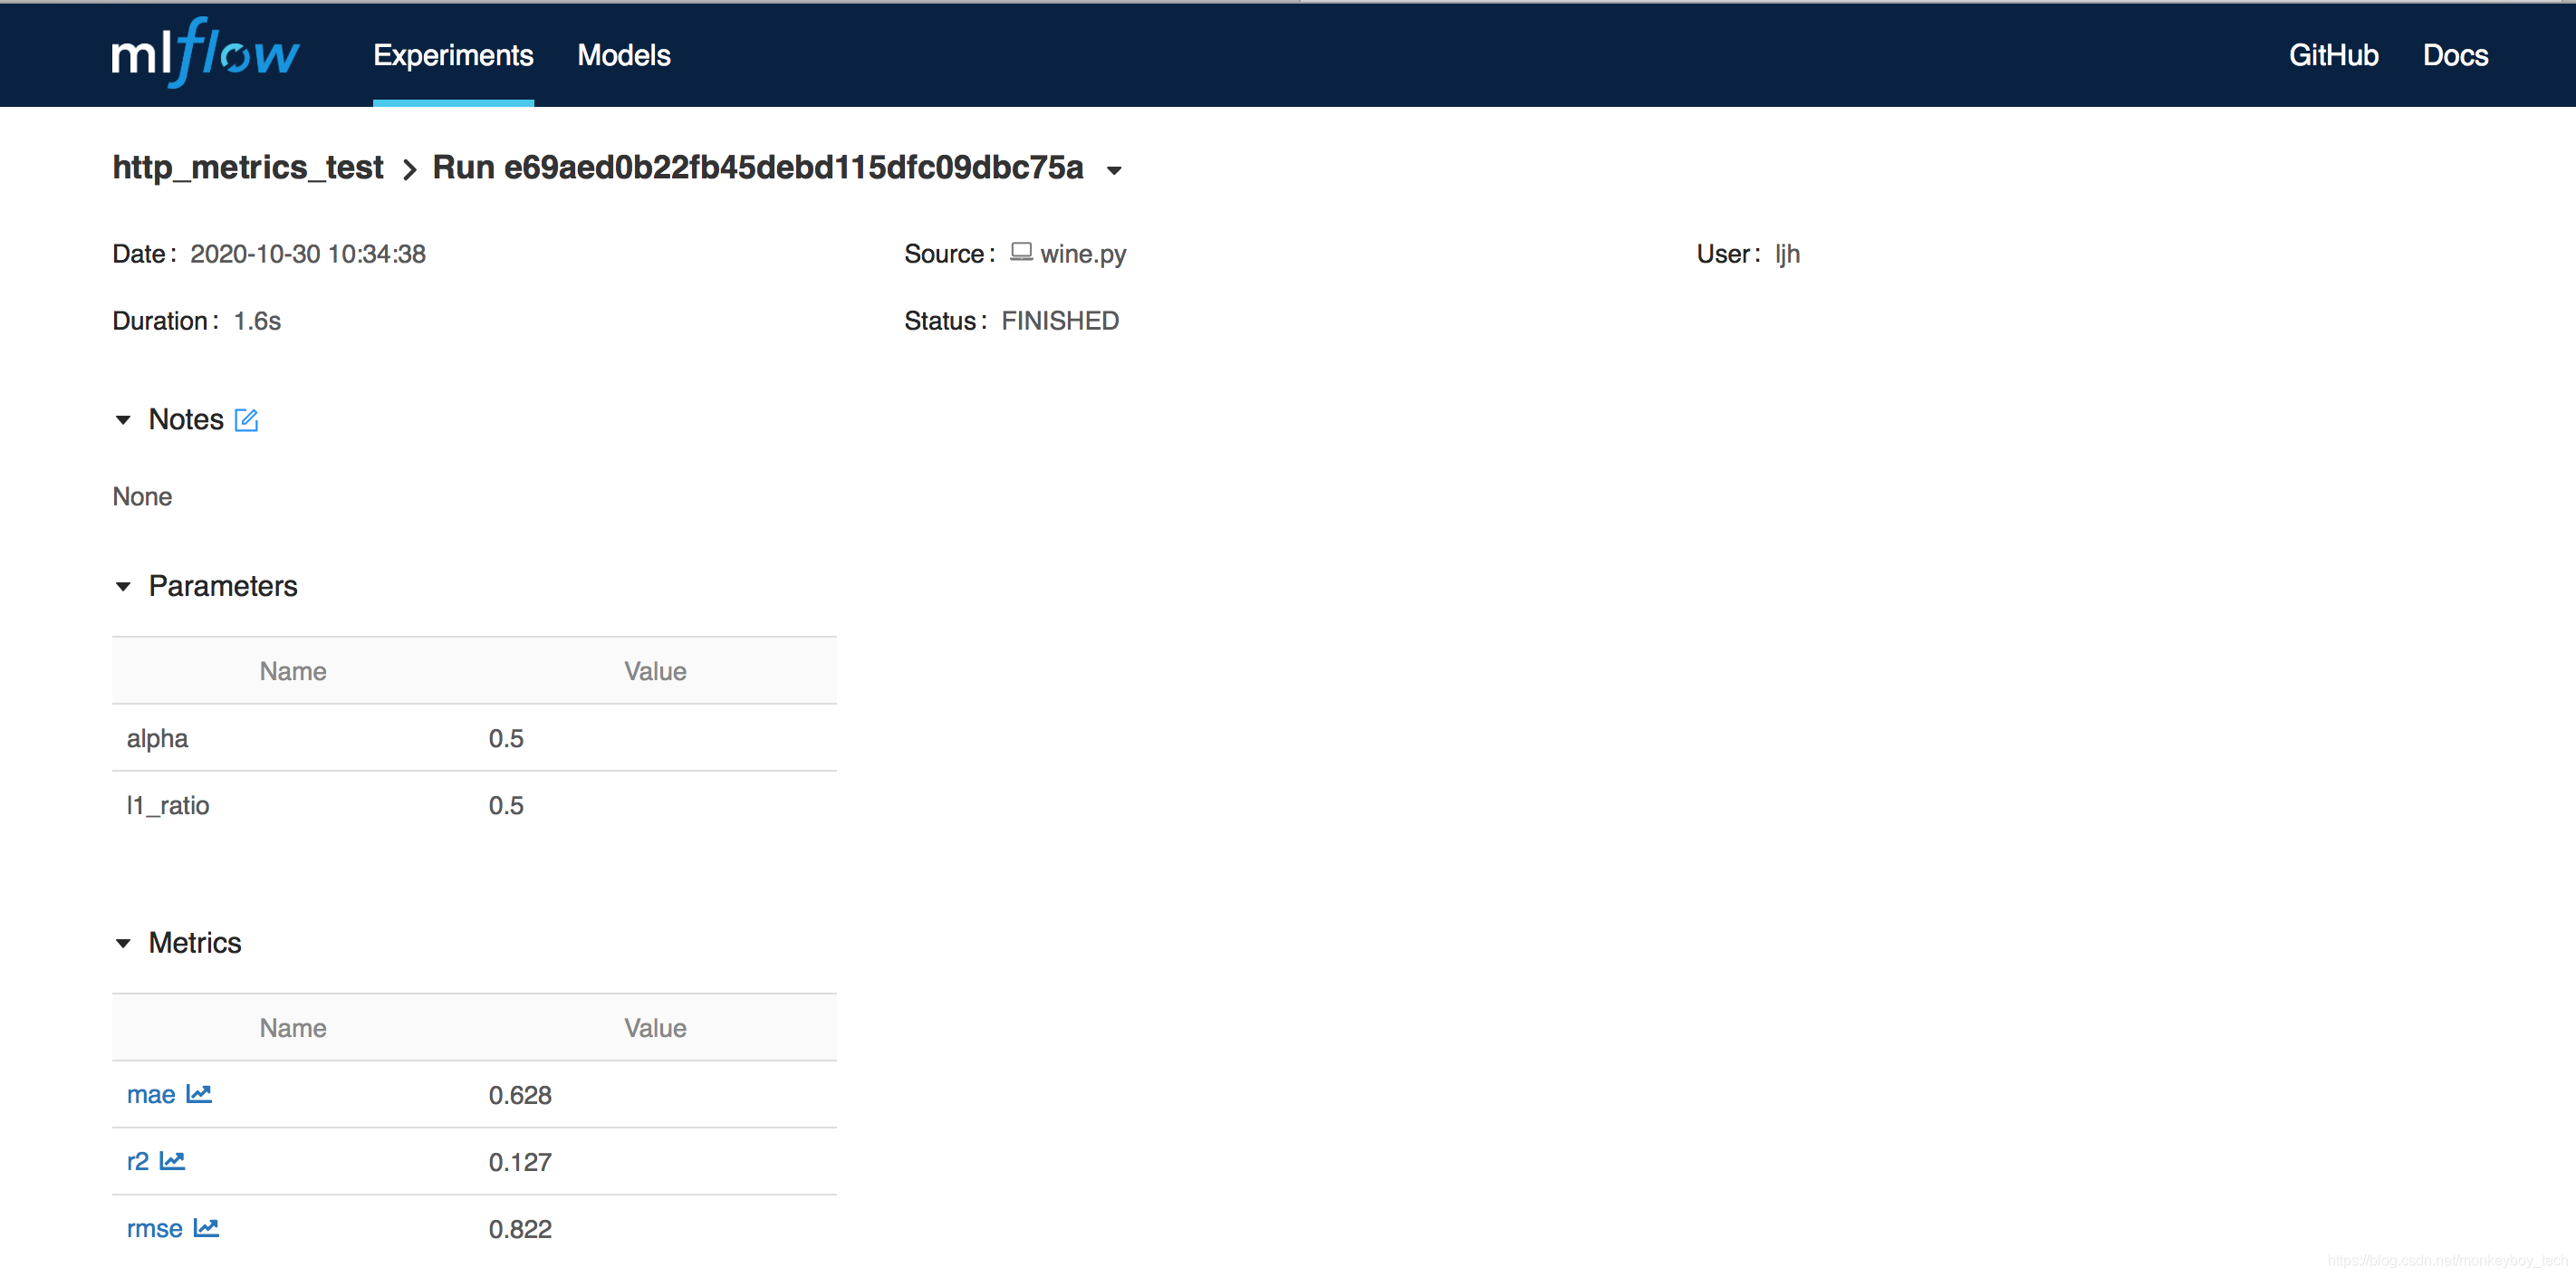
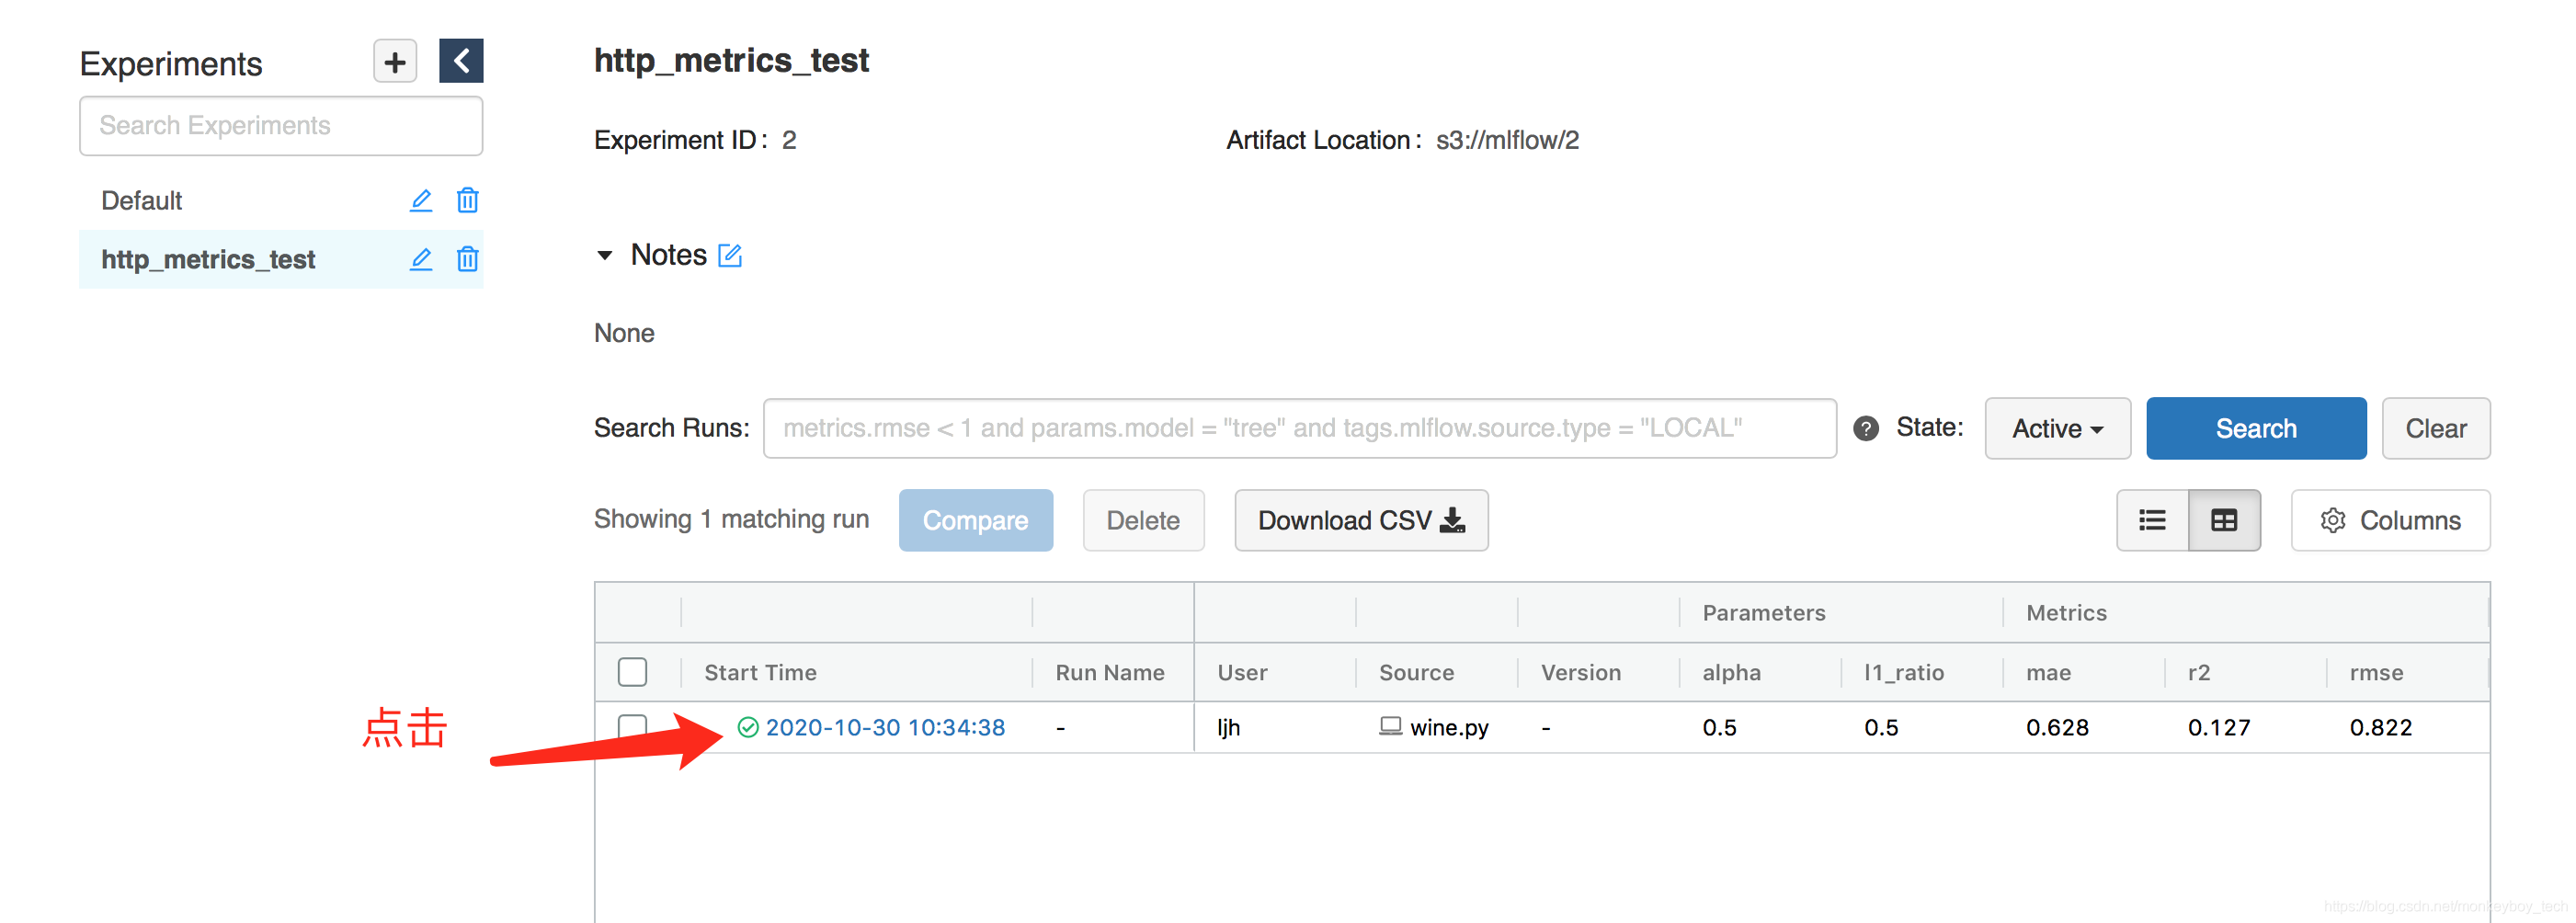 点击 2020-10-30 10:34:38,如下:
在同一个conda环境中执行命令
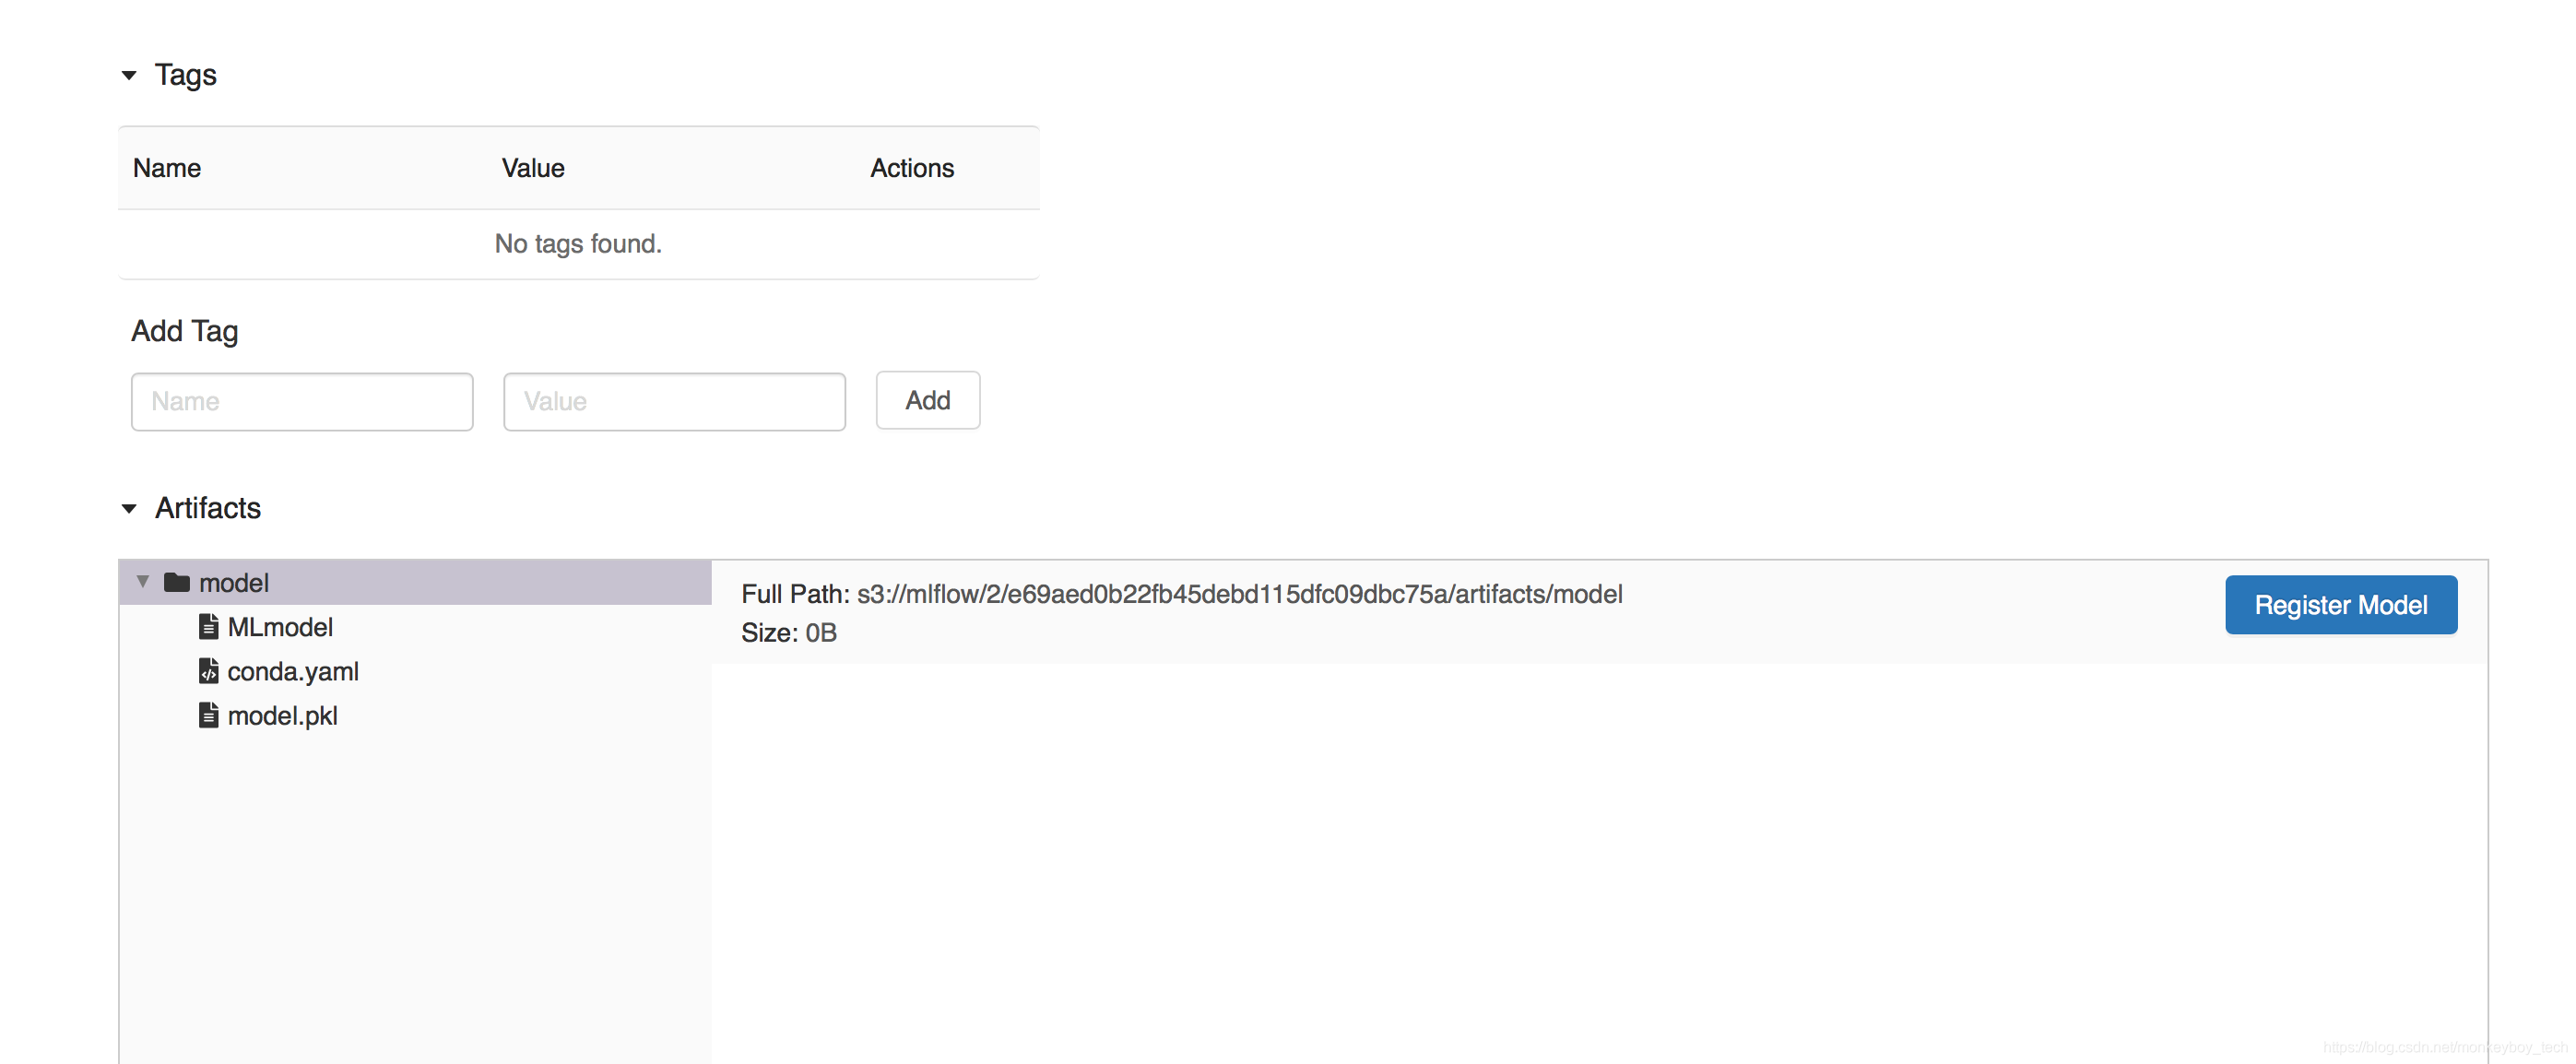
export MLFLOW_TRACKING_URI=http://localhost:5002
mlflow models serve -m runs:/e69aed0b22fb45debd115dfc09dbc75a/model -p 1234 --no-conda
其中e69aed0b22fb45debd115dfc09dbc75a为mlflow tracking server ui中的run id
如遇到ModuleNotFoundError: No module named 'sklearn'
执行 pip install scikit-learn==0.19.1
遇到ModuleNotFoundError: No module named 'scipy'
执行pip install scipy
请求访问该model启动的服务:
curl -X POST -H "Content-Type:application/json; format=pandas-split" --data '{"columns":["alcohol", "chlorides", "citric acid", "density", "fixed acidity", "free sulfur dioxide", "pH", "residual sugar", "sulphates", "total sulfur dioxide", "volatile acidity"],"data":[[12.8, 0.029, 0.48, 0.98, 6.2, 29, 3.33, 1.2, 0.39, 75, 0.66]]}' http://127.0.0.1:1234/invocations输出 [5.455573233630147] 则表明该模型服务成功部署
看完上述内容,你们掌握mlflow的搭建使用是怎样的的方法了吗?如果还想学到更多技能或想了解更多相关内容,欢迎关注亿速云行业资讯频道,感谢各位的阅读!
免责声明:本站发布的内容(图片、视频和文字)以原创、转载和分享为主,文章观点不代表本网站立场,如果涉及侵权请联系站长邮箱:is@yisu.com进行举报,并提供相关证据,一经查实,将立刻删除涉嫌侵权内容。


