一、加密介绍
1、总览
Zabbix版本从3.0之后,开始支持Zabbix server, Zabbix proxy, Zabbix agent, zabbix_sender and zabbix_get之间的通信加密,加密方式有预共享密钥(PSK)和证书加密。
加密配置是可选项,一些proxies和agents可以使用证书认证加密通信,另外一些可以使用PSK加密通信,而剩余的可以不使用加密进行通信。
关于porxy的配置设备,我这里就不在介绍了,大家可以去看官方文档。
但是并不是所有的通信都进行了加密,下面的几点就是没有覆盖到。
Private keys are stored in plain text in files readable by Zabbix components during startup.
Pre-shared keys are entered in Zabbix frontend and stored in Zabbix database in plain text.
Built-in encryption does not protect communications:
between web server running Zabbix frontend and user web browser,
between Zabbix frontend and Zabbix server,
between Zabbix server (proxy) and Zabbix database.
Currently each encrypted connection opens with a full TLS handshake, no session caching and tickets are implemented.
Adding encryption increases time of checks and actions, depending on network latency.
For example, if packet delay is 100ms then opening a TCP connection and sending unencrypted request takes around 200ms.
With encryption about 1000 ms are added for establishing TLS connection.
Timeouts may need to be increased, otherwise some items and actions running remote scripts on agents may work with unencrypted connections but fail with timeout with encrypted.
Encryption is not supported by network discovery. Zabbix agent checks performed by network discovery will be unencrypted and if Zabbix agent is configured to reject unencrypted connections such checks will not succeed.
2、编译支持加密功能
要想支持加密功能,我们必须在编译安装的时候把加密库编译进Zabbix里面。
编译的时候加上 --with-openssl
./configure \
--prefix=/usr/local/zabbix \
--sysconfdir=/etc/zabbix \
--enable-server \
--enable-agent \
--with-mysql \
--with-net-snmp \
--with-libcurl \
--with-openssl
二、使用预共享密钥(PSK)
1、生成psk
# openssl rand -hex 32
af8ced32dfe8714e548694e2d29e1a14ba6fa13f216cb35c19d0feb1084b0429
2、配置agent
创建一个文件/etc/zabbix/zabbix_agentd.conf.d/zabbix_agentd.psk,存入刚刚生成的psk。
编辑/etc/zabbix/zabbix_agentd.conf,添加如下内容。
TLSConnect=psk
TLSAccept=psk
TLSPSKFile=/etc/zabbix/zabbix_agentd.conf.d/zabbix_agentd.psk
TLSPSKIdentity=PSK 001
然后重启agent,在server上面测试看看加密连接。
zabbix_get -s 127.0.0.1 -k "system.cpu.load[all,avg1]" --tls-connect=psk --tls-psk-identity="PSK 001" --tls-psk-file=/etc/zabbix/zabbix_agentd.conf.d/zabbix_agentd.psk
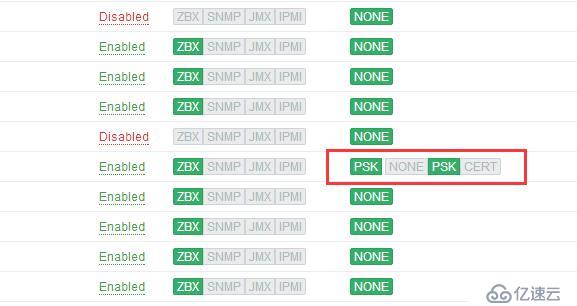
测试下来没有什么问题,那我们就配置WEB页面。

等待一段时间,就生效了哦。
三、使用证书通信加密
待完成……

参考文档:https://www.zabbix.com/documentation/3.2/manual/encryption/using_pre_shared_keys
免责声明:本站发布的内容(图片、视频和文字)以原创、转载和分享为主,文章观点不代表本网站立场,如果涉及侵权请联系站长邮箱:is@yisu.com进行举报,并提供相关证据,一经查实,将立刻删除涉嫌侵权内容。


