Spring Security是为基于Spring的应用程序提供的一种声明式安全性框架。它提供了一套完整的安全性解决方案,能够在Web请求级别和方法调用级别处理身份认证和授权。
Spring Security可以从两个方面来解决安全性问题:
使用Servlet规范中的Filter保护Web请求并限制URL级别的访问
使用Spring AOP保护方法调用——借助于对象代理和使用通知,能够确保只有具备适当权限的用户才能方法安全保护的方法
下面我将简单介绍Spring Security的最基础的入门实例
(1)新建基于Spring MVC的Java Web项目:
导入Spring Security以及一些其他的spring相关的包之后,项目结构如下所示:

在这个测试项目中不需要再另写Java文件,同时也不涉及到数据库操作,实际上涉及到的文件只有:index.jsp、web.xml以及springmvc-servlet.xml文件
(2)web.xml:
<?xml version="1.0" encoding="UTF-8"?>
<web-app xmlns:xsi="http://www.w3.org/2001/XMLSchema-instance"
	xmlns="http://java.sun.com/xml/ns/javaee"
	xsi:schemaLocation="http://java.sun.com/xml/ns/javaee http://java.sun.com/xml/ns/javaee/web-app_3_0.xsd"
	version="3.0">
	<servlet>
		<servlet-name>springmvc</servlet-name>
		<servlet-class>org.springframework.web.servlet.DispatcherServlet</servlet-class>
		<load-on-startup>1</load-on-startup>
	</servlet>

	<servlet-mapping>
		<servlet-name>springmvc</servlet-name>
		<url-pattern>*.html</url-pattern>
	</servlet-mapping>

	<filter>
		<filter-name>characterEncodingFilter</filter-name>
		<filter-class>org.springframework.web.filter.CharacterEncodingFilter</filter-class>
		<init-param>
			<param-name>encoding</param-name>
			<param-value>UTF-8</param-value>
		</init-param>
	</filter>
	<filter-mapping>
		<filter-name>characterEncodingFilter</filter-name>
		<url-pattern>/*</url-pattern>
	</filter-mapping>

	<filter>
		<filter-name>springSecurityFilterChain</filter-name>
		<filter-class>org.springframework.web.filter.DelegatingFilterProxy</filter-class>
	</filter>

	<filter-mapping>
		<filter-name>springSecurityFilterChain</filter-name>
		<url-pattern>/*</url-pattern>
	</filter-mapping>

	<welcome-file-list>
		<welcome-file>index.html</welcome-file>
		<welcome-file>index.htm</welcome-file>
		<welcome-file>index.jsp</welcome-file>
		<welcome-file>default.html</welcome-file>
		<welcome-file>default.htm</welcome-file>
		<welcome-file>default.jsp</welcome-file>
	</welcome-file-list>
</web-app>
在这个web.xml中,除了定义的一些常规的Spring项目的配置之外,在文件的第30-38行定义了一个名为“springSecurityFilterChain”的filter,这个filter定义之后spring security保护web请求这个作用就开始生效了,spring security将会对请求的url进行拦截并判断其权限
(3)springmvc-servlet.xml:
<?xml version="1.0" encoding="UTF-8"?>
<beans xmlns="http://www.springframework.org/schema/beans"
	xmlns:xsi="http://www.w3.org/2001/XMLSchema-instance" xmlns:context="http://www.springframework.org/schema/context"
	xmlns:security="http://www.springframework.org/schema/security"
	xmlns:mvc="http://www.springframework.org/schema/mvc"
	xsi:schemaLocation="http://www.springframework.org/schema/beans
       					   http://www.springframework.org/schema/beans/spring-beans-4.0.xsd
       					   http://www.springframework.org/schema/context
       					   http://www.springframework.org/schema/context/spring-context-4.0.xsd
       					   http://www.springframework.org/schema/mvc
       					   http://www.springframework.org/schema/mvc/spring-mvc-4.0.xsd
       					   http://www.springframework.org/schema/security
       					   http://www.springframework.org/schema/security/spring-security-4.1.xsd">

	<security:user-service id="userService">
		<security:user name="admin" password="admin"
			authorities="ROLE_USER,ROLE_ADMIN" />
		<security:user name="zifangsky" password="www.zifangsky.cn"
			authorities="ROLE_USER" />
	</security:user-service>

	<security:authentication-manager>
		<security:authentication-provider
			user-service-ref="userService" />
	</security:authentication-manager>

	<security:http pattern="/favicon.ico" security="none" />

	<security:http auto-config="true">
		<security:intercept-url pattern="/**"
			access="hasRole('ROLE_USER')" />
	</security:http>

	<context:component-scan base-package="cn.zifangsky.* *.controller" />

	<context:annotation-config />  <!-- 激活Bean中定义的注解 -->
	<mvc:annotation-driven />

	<bean
		class="org.springframework.web.servlet.view.InternalResourceViewResolver">
		<property name="prefix" value="/WEB-INF/pages/" />
		<property name="suffix" value=".jsp" />
	</bean>
</beans>
在这个配置文件中,实际上34行及之后的那些配置都是跟SpringMVC相关的,而之前的那些配置则是在定义spring security的权限校验规则。
在第29-32行的配置中,“http”定义了一个Web相关的权限配置,同时“intercept-url”标签则配置了权限控制规则,即:网站根目录下的所有目录都需要有“ROLE_USER”的权限才允许访问。这将导致我们在访问首页的index.jsp文件都需要进行权限验证,也就是说程序运行之后就需要登录验证,验证通过之后才能访问首页及其他页面。当然,这个登录页面是spring security默认自带的,我在后面的文章中再说如何进行自定义这个登录页面
既然spring security需要验证访客的身份,那么就需要我们提供哪些用户具有哪些访问权限,也就是第22-25行配置的“authentication-manager”了,当然真正进行身份验证的是“authentication-provider”这个元素,从上面代码可以看出这里只是简单引用了一个采用硬编码的“user-service”,其里面定义了两个角色以及它们所对应的权限。
注:真正生产环境中,用户及其对应的权限这些信息是需要从数据库中读取的,这里为了理解方便就这样硬编码了
(4)index.jsp:
<%@ page language="java" contentType="text/html; charset=UTF-8"
    pageEncoding="UTF-8"%>
<%
String path = request.getContextPath();
String basePath = request.getScheme()+"://"+request.getServerName()+":"+request.getServerPort()+path+"/";
%>
<!DOCTYPE html>
<html>
<head>
<meta http-equiv="Content-Type" content="text/html; charset=UTF-8">
	<base href="<%=basePath%>">
	<title>Spring Security Demo</title>
</head>
<body>
	<div align="center">
		Hello Spring Security!
	</div>
</body>
</html>
(5)运行测试:
运行项目之后,我们可以发现并没有直接出现首页,而是强制转到了一个默认的登录页面:
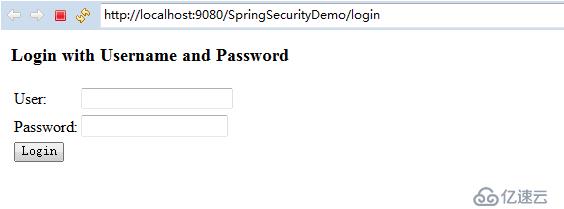
然后输入上面定义的两组用户认证的其中一个,比如:admin/admin,然后就可以跳转到正常的首页中去了:
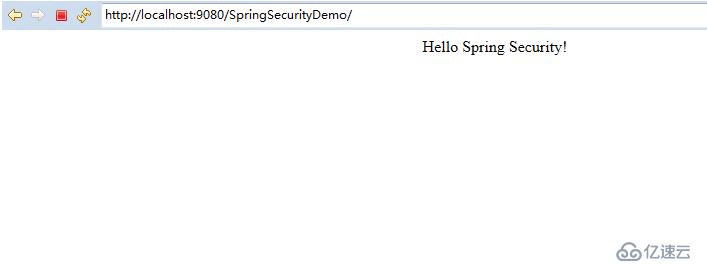
至此,这个最基本的spring security入门实例到此就结束了。不过我将在后面的文章中进一步说明spring security的其他用法
参考文章:
http://haohaoxuexi.iteye.com/blog/2154299
免责声明:本站发布的内容(图片、视频和文字)以原创、转载和分享为主,文章观点不代表本网站立场,如果涉及侵权请联系站长邮箱:is@yisu.com进行举报,并提供相关证据,一经查实,将立刻删除涉嫌侵权内容。


