前言:
适用场景:商城类的 App 。将自定义的购物车 view 设置为 navigationItem 的导航栏按钮。效果图如下:
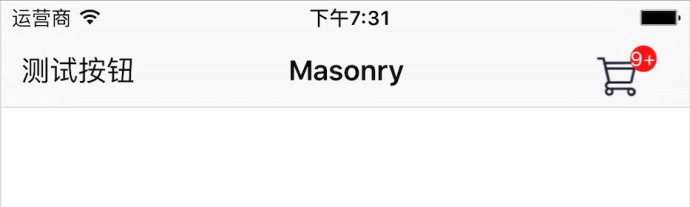
图1、右上角的购物车即是我们定义的view
实现原理:
1、利用 navigationItem 可以将 UIView 设置为导航栏的按钮;
2、将一个 UIButton 和 一个 UILabel 添加到一个 UIView 上。然后将这个 UIView 设置为 navigationItem 的右侧按钮;3、UILabel 控件的动画效果。
具体实现代码如下:
1、ShopCarView.h 文件
#import
@protocol ShopCarButtonDelegate <</span>NSObject>
// 代理的方法,在此方法内,完成按钮的点击事件。
- (void)shopCarButtonClickAction;
@end
@interfaceShopCarView : UIView
@property (nonatomic, assign)id<</span>ShopCarButtonDelegate> delegate;
// 为购物车设置角标内数值
- (void)setShopCarCount:(NSString *)count;
@end
2、ShopCarView.m 文件
#import "ShopCarView.h"
@interfaceShopCarView()
@property (nonatomic, strong)UIButton *carButton;
@property (nonatomic, strong)UILabel *countLabel;
@end
@implementation ShopCarView
- (instancetype)initWithFrame:(CGRect)frame{
CGRect myFrame = CGRectMake(0, 0, 40, 40);
self = [superinitWithFrame:myFrame];
if (self) {
[selfaddSubview:self.carButton];
}
returnself;
}
- (UIButton *)carButton{
if (!_carButton) {
_carButton = [UIButtonbuttonWithType:UIButtonTypeCustom];
_carButton.frame = CGRectMake(0, 8, 32, 32);
[_carButtonsetImage:[UIImageimageNamed:@"购物1"] forState:UIControlStateNormal];
[_carButtonaddTarget:selfaction:@selector(shopCarButtonAction) forControlEvents:UIControlEventTouchUpInside];
}
return_carButton;
}
- (UILabel *)countLabel{
if (!_countLabel) {
_countLabel = [[UILabelalloc] initWithFrame:CGRectMake(24, 5, 16, 16)];
_countLabel.backgroundColor = [UIColorredColor];
_countLabel.textAlignment = NSTextAlignmentCenter;
_countLabel.textColor = [UIColorwhiteColor];
_countLabel.layer.cornerRadius = 8;
_countLabel.font = [UIFontsystemFontOfSize:12];
_countLabel.layer.masksToBounds = YES;
[selfaddSubview:_countLabel];
}
return_countLabel;
}
// 为购物车设置角标内数值
- (void)setShopCarCount:(NSString *)count{
if ([count integerValue] == 0) {
if (_countLabel) {
[_countLabelremoveFromSuperview];
_countLabel = nil;
}
return;
}
if ([count integerValue] > 9) {
self.countLabel.text = @"9+";
}else{
self.countLabel.text = count;
}
[selfshakeView:_countLabel];
}
// 实现的代理方法
- (void)shopCarButtonAction{
[self.delegateshopCarButtonClickAction];
}
// 实现抖动效果
-(void)shakeView:(UIView*)viewToShake
{
CGFloat t =2.0;
CGAffineTransform translateRight =CGAffineTransformTranslate(CGAffineTransformIdentity, t,0.0);
CGAffineTransform translateLeft =CGAffineTransformTranslate(CGAffineTransformIdentity,-t,0.0);
viewToShake.transform = translateLeft;
[UIViewanimateWithDuration:0.07delay:0.0options:UIViewAnimationOptionAutoreverse|UIViewAnimationOptionRepeatanimations:^{
[UIViewsetAnimationRepeatCount:2.0];
viewToShake.transform = translateRight;
} completion:^(BOOL finished){
if(finished){
[UIViewanimateWithDuration:0.05delay:0.0options:UIViewAnimationOptionBeginFromCurrentStateanimations:^{
viewToShake.transform =CGAffineTransformIdentity;
} completion:NULL];
}
}];
}
@end
代码很简单,逻辑也比较清晰。使用代理方法,将自定义的 View 的属性隐藏起来,打到很好的封装效果。
以上就是本文的全部内容,希望本文的内容对大家的学习或者工作能带来一定的帮助,同时也希望多多支持亿速云!
免责声明:本站发布的内容(图片、视频和文字)以原创、转载和分享为主,文章观点不代表本网站立场,如果涉及侵权请联系站长邮箱:is@yisu.com进行举报,并提供相关证据,一经查实,将立刻删除涉嫌侵权内容。


