这篇文章主要讲解了Android如何美化底部菜单栏,内容清晰明了,对此有兴趣的小伙伴可以学习一下,相信大家阅读完之后会有帮助。
众所周知,android的底部菜单栏太重要,平时项目一般都是需要用到的,但是网上关于这方面的demo做得太丑了,实在惨不忍睹,所以这里便用RadioGroup+Fragment的方式写了一个,顺便美化了一下,需要的可以看下。
效果图:

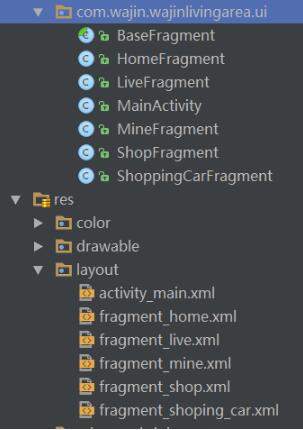
项目结构
MainActivity.java
public class MainActivity extends AppCompatActivity {

  private FrameLayout frameLayout;
  private RadioGroup radioGroup;
  private Fragment[] mFragments;
  private int mIndex;


  @Override
  protected void onCreate(Bundle savedInstanceState) {
    super.onCreate(savedInstanceState);
    setContentView(R.layout.activity_main);
    initFragment();
    setRadioGroupListener();


  }

  private void initFragment() {
    radioGroup = (RadioGroup) findViewById(R.id.radioGroup);
    frameLayout = (FrameLayout) findViewById(R.id.fl_content);
    HomeFragment homeFragment = new HomeFragment();
    ShopFragment shopFragment = new ShopFragment();
    LiveFragment liveFragment = new LiveFragment();
    ShoppingCarFragment shoppingCarFragment = new ShoppingCarFragment();
    MineFragment mineFragment = new MineFragment();
    //添加到数组
    mFragments = new Fragment[]{homeFragment, shopFragment, liveFragment, shoppingCarFragment, mineFragment};
    //开启事务
    FragmentTransaction ft = getSupportFragmentManager().beginTransaction();
    //添加首页
    ft.add(R.id.fl_content, homeFragment).commit();
    //默认设置为第0个
    setIndexSelected(0);
  }

  private void setIndexSelected(int index) {
    if (mIndex == index) {
      return;
    }
    FragmentManager fragmentManager = getSupportFragmentManager();
    FragmentTransaction ft = fragmentManager.beginTransaction();
    //隐藏
    ft.hide(mFragments[mIndex]);
    //判断是否添加
    if (!mFragments[index].isAdded()) {
      ft.add(R.id.fl_content, mFragments[index]).show(mFragments[index]);
    } else {
      ft.show(mFragments[index]);
    }
    ft.commit();
    //再次赋值
    mIndex = index;

  }

  private void setRadioGroupListener() {
    radioGroup.setOnCheckedChangeListener(new RadioGroup.OnCheckedChangeListener() {
      @Override
      public void onCheckedChanged(RadioGroup radioGroup, int i) {
        switch (i) {
          case R.id.rb_home:
            setIndexSelected(0);
            break;
          case R.id.rb_shop:
            setIndexSelected(1);
            break;
          case R.id.rb_live:
            setIndexSelected(2);
            break;
          case R.id.rb_shopping_car:
            setIndexSelected(3);
            break;
          case R.id.rb_mine:
            setIndexSelected(4);
            break;
          default:
            setIndexSelected(0);
            break;
        }
      }
    });
  }

  @Override
  public boolean onKeyDown(int keyCode, KeyEvent event) {
    if (keyCode == KeyEvent.KEYCODE_BACK) {
      //仅当activity为task根(即首个启动activity)时才生效,这个方法不会改变task中的activity状态,
      // 按下返回键的作用跟按下HOME效果一样;重新点击应用还是回到应用退出前的状态;
      moveTaskToBack(false);
      return true;
    }
    return super.onKeyDown(keyCode, event);
  }
}
Fragment,这里只列出HomeFragment的,其他都是一样
public class HomeFragment extends BaseFragment {

  public HomeFragment() {
  }


  @Override
  public View onCreateView(LayoutInflater inflater, ViewGroup container, Bundle savedInstanceState) {
    View view=inflater.inflate(R.layout.fragment_home,container,false);
    return view;
  }


}
activity_main.xml布局文件
<?xml version="1.0" encoding="utf-8"?>
<RelativeLayout xmlns:android="http://schemas.android.com/apk/res/android"
xmlns:tools="http://schemas.android.com/tools"
android:layout_width="match_parent"
android:layout_height="match_parent">
<FrameLayout
android:id="@+id/fl_content"
android:layout_width="match_parent"
android:layout_height="match_parent"
android:layout_above="@+id/line" />
<View
android:id="@+id/line"
android:layout_width="match_parent"
android:layout_height="@dimen/line_size"
android:layout_above="@+id/radioGroup"
android:background="#9e9e9e" />
<RadioGroup
android:id="@+id/radioGroup"
android:layout_width="match_parent"
android:layout_height="wrap_content"
android:layout_alignParentBottom="true"
android:clickable="true"
android:gravity="center"
android:orientation="horizontal"
android:padding="3dp">
<RadioButton
android:id="@+id/rb_home"
android:checked="true"
android:drawableTop="@drawable/btn_home"
android:text="@string/home" />
<RadioButton
android:id="@+id/rb_shop"
android:drawableTop="@drawable/btn_shop"
android:text="@string/shop" />
<RadioButton
android:id="@+id/rb_live"
android:drawableTop="@drawable/btn_live"
android:text="@string/live" />
<RadioButton
android:id="@+id/rb_shopping_car"
android:drawableTop="@drawable/btn_shopping_car"
android:text="@string/shopping_car" />
<RadioButton
android:id="@+id/rb_mine"
android:drawableTop="@drawable/btn_mine"
android:text="@string/mine" />
</RadioGroup>
</RelativeLayout>RadioButton的样式
<style name="RadioButtonStyle">
    <item name="android:layout_width">0dp</item>
    <item name="android:layout_weight">1</item>
    <item name="android:layout_height">match_parent</item>
    <item name="android:layout_marginRight">10dp</item>
    <item name="android:layout_marginLeft">10dp</item>
    <item name="android:button">@null</item>
    <item name="android:gravity">center</item>
    <item name="android:textColor">@color/color_radiobutton</item>
    <item name="android:textSize">10sp</item>
</style>
Demo下载地址:底部菜单栏
温馨提示:以后我自己写的demo都是用Android Studio写的了,用Eclipse的同学要的话需要自己改一下,时代在进步,工具也在升级!
看完上述内容,是不是对Android如何美化底部菜单栏有进一步的了解,如果还想学习更多内容,欢迎关注亿速云行业资讯频道。
免责声明:本站发布的内容(图片、视频和文字)以原创、转载和分享为主,文章观点不代表本网站立场,如果涉及侵权请联系站长邮箱:is@yisu.com进行举报,并提供相关证据,一经查实,将立刻删除涉嫌侵权内容。


